

“Money is not beside the point. Money IS the point.” — Saul Goodman, World’s best lawyer.
Hello friend,
Nice to meet you again in the last post of this collection of tutorials about developing Alexa Skills with Python. This one is about making money. I don’t think I need to say more to motivate you to keep reading 😊.
This part is one of the main reasons that pushed me to create this tutorial series because I couldn’t find enough practical documentation or examples to guide me through the process of implementing monetization with Python. I hope you will find it useful.
Note that the code snippets used in this post are available on my GitHub profile. Also, this monetization part is quite general and not particularly tied to the RPS game we used in the previous tutorials.
Previous tutorials of this series:
- An Introduction to Alexa Skills 2. How to Create Alexa Skills with Python 3. Alexa Presentation Language (APL) 4. Multilingual support
Ways to make money with Alexa
Basically, there are 3 methods to earn money with your Alexa Skill. You could either use Amazon Pay for Alexa Skills to sell real-world goods and services, charge customers an up-front payment to access your skill, or you could opt for in-skill purchasing (ISP), which means to sell digital goods and services within the Skill experience (for example hints in a Q&A skill or additional lives in a game skill).
The first method is outside the scope of this tutorial, it’s just a voice extension of Amazon Pay. The second is pretty straightforward: You pay upfront to have unlimited access to the skill. Thus, let’s delve deeper into the more challenging one: the ISP.
Fundamentally, this method supports three different types of products:
- One-time purchase: Do not expire, like buying an audiobook for example.
- Consumable: Like when you buy lives in a game, and every time you die, you lose one of the lives you bought.
- Subscription, which means .. Come on! You know what a subscription is.
Source: Alexa documentation
Okay, enough theory. Let’s start doing what really matters: Building things.

Select your monetization option
I suppose you’ve already created an Alexa skill. If you haven’t done so, what on earth are you trying to monetize then? Lucky for you I have other tutorials on how to create an Alexa skill from scratch 😊.
Now, in your Skill’s console:
- Navigate to the “Build” section.
- On the left-hand side menu, click on Models, then Monetize your skill.
- Next, select “add in-skill-product” and click Next.
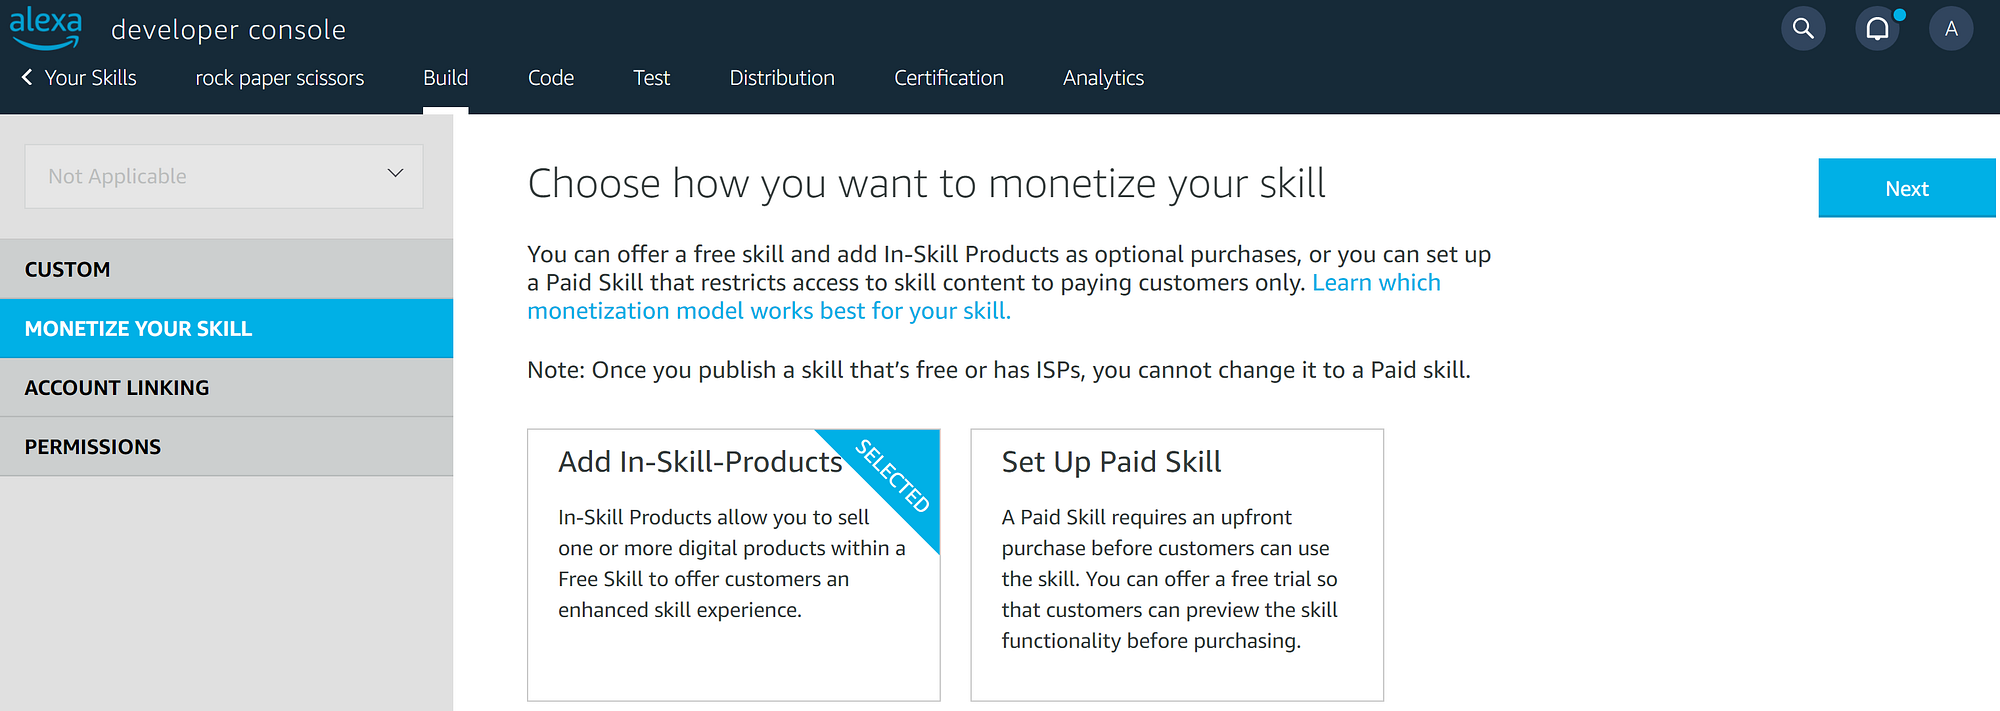
- In the new window, click on the top right button “Create in-skill product”
- Pick a name for your product, select “subscription”, and hit “Create in-skill product”
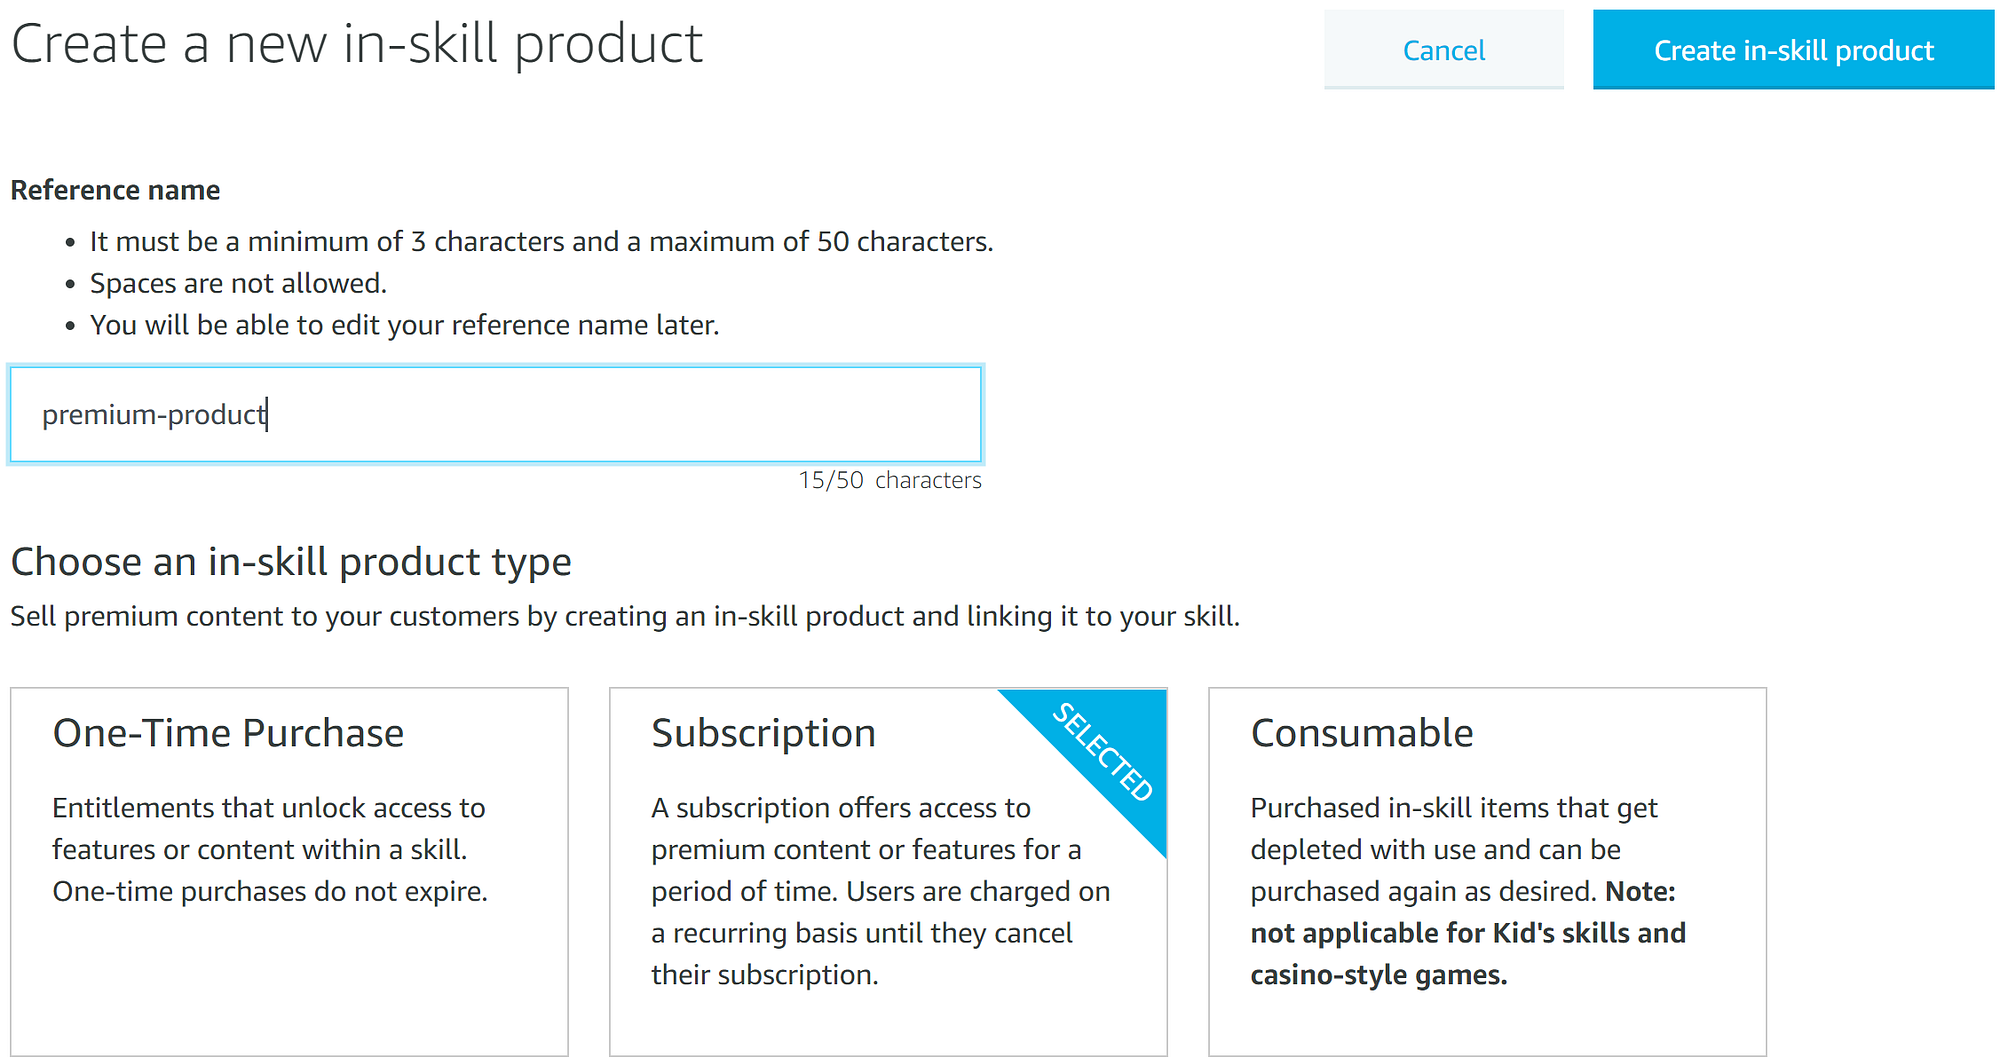
As explained before, there are 3 types of in-skill purchases that Alexa supports. For the sake of simplicity, we’re not going to cover all three types here. Let’s go for subscriptions.
Supported languages
In the new window, go to the “Supported Languages” section and “add new language”
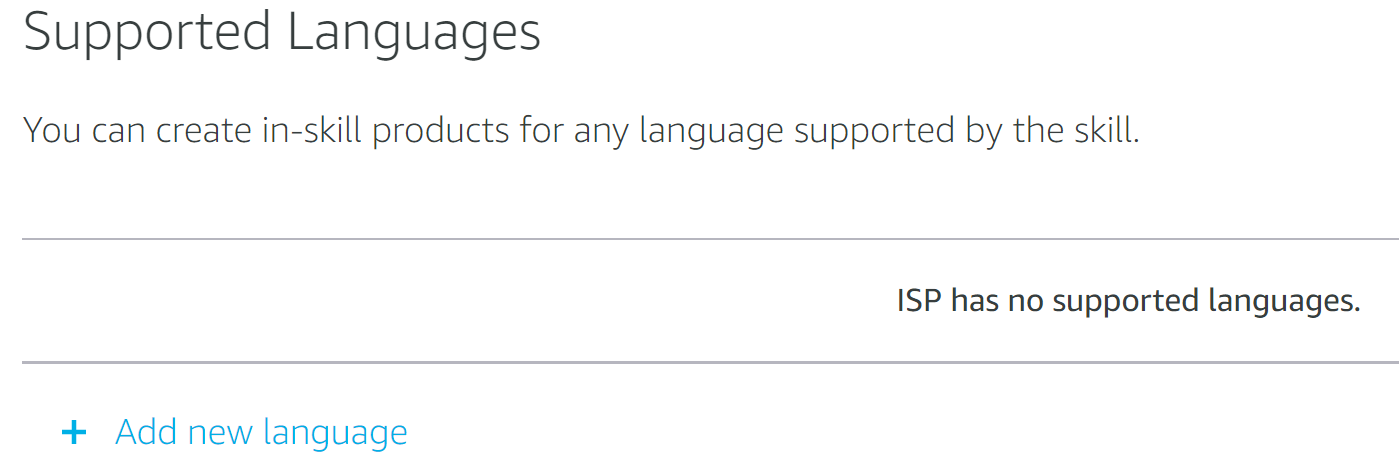
Select the Languages that your skill supports. In the case of the RPS game that we were following throughout this series, we choose English (US) and French (FR).
When you select a language, you need to fill in some information about the product you’re selling.
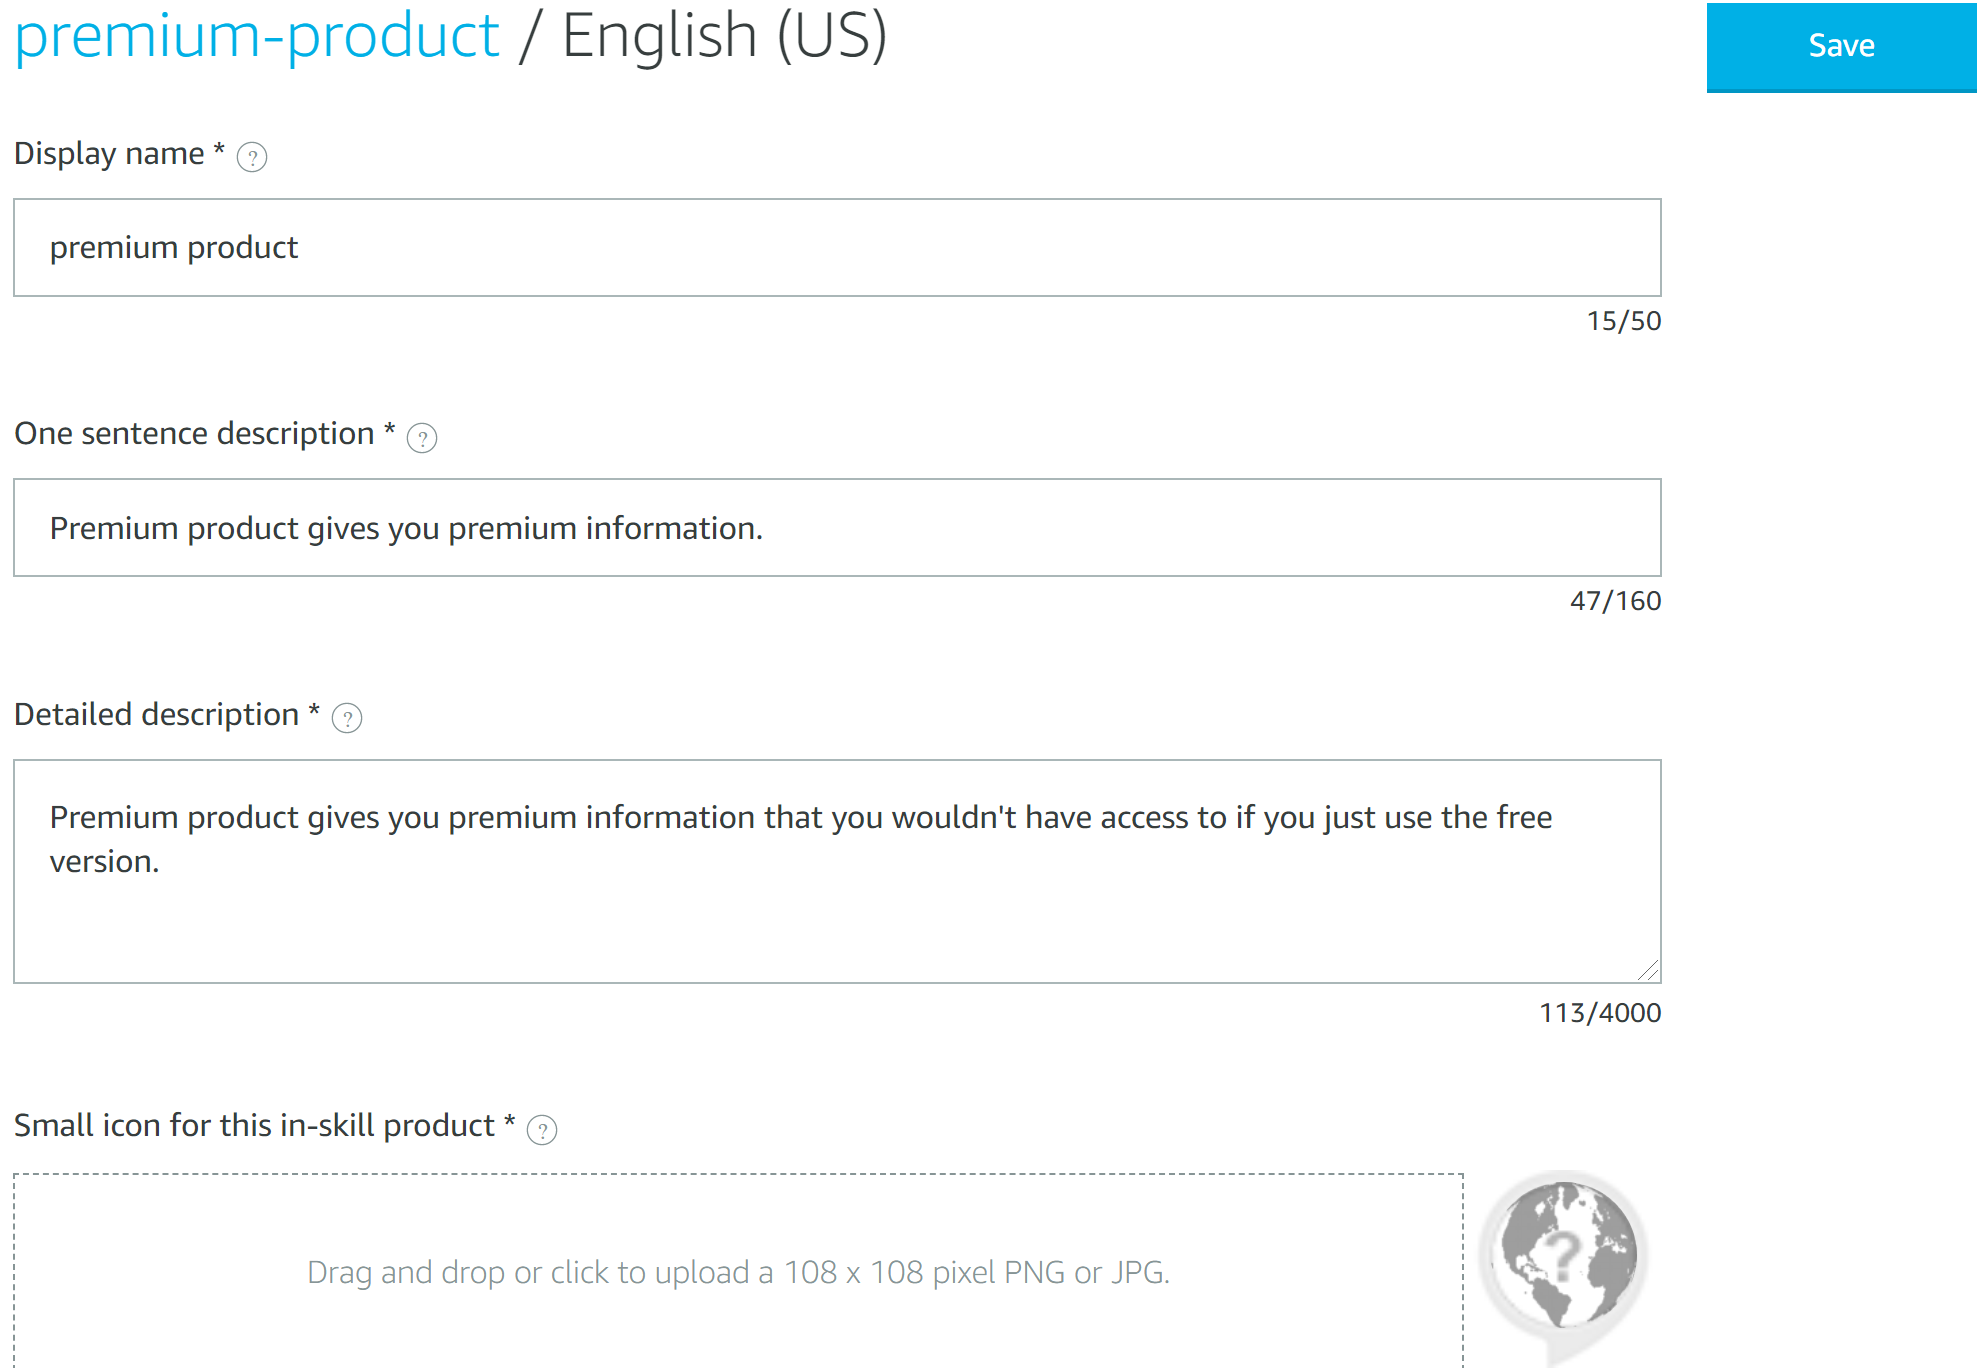
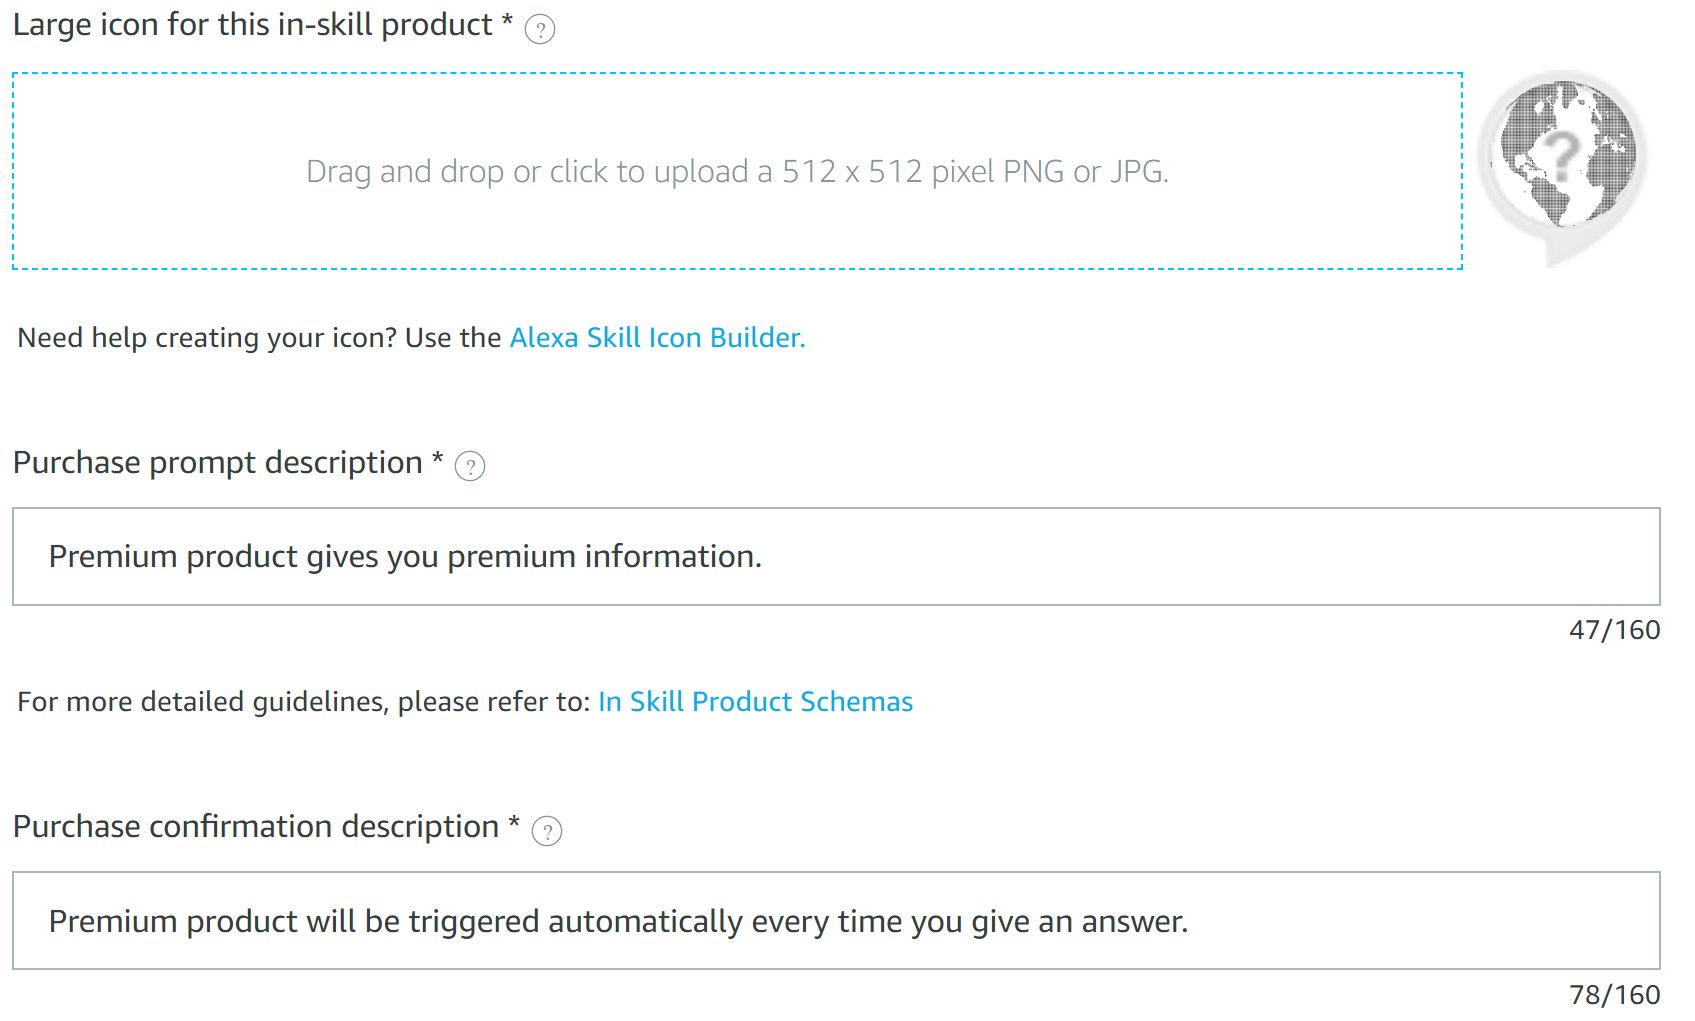
When you’re done, hit Save, and do the same for the French language.
Pricing
After that, you’ll be directed to the previous product page. Under “Pricing & Availability” select where the product will be available.
Choose reasonable prices. Don’t overcharge the users. After all, even if they subscribe, they can always cancel if they find the price doesn’t match what they’re paying for 🤷🏻♀️.
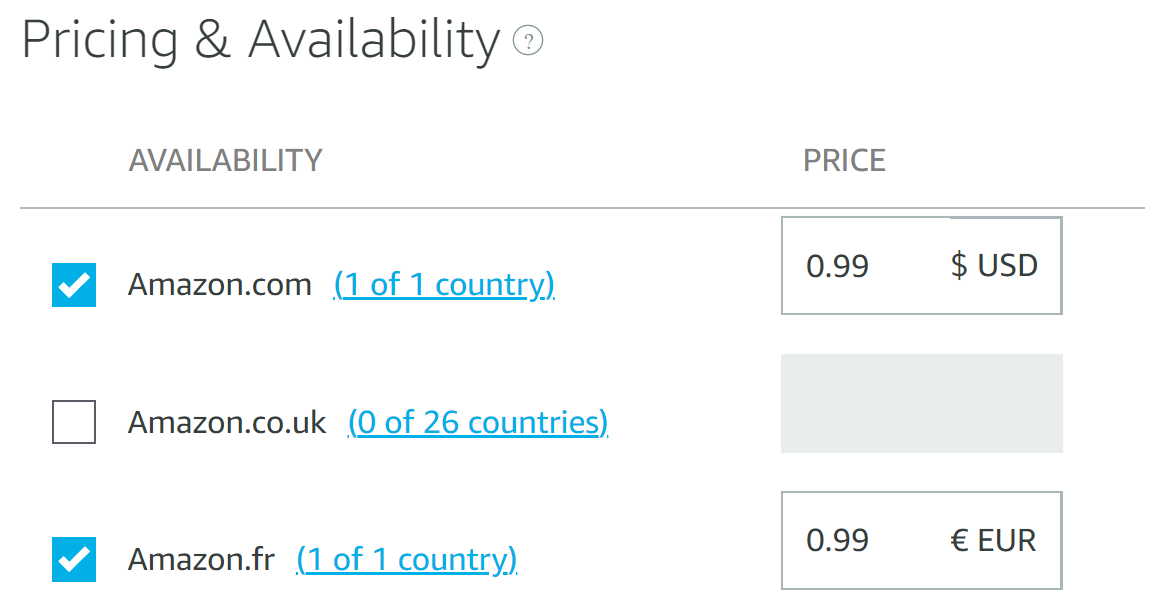
Under the tax category, we select “software” and then fill in the billing frequency and trial period information.
You can also provide some testing instructions to Amazon’s certification team. Something that will tell them how to discover your product, test account credentials, etc.
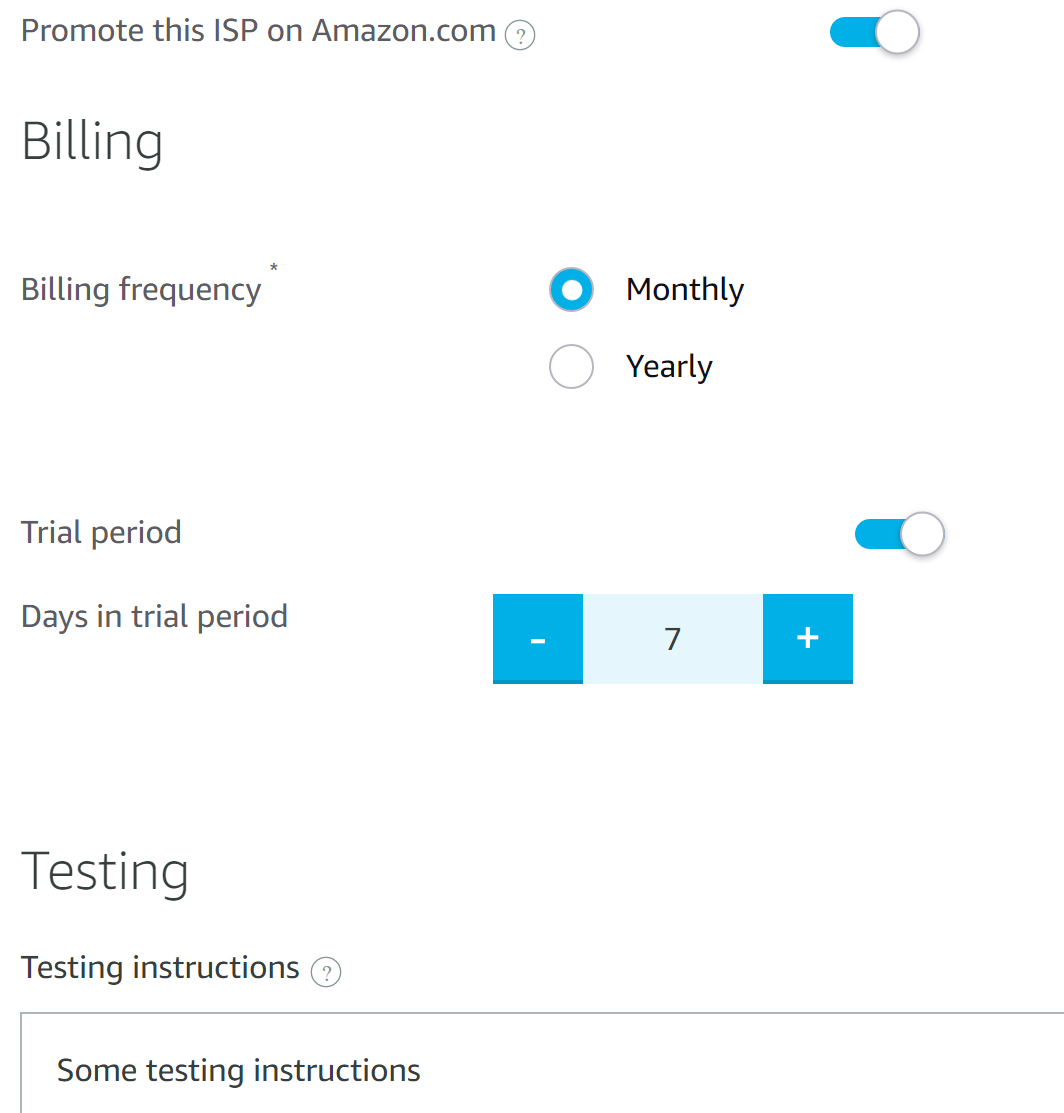
Save your changes, then in the next popup select Link to skill
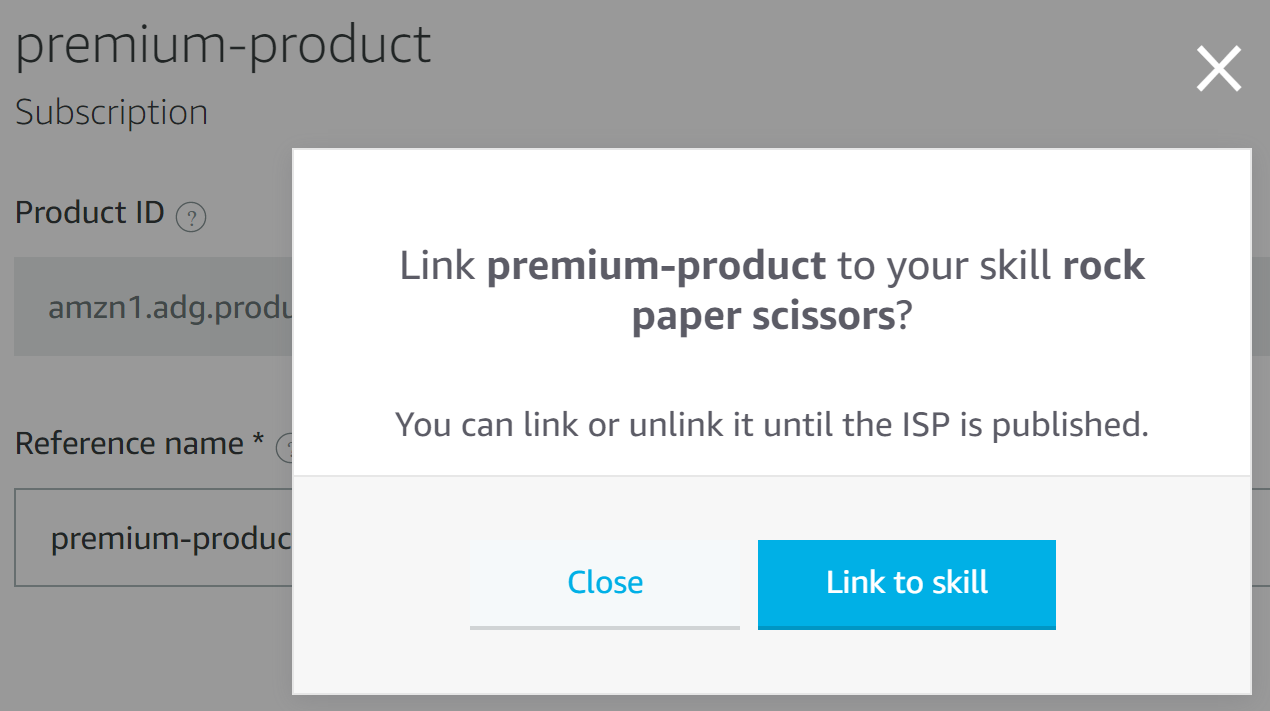
Good job 🙌🏻. You have successfully created your first product and linked it to your skill.
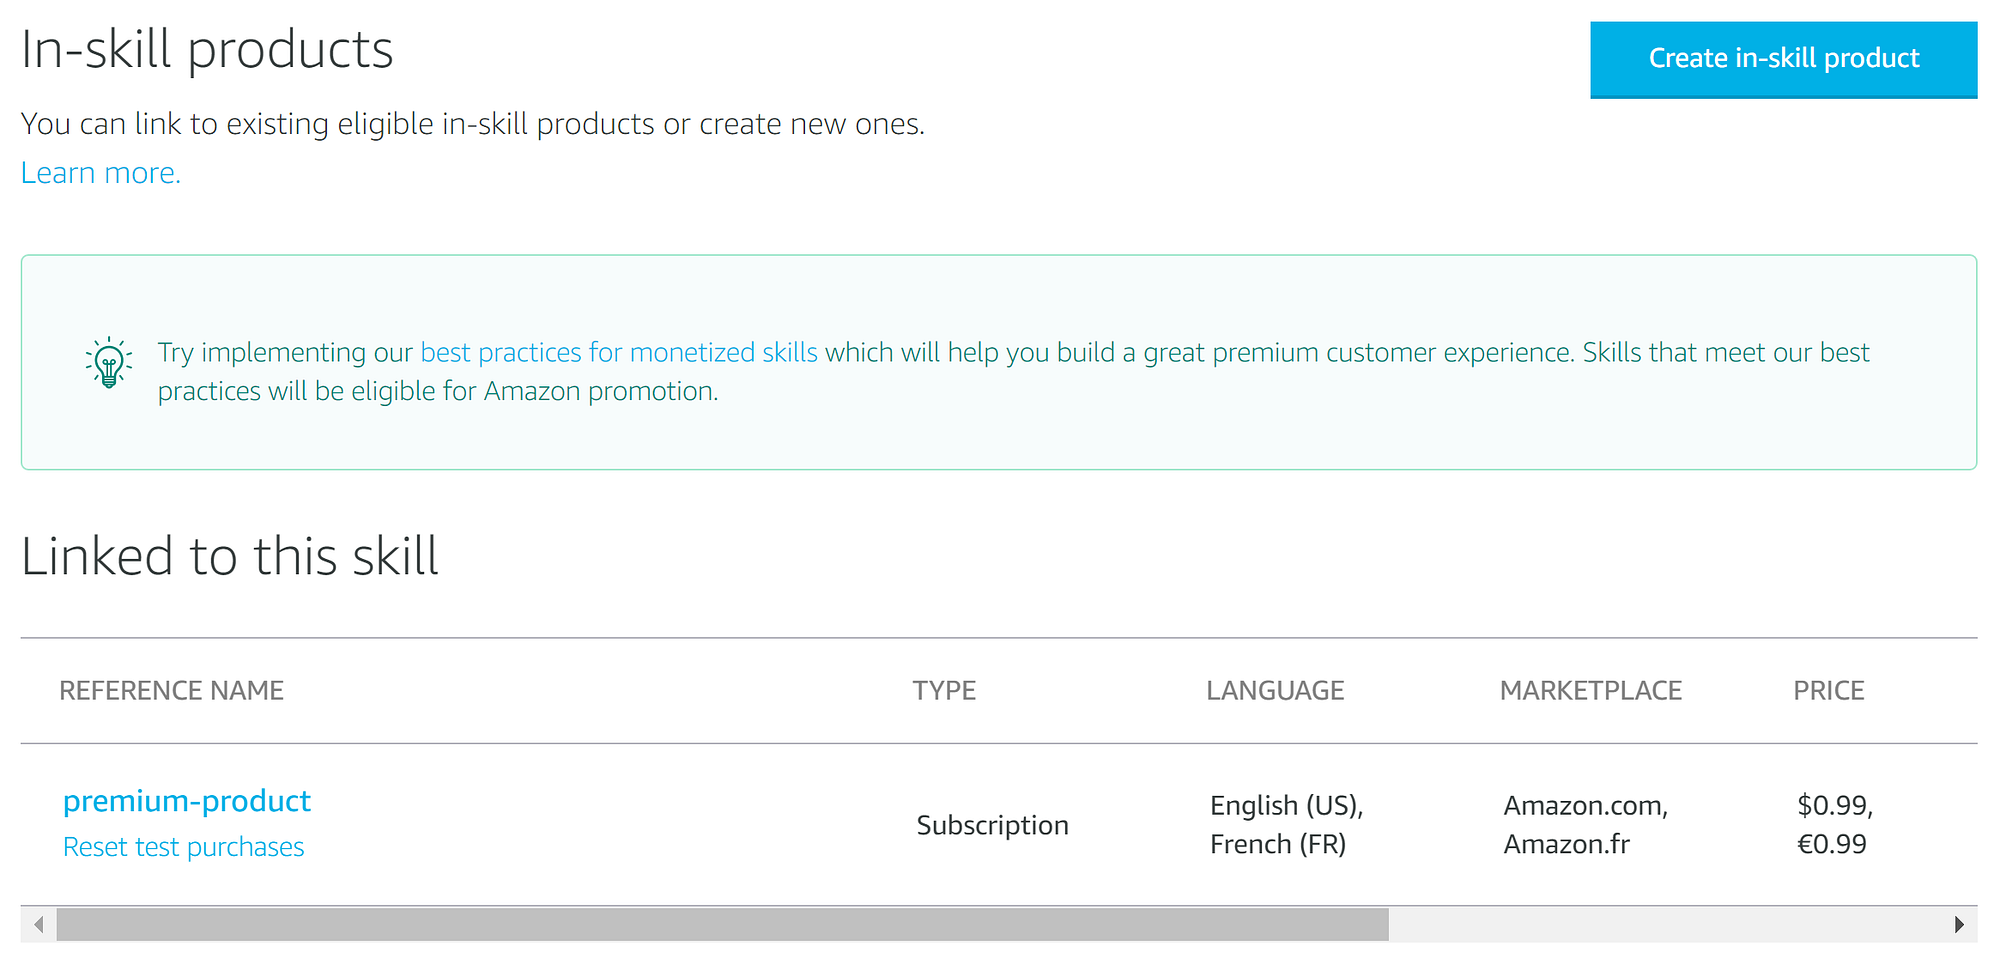
Now if you go back to the monetization section, you’ll see the premium product under the “Linked to this skill” list. And of course, you can modify what you want on the product by clicking on the “Edit” button.
How can users find your product?
While I’m proud of what you’ve accomplished so far, I hate to tell you that you just finished the easy part. The big problems are yet to come. But the good news is that you’re lucky I’m here to help you navigate this maze.
Actually, if you think about it... Yeah, the product is there, but how could Alexa users find it? We need a way for users to tell Alexa that they are interested in buying the product this Skill offers.
That we know how to do. We need a new intent, which will be triggered when asking for buying a product. And since we can have more than one product to sell, let’s first start by creating a slot type for premium products.
I suppose you’re already familiar with creating slot types: Left side menu, Custom, Slot Types, Add Slot Type. Then gave it a name (ProductName).
After that, click on the + button to create a new value. We just have one product, therefore let’s just go for “Premium product”.
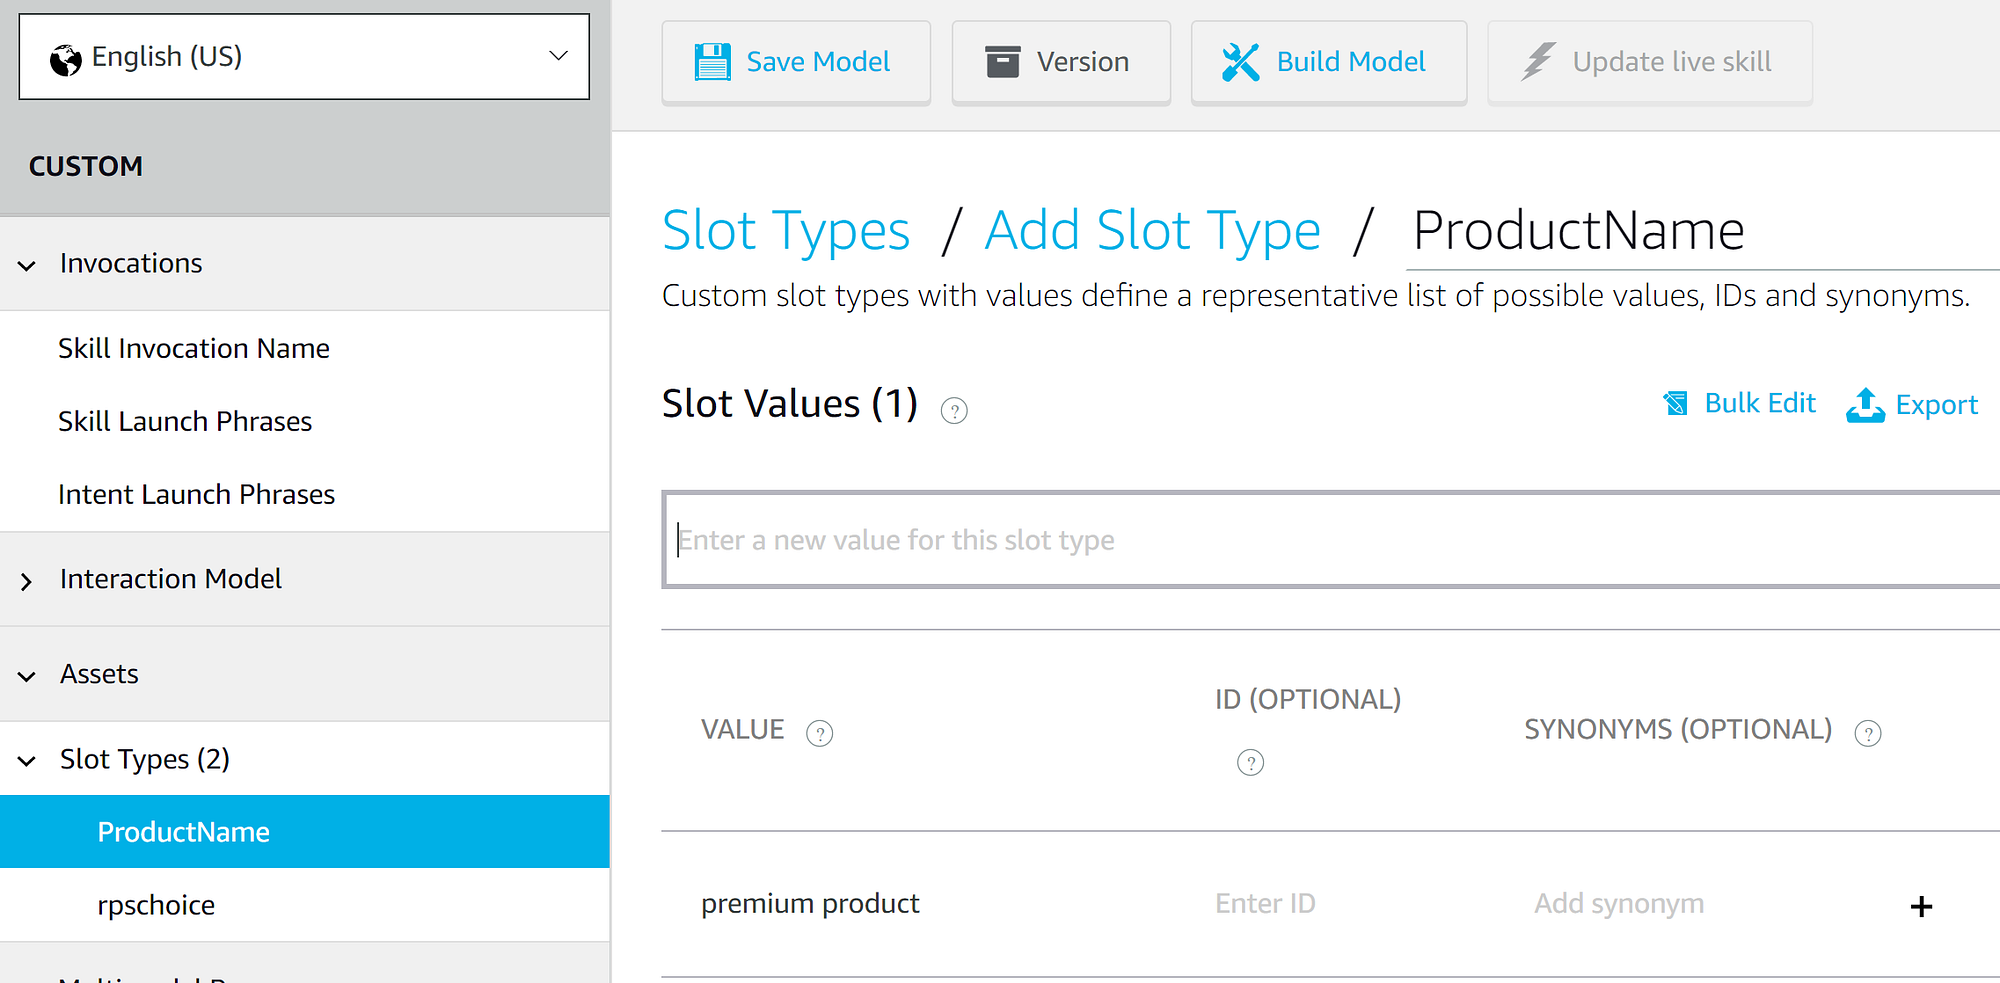
Now let’s create a “BuyIntent”: Interaction Model — > Intent — > Add Intent.
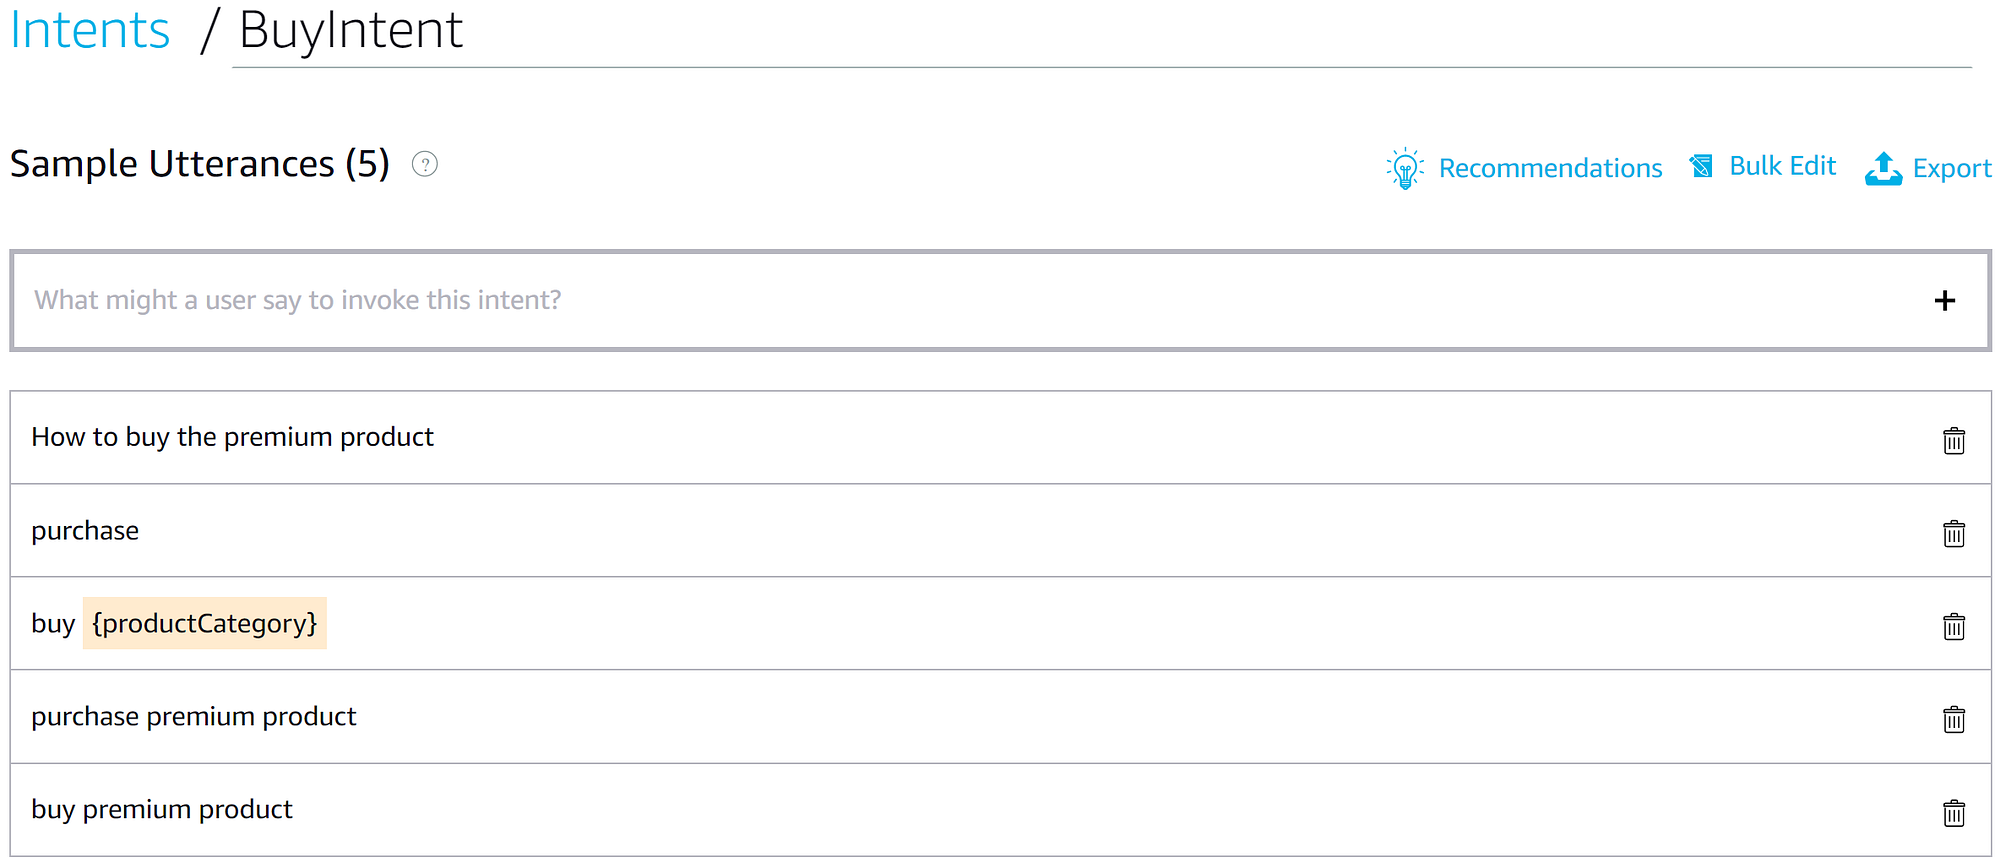
Associate the slots from the training phrases with the slot type ProductName. I’m not providing annoying details here because we’ve discussed these things in a previous post.
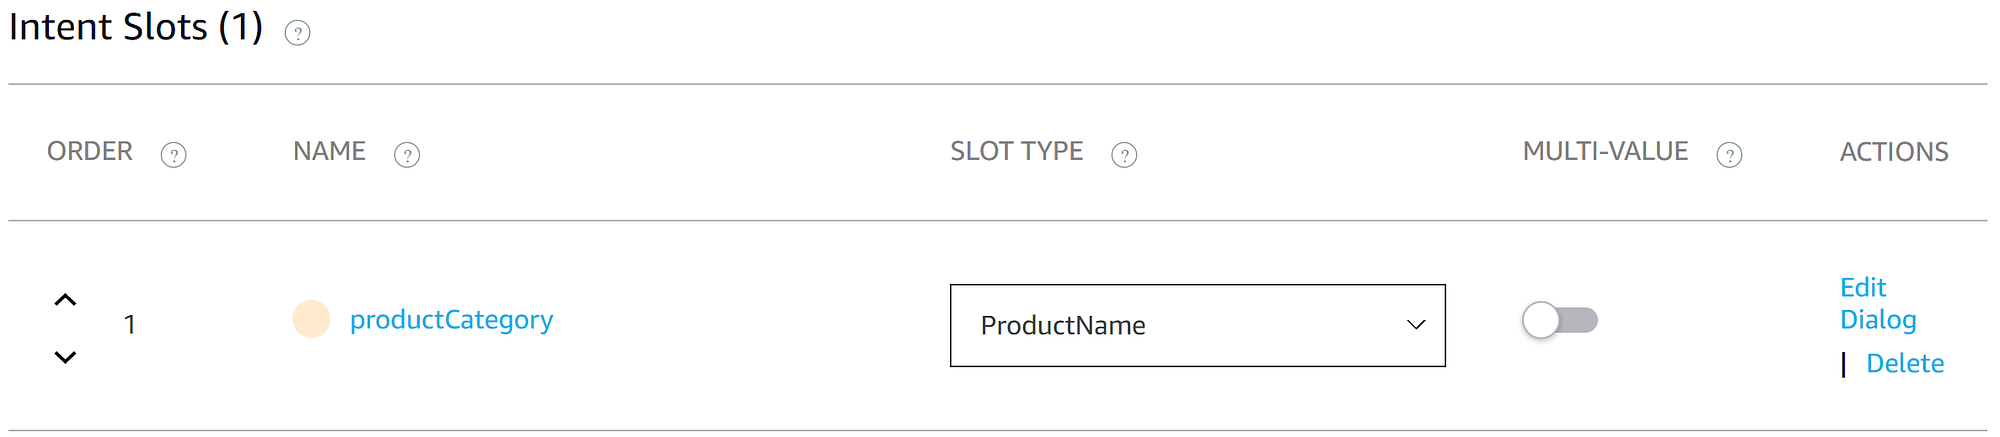
In addition to the BuyIntent, users would appreciate it if you provide them with another intent to cancel their subscription if they no longer like your service. Don’t let them be stuck without a way out. I’m counting on your kindness and good faith 😇 😇 😇.
Or you know what, I’m not 🙄. The less you trust, the less you get hurt 😅.
In fact, your Skill will not get certified by Amazon if you don’t provide an intent to cancel users' subscriptions (or to refund for the other types of products).
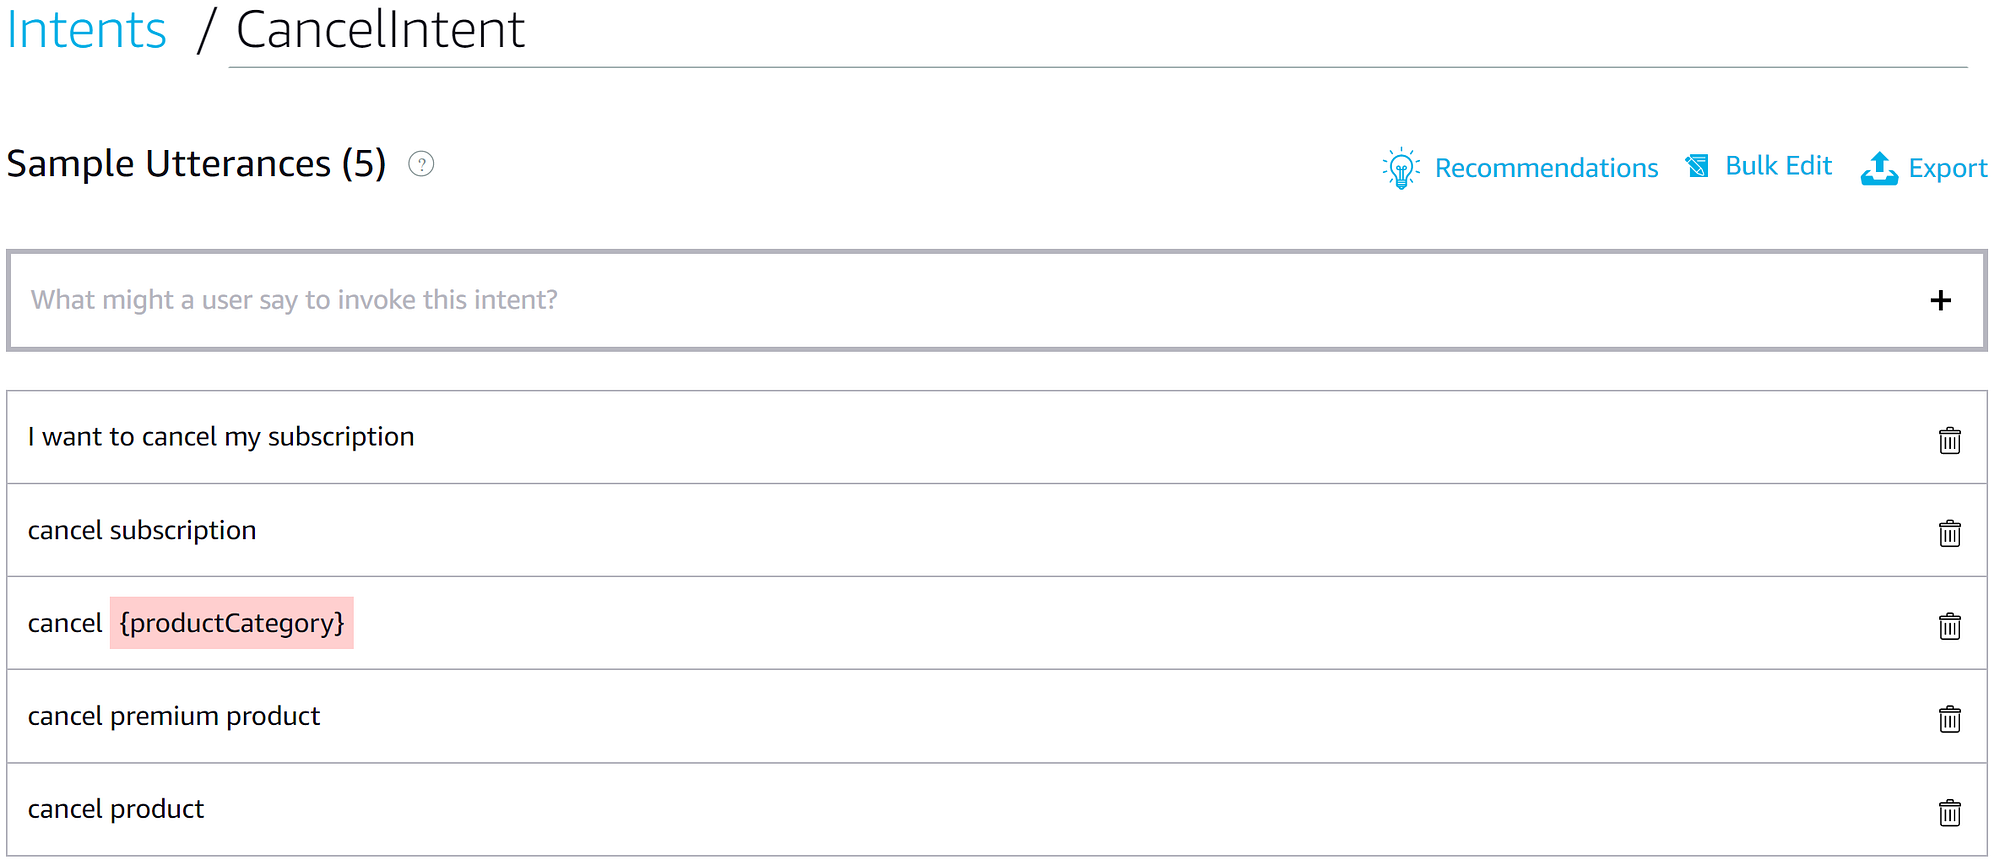
Do the same for other languages. In our RPS game, switch to French and create these two intents there too.
Otherwise, you can just use the JSON files from my Github account.
Update the code
Back to the Code section.
- First, in the requirements.txt file, add ask_sdk==1.13.0 as in [here]
- Then, add a monetize.py file in which we’ll put some helper functions
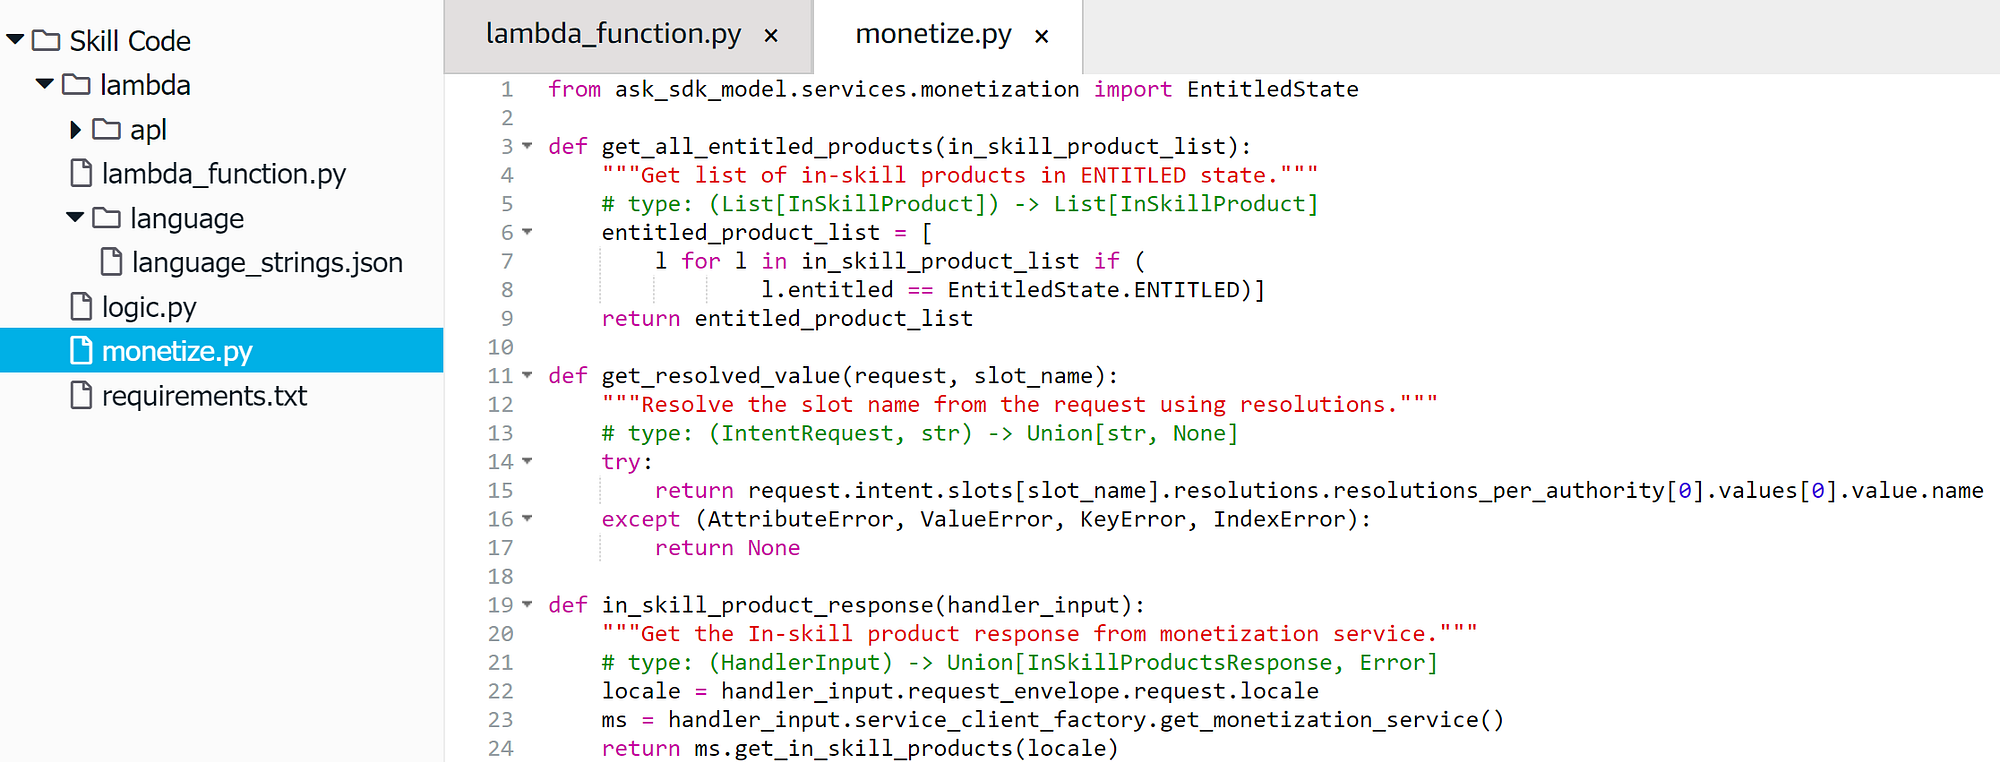
I tried to add as many comments as I thought necessary so that I don’t submerge you with a deluge of text here. If you have any questions about any line of code, refer to the official documentation, or let me know in the comments below.
- I also added some new variables that I will need afterwards in the language_string.json file


Now it’s time for the Lambda function:
- Add some imports
- Change the SkillBuilder() to StandardSkillBuilder()

- Create four classes: BuyIntentHandler / BuyResponseHandler and CancelProductIntentHandler /CancelResponseHandler
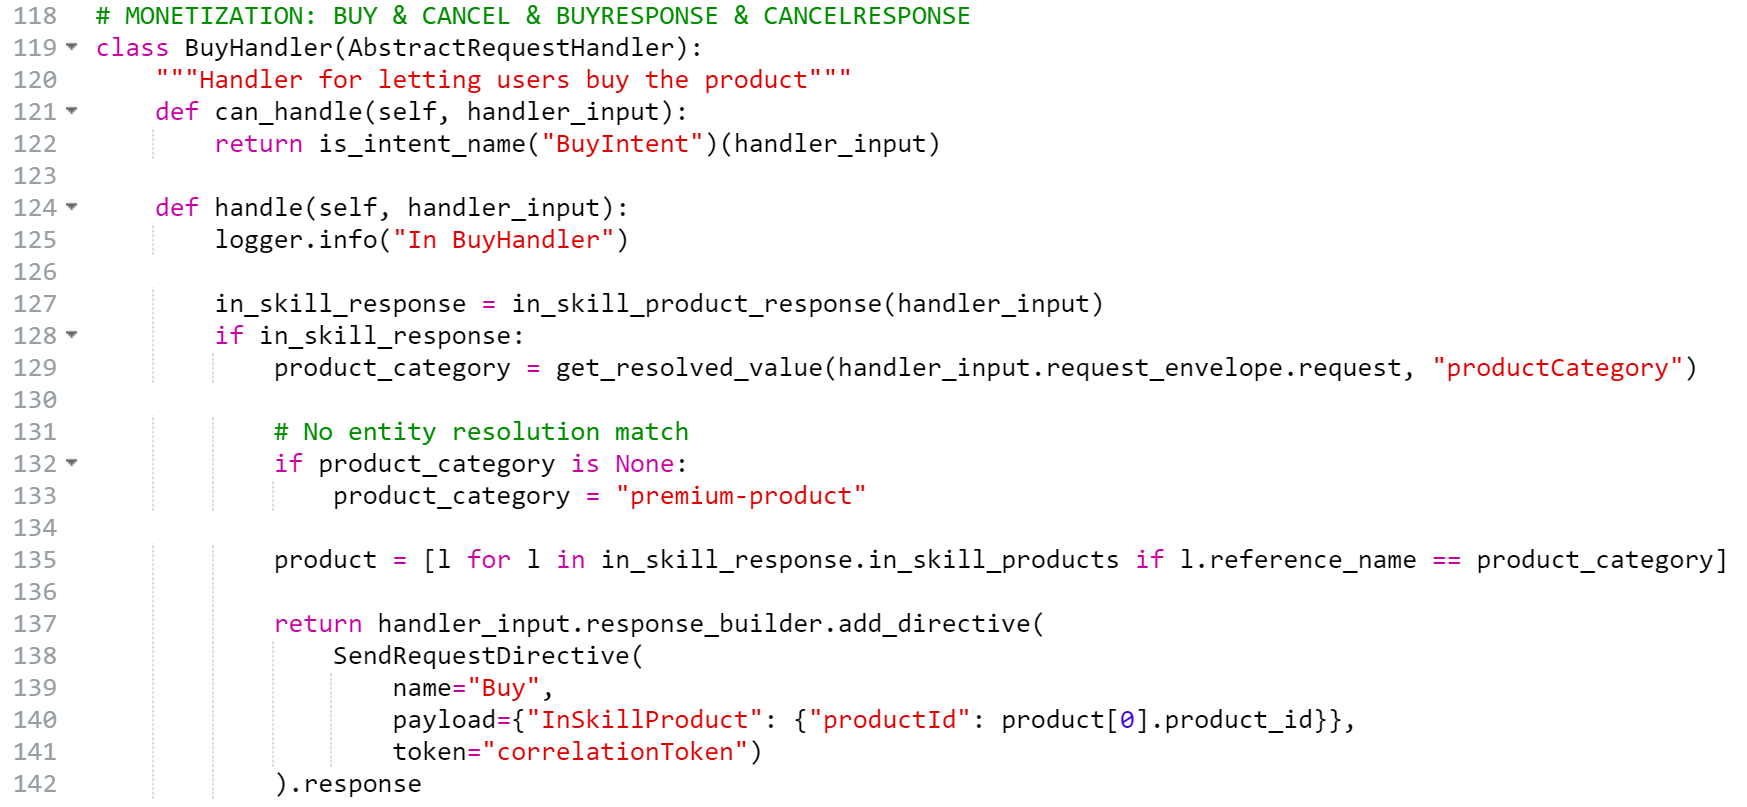
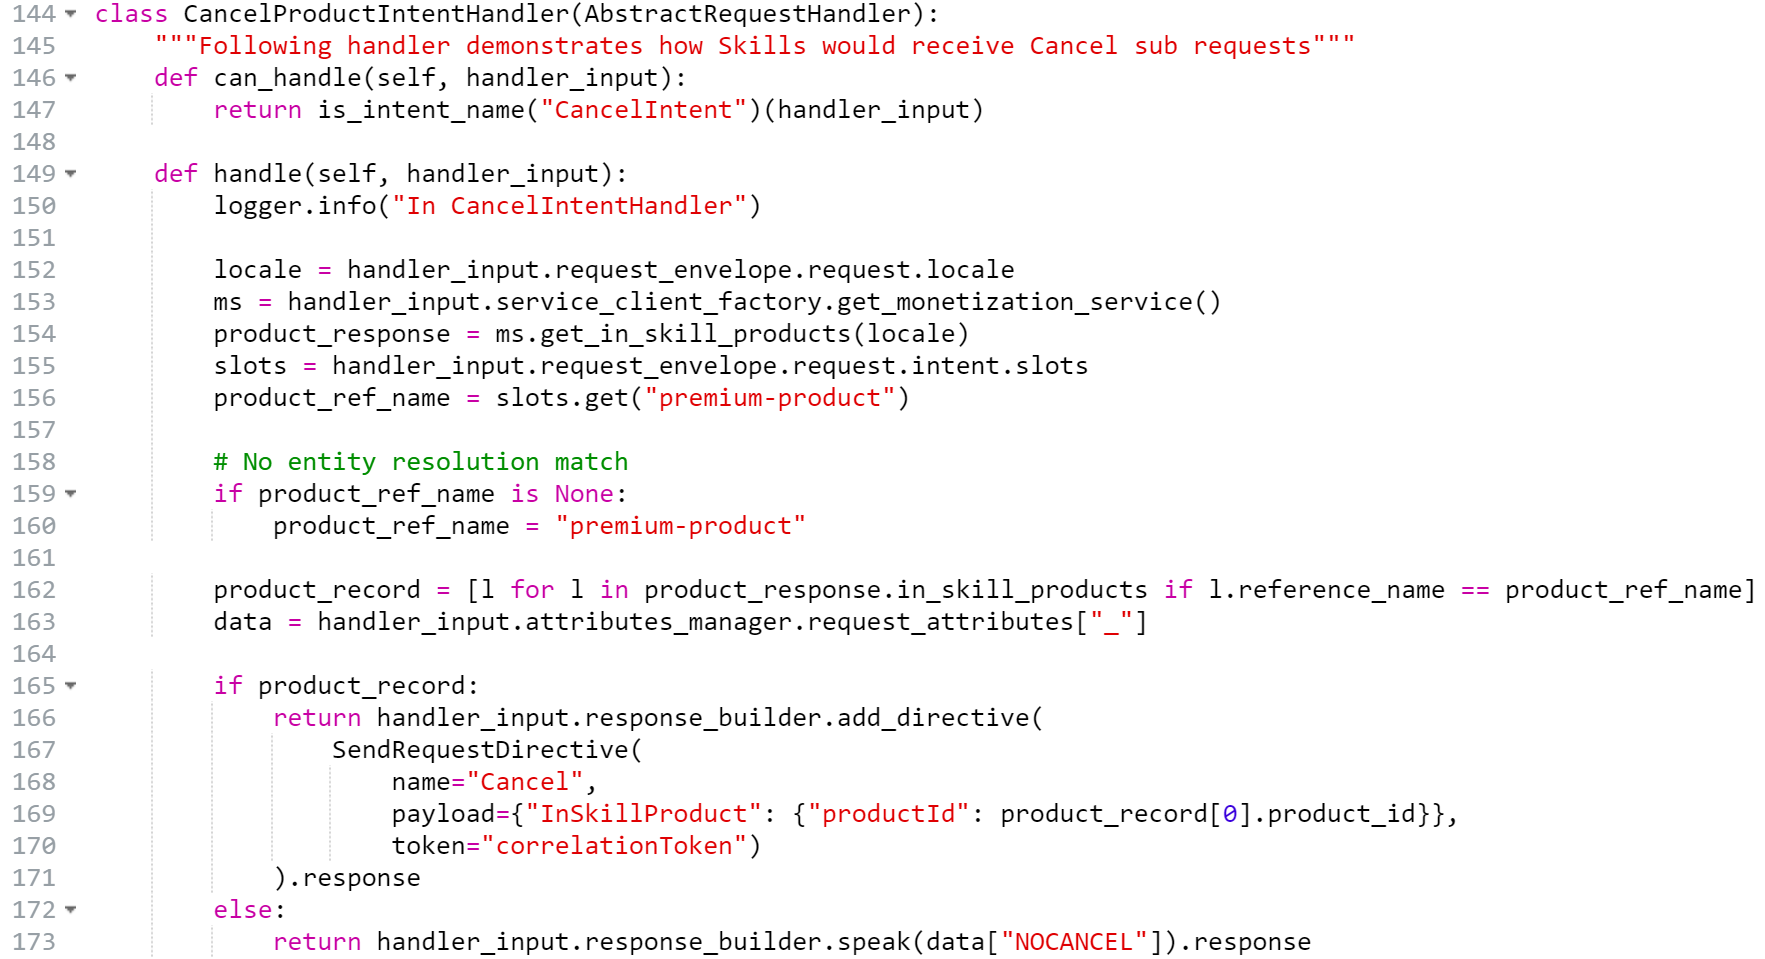
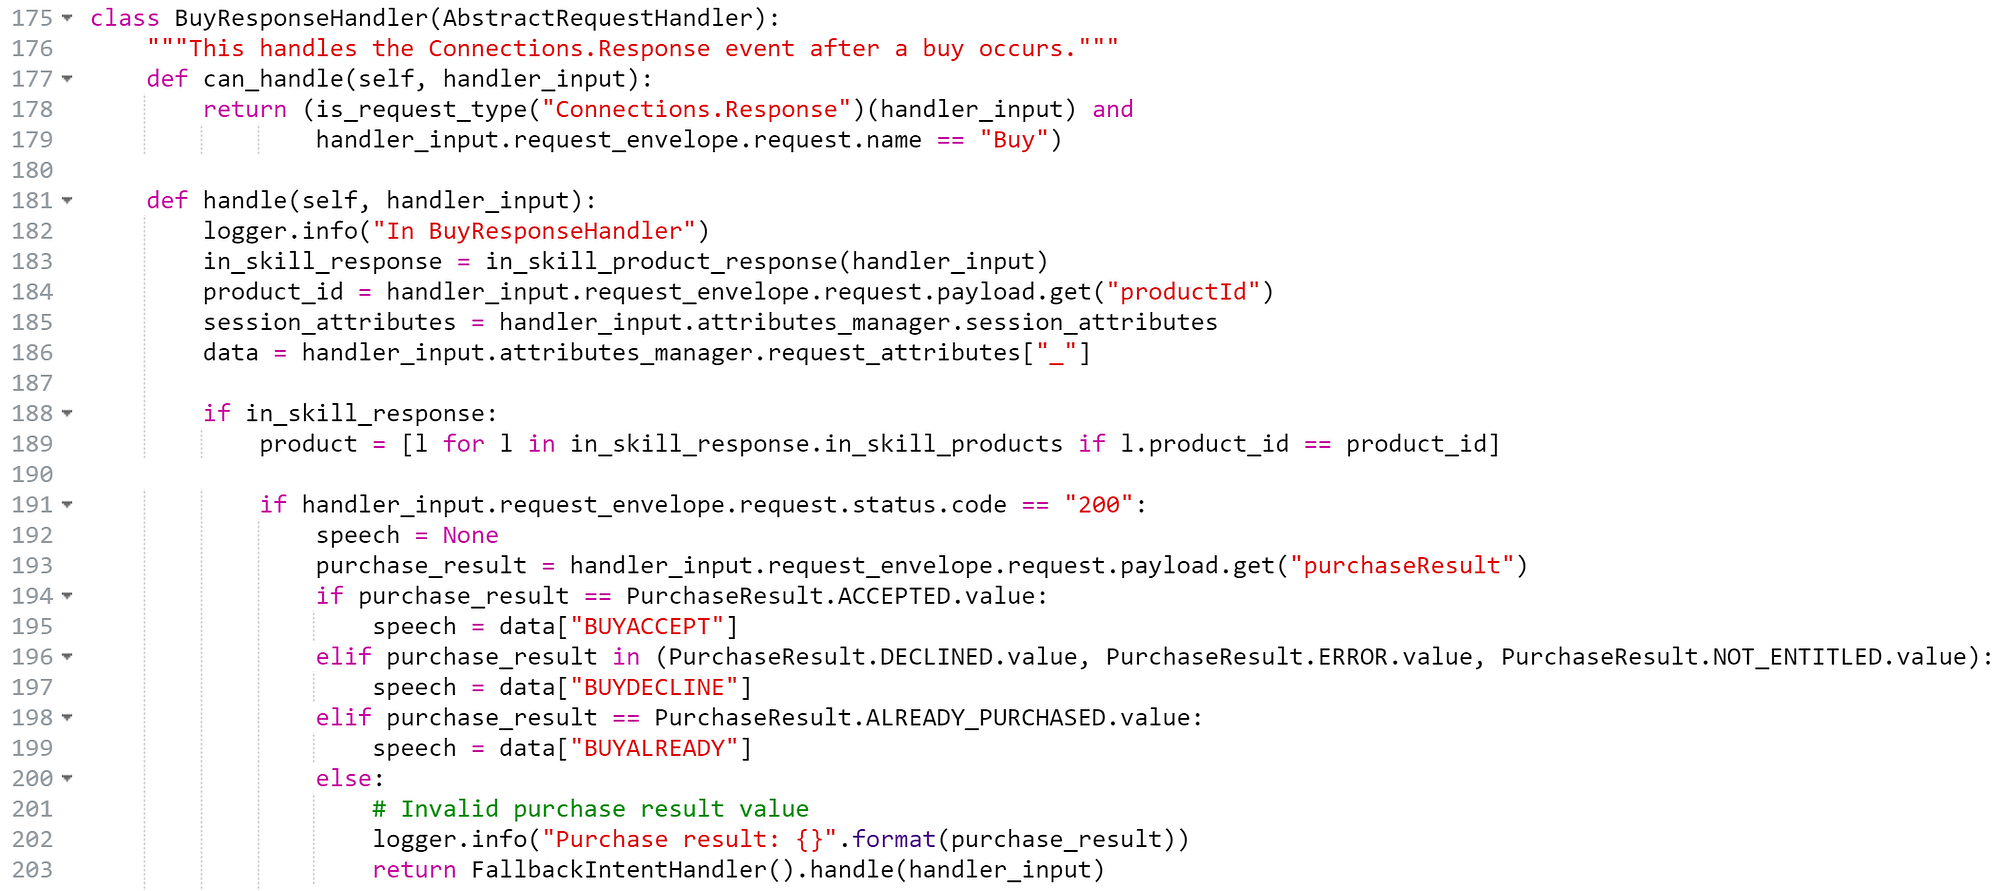
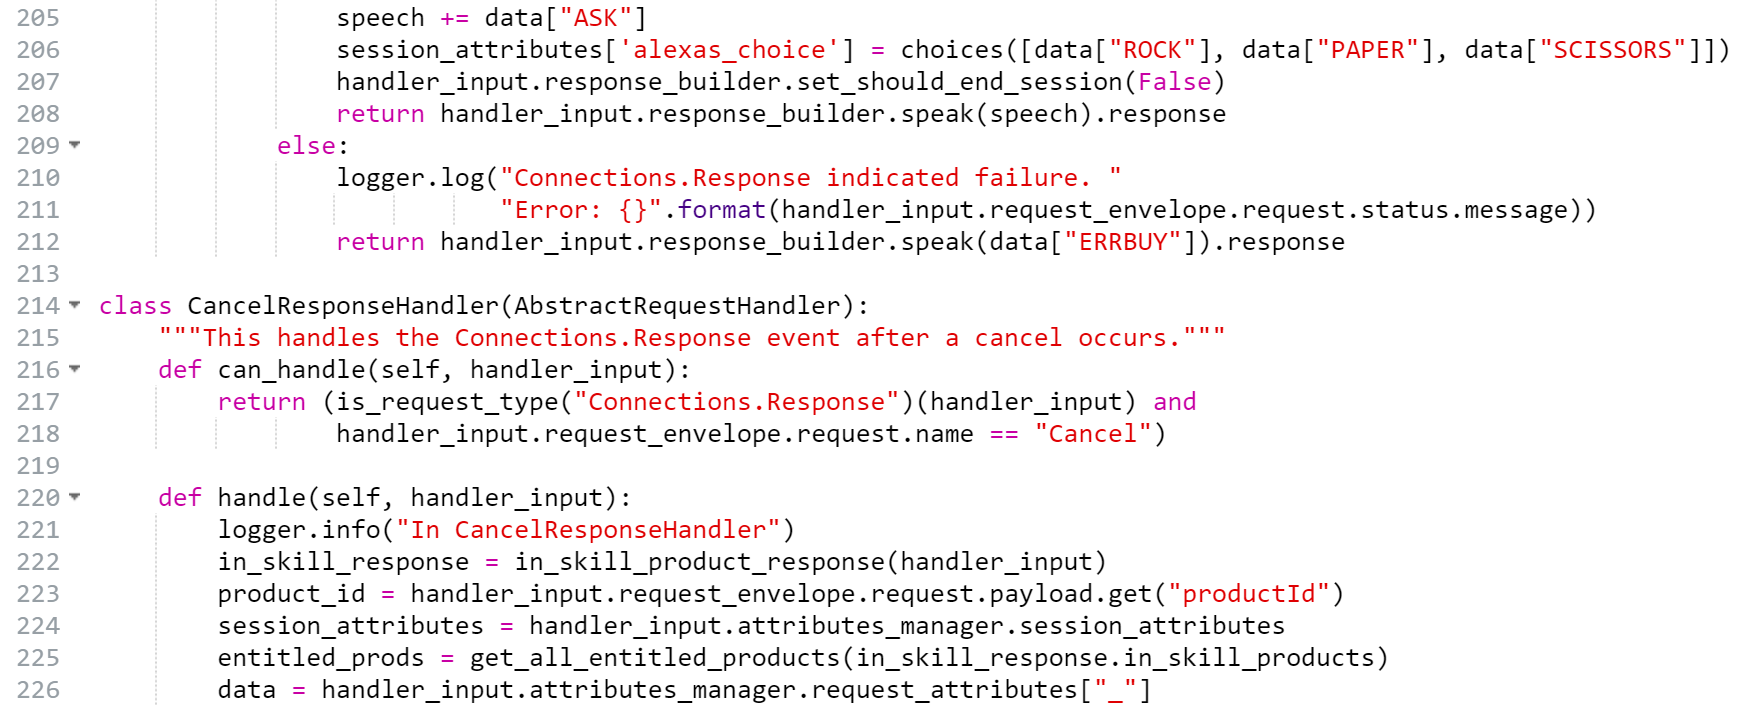
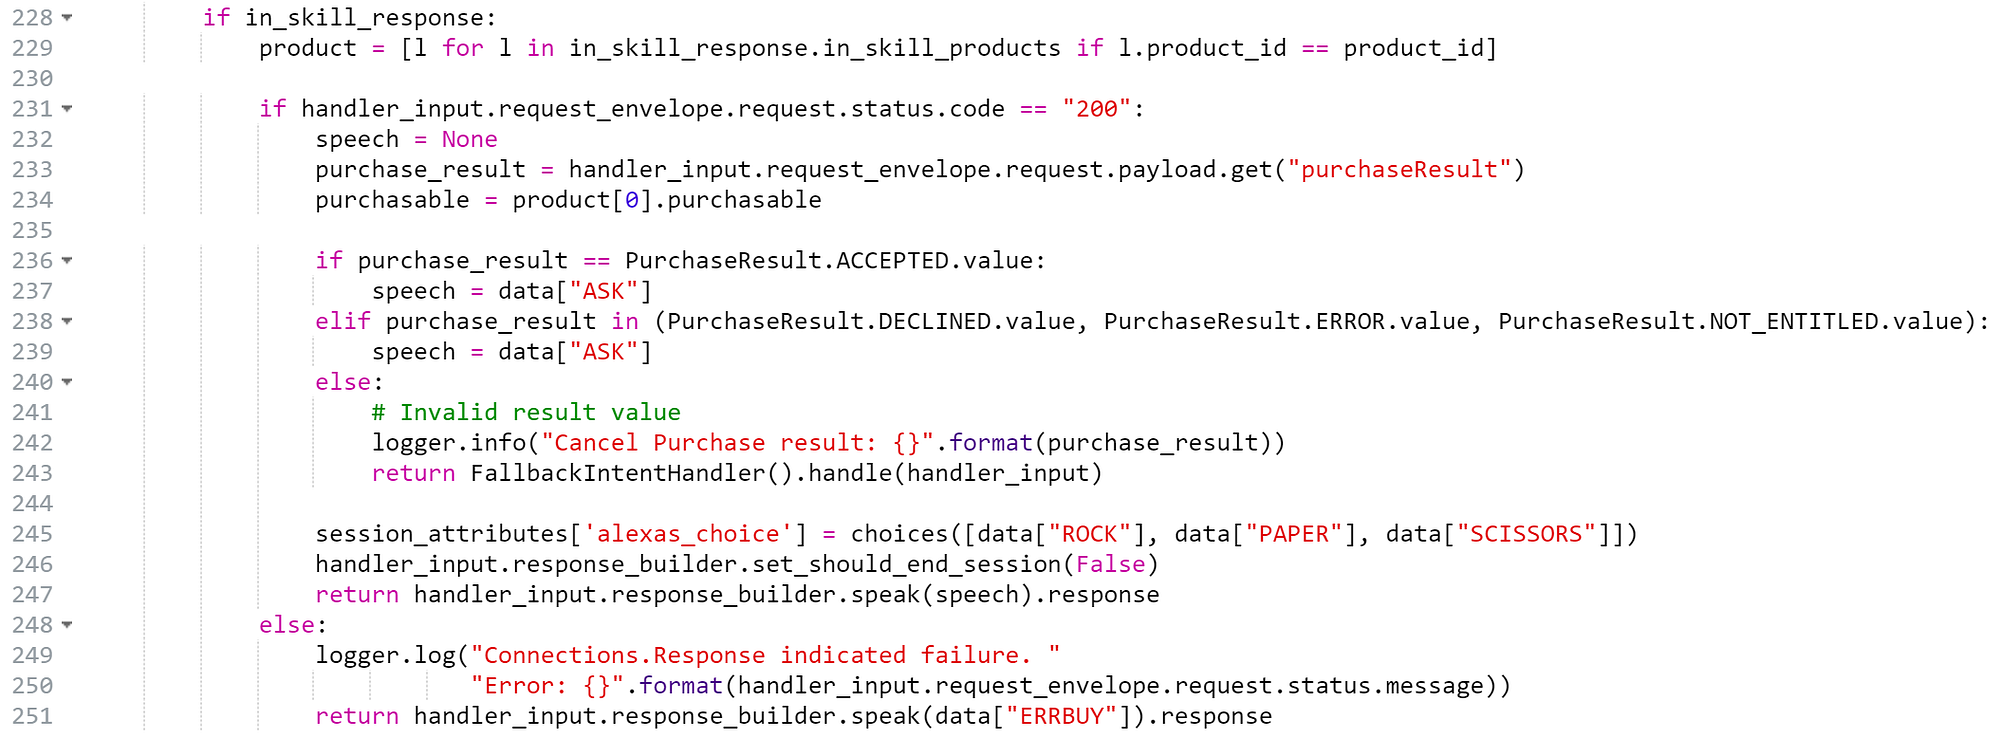
Remember that whenever you trigger Buy or Cancel intents, the session attributes get lost. So make sure to handle this either by re-initiating them like we are doing here or by using persistent attributes instead.
Also, don’t forget to add these lines at the bottom of the file.

Now in the AnswerIntentHandler, add a message that users will get when the product is triggered.

➔ Note that we didn’t add APL for buy and cancel intents, but feel free to do it on your own. Check out my previous post to refresh your memory.
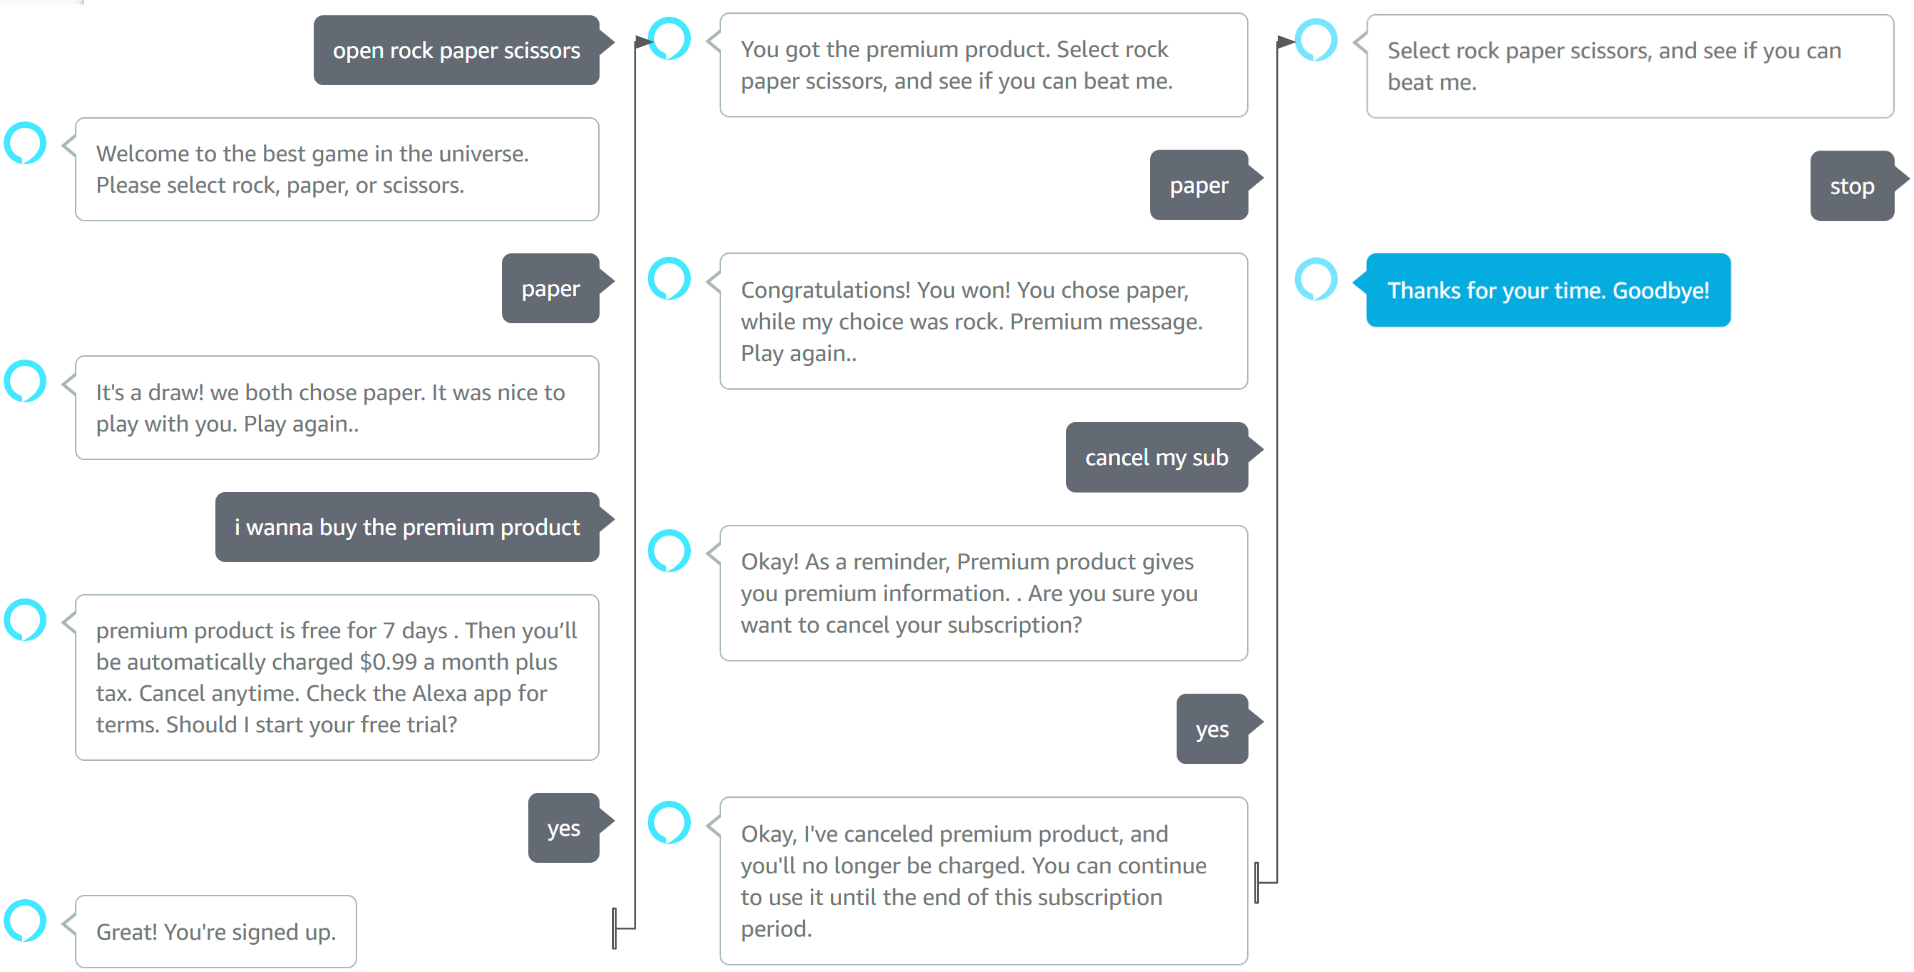
The complete code for the lambda function can be found here.
Final word
That was a nice journey. Five tutorials where I’ve shared with you everything you need to know to develop an Alexa Skill. We even went the extra mile to explore ways of adding visualization, multilingual support, and monetization. I hope you found this series useful.
See you soon in another blog post or even on another medium (pun intended 😉). You can find me on Twitter or LinkedIn.

More content at PlainEnglish.io. Sign up for our free weekly newsletter. Follow us on Twitter, LinkedIn, YouTube, and Discord. Interested in Growth Hacking? Check out Circuit.
Alexa Skills with Python: Monetization