

“One language sets you in a corridor for life. Two languages open every door along the way” Frank Smith.
Don’t overthink it. I just googled quotes about learning multiple languages so that I can start my blog post like a wise man 🙄.
Hey hey, welcome again to this series of learning how to create Alexa Skills using Python. After explaining the general concept behind Alexa skills, developing an actual Rock Paper Scissors (RPS) skill, and adding the visual components, now is the time to learn how to make our application (Skill) speak multiple languages.
⚠️ As a reminder, although the code snippets in this tutorial are screenshots that you can’t copy/paste; the same codes are available in my GitHub profile [here]. I’m not cruel 😇, it’s just that the code is more readable when presented this way.
Back to work gentlefolks! 🤜🤛
Add a new Language
So far we built an English-only Rock Paper Scissors skill, which also supports the Alexa Presentation Language. Let’s open our Skill and start our journey to make it international. 🤓
- To do so, go to the Build section, click on English (US) selector on the left-hand side menu, and then select Language Settings.
- In the new window select “+ Add new language” at the bottom
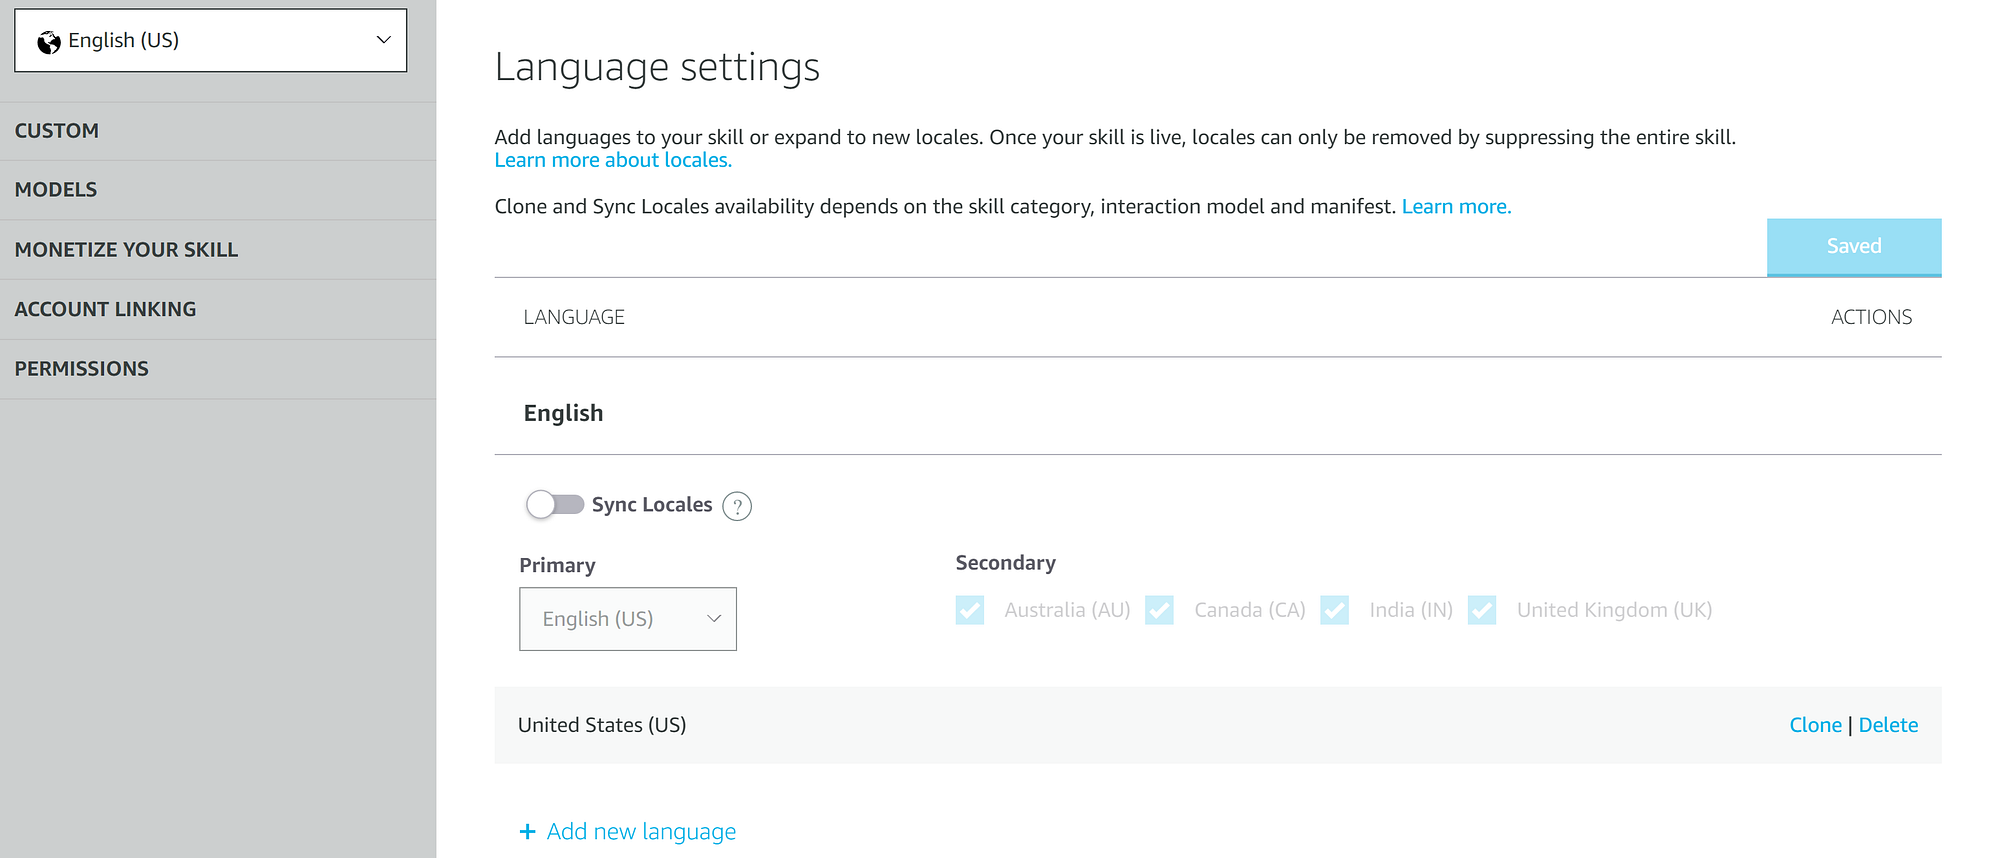
Add support for an additional language
- Let’s select “French (FR)” as the second language that we want the Skill to support, then click “Save”
Now you will be able to see “French (FR)” when you click on English (US) in the Build section. But for now, let’s stay in the English version for a moment.
(Re)Build the structure of the Skill
One thing to bear in mind when adding a new language is that from Alexa’s perspective, the two languages are created pretty much like two separate skills. So we need to somehow provide the structure of the French version (intents, slots, …) as well as the translation to every answer the Skill was saying in English.
- Go to “Interaction models” and select “JSON Editor”.
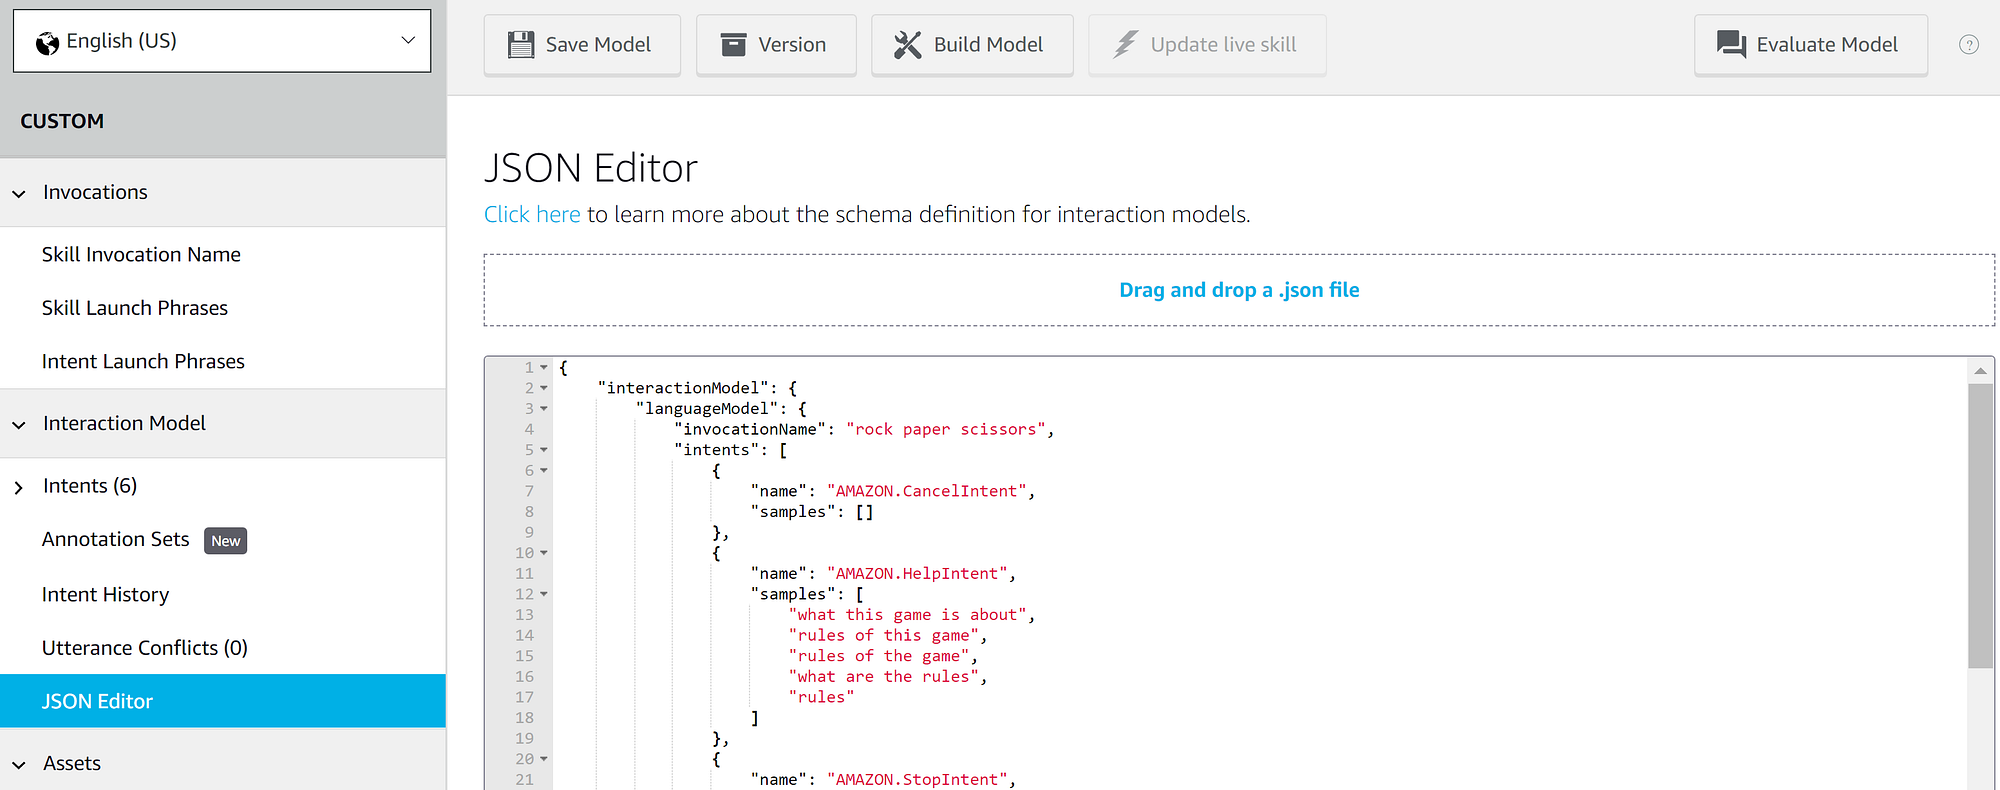
- Copy the content of this file, then switch to the French version (by clicking on the top left “English (US)” button and selecting “French (FR)”)
- Navigate to “Interaction models”, and “JSON Editor”, then paste the JSON content there.
What we did is self-explanatory: we literally copied the structure of the English version to the new French one. However, this file actually contains the samples to trigger intents, slots, as well as the invocation name which we definitely need to change to the French language.
- Thus try to translate these English expressions. Make sure you don’t change intents' names. You can find the translated file [here] on Github.
- As always don’t forget to: Save model and Build model
Translate the Alexa interactions
In addition to the structure and the users' inputs, we also need to handle how the new version of Alexa responds to its French users.
In order to handle this, let’s go back to the Code section, create a language folder and a JSON file within it, which will contain the texts that will be used by the two versions of the Skill. (Check out the complete file [here]).
Basically, we create a mirrored version of the English responses, using the same keys, so that we can switch between them in our backend code, as we will see later in this tutorial.
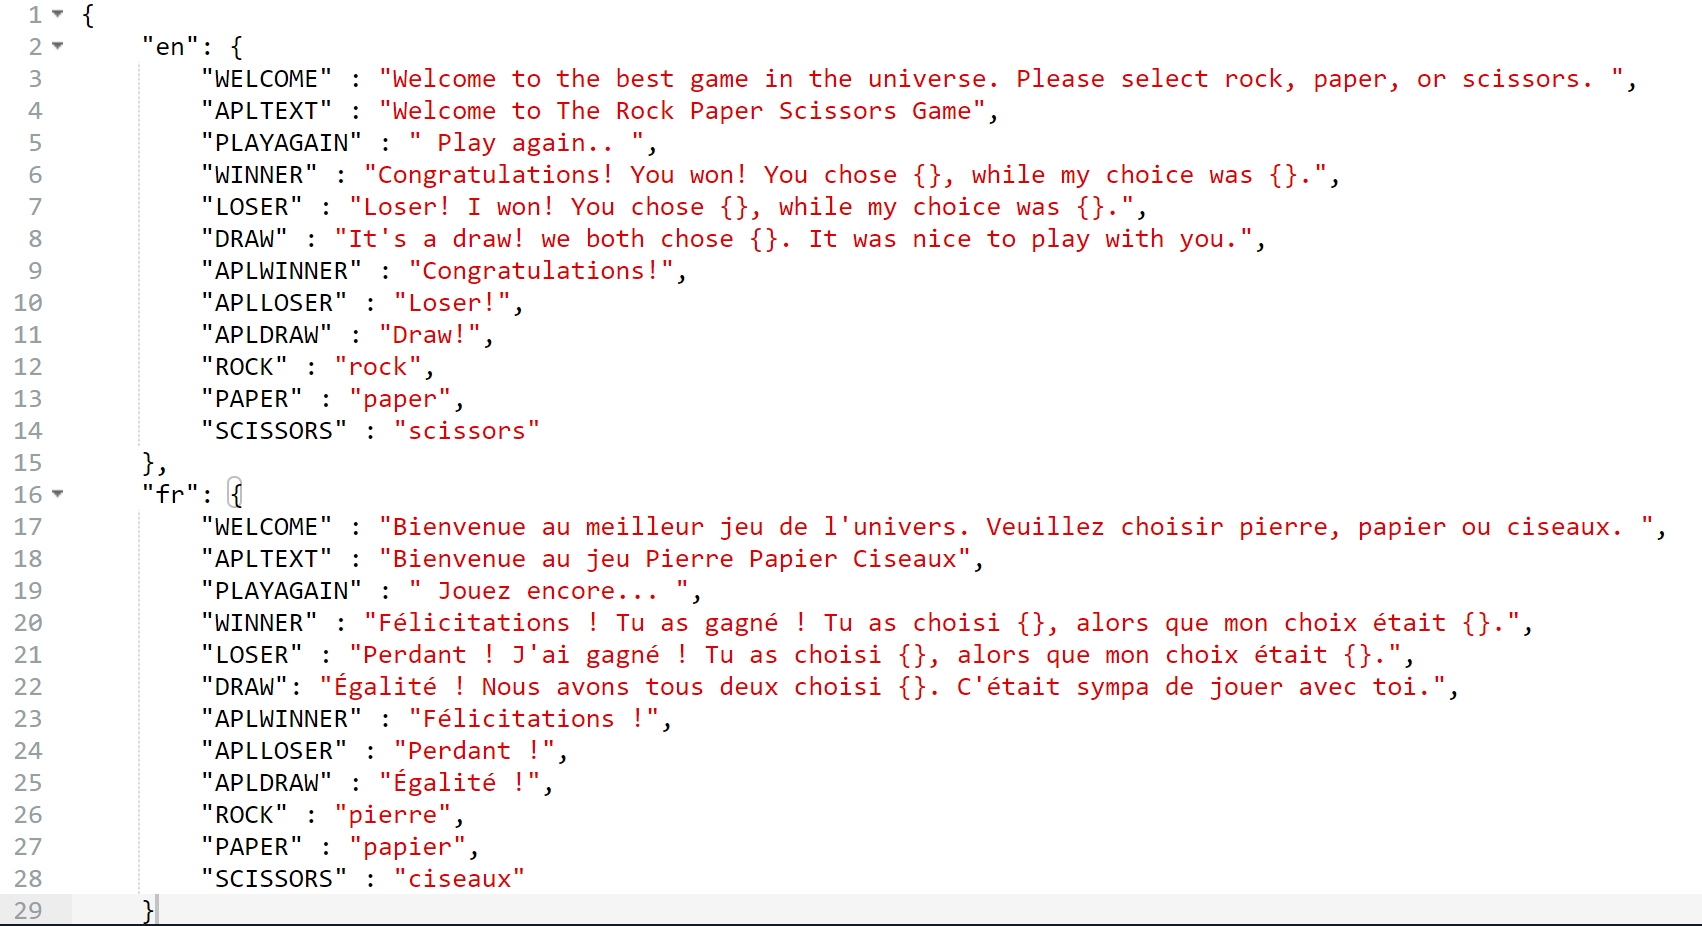
Load data according to the user language
Now that we handled Human language, let’s get into machine language: code.
- Back to our lambda function (“Code” section)
- Import “AbstractRequestInterceptor” as shown [here]
- Create “LocalizationInterceptor” class
- Don’t forget to add the following line at the bottom of the file like we always do: sb.add_global_request_interceptor(LocalizationInterceptor())
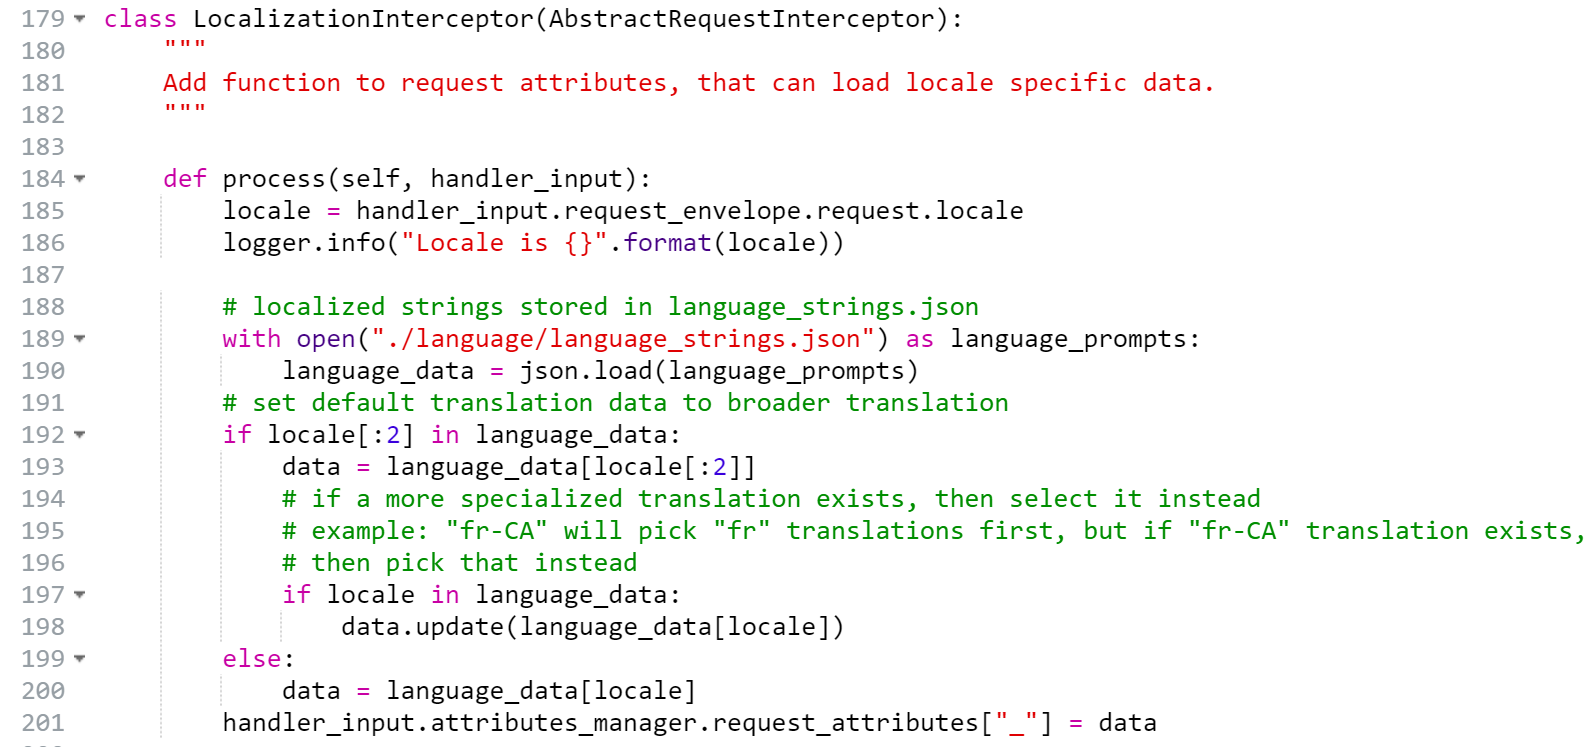
Basically, the code above is responsible for detecting the user language, and updating the answers accordingly (using the “language_strings.json” file)
The updated responses are now stored in the attribute_manager. Thus, to invoke them from any other intent all we need to do is to extract the value of the request_attributes[_] as we can see below.
Update the code to use the proper language
First, here is how the LaunchRequestHandler class became in order to support multiple languages.
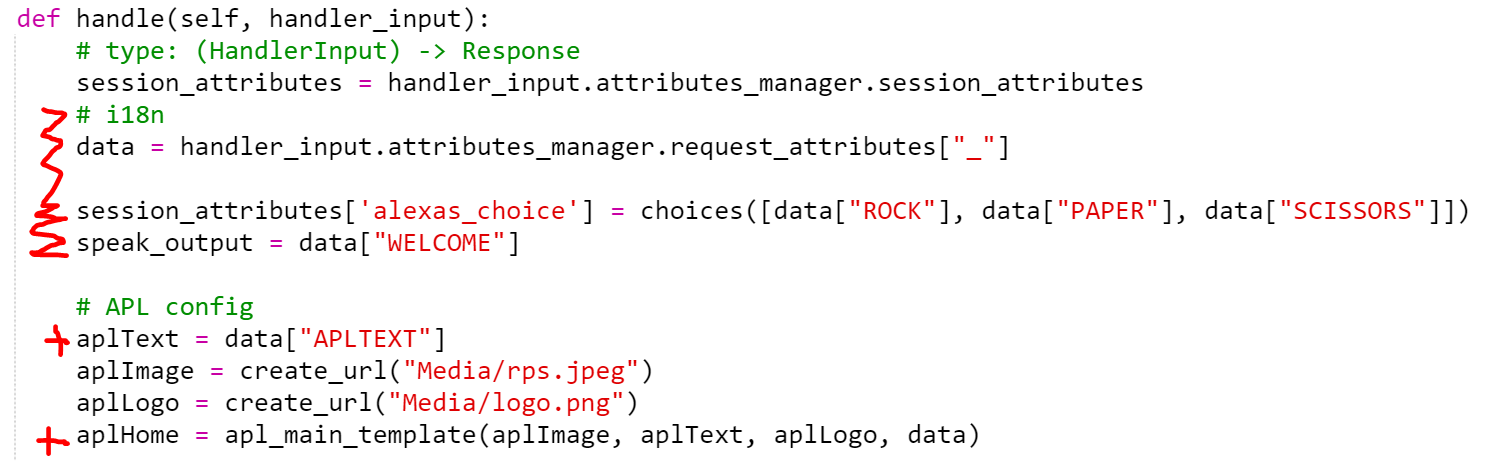
Essentially, we changed three things:
- We extracted the data from the last step and stored it in a data variable
- We are now using this loaded data instead of the hardcoded texts which we were using before
- We also updated the apl_main_template function by changing the hardcoded variables with inputs from the loaded data.
Here is what the aforementioned function looks like now:
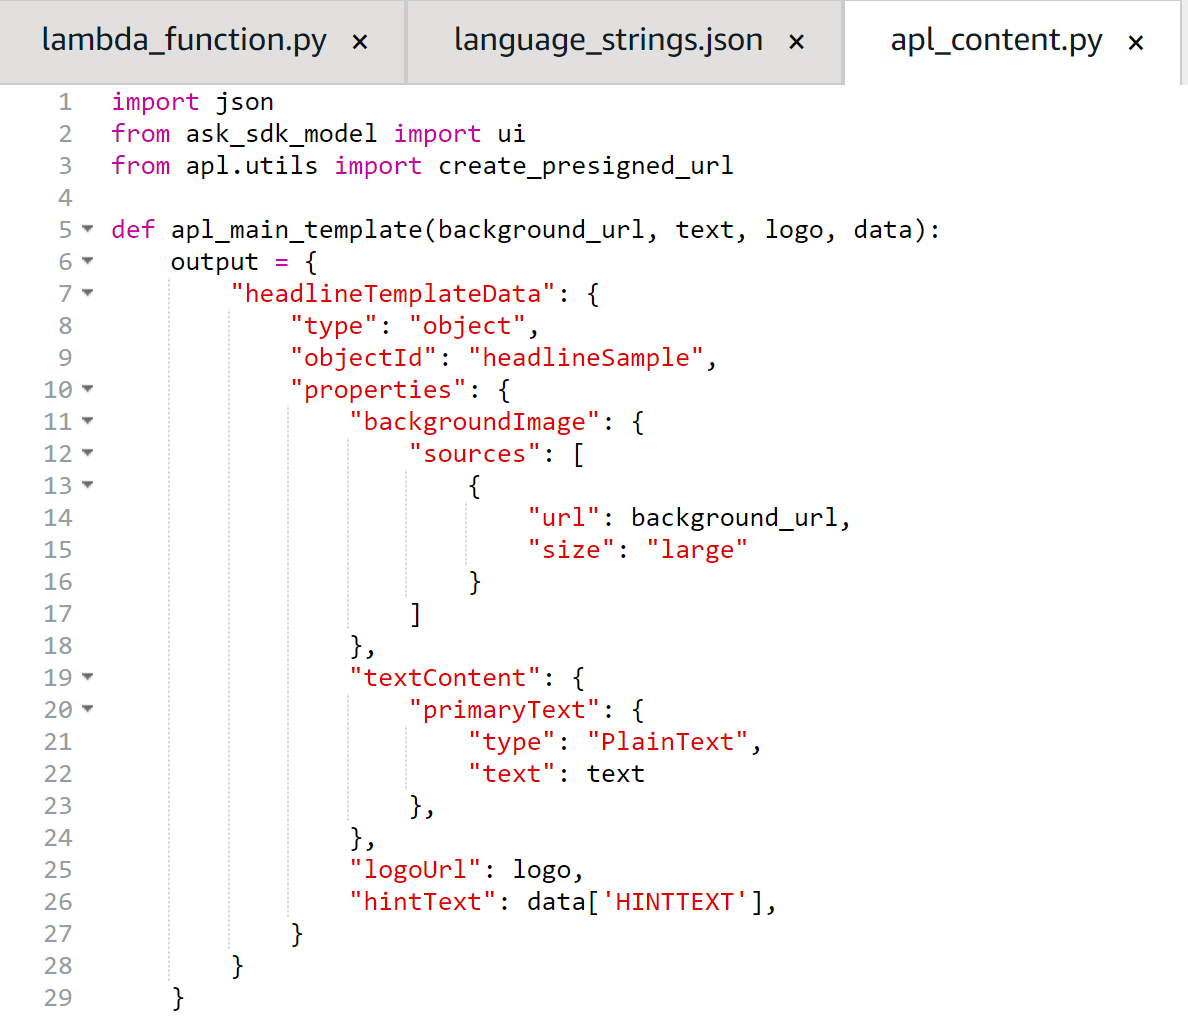
I think you got the idea. From now on, whenever we find a hardcoded text, we have to change it in order to contextualize the replies according to the user language:
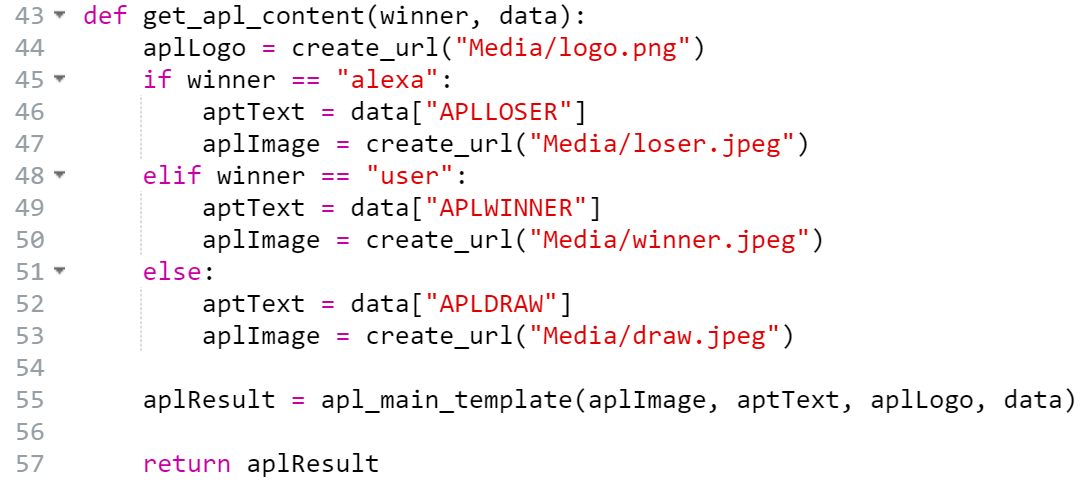
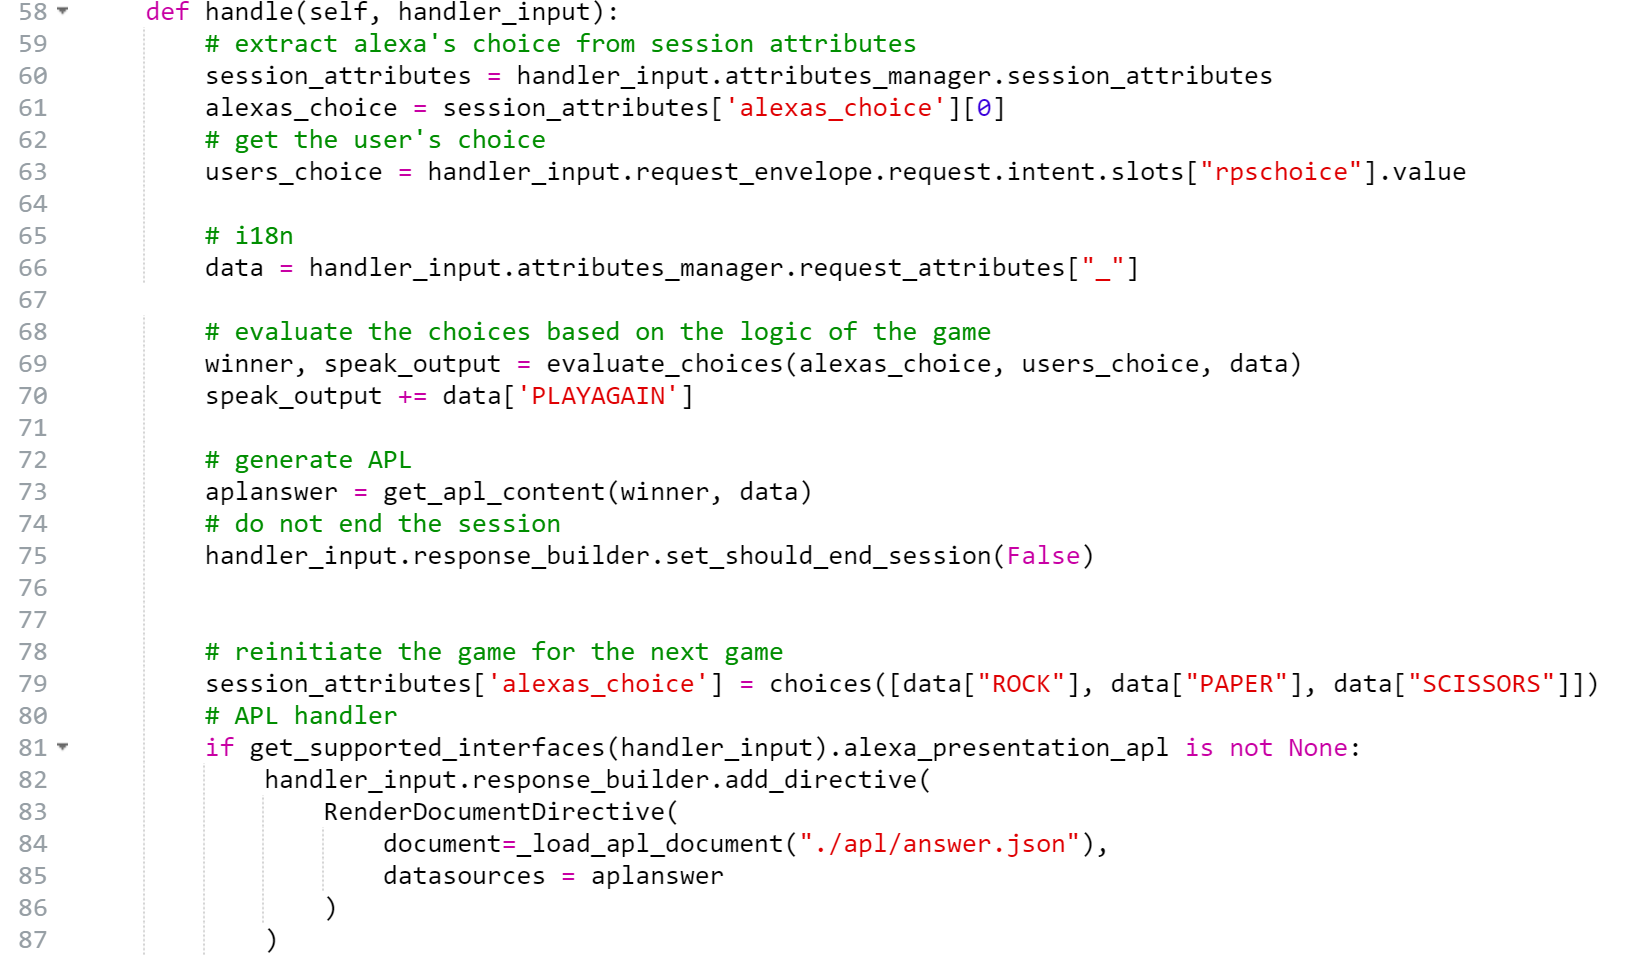
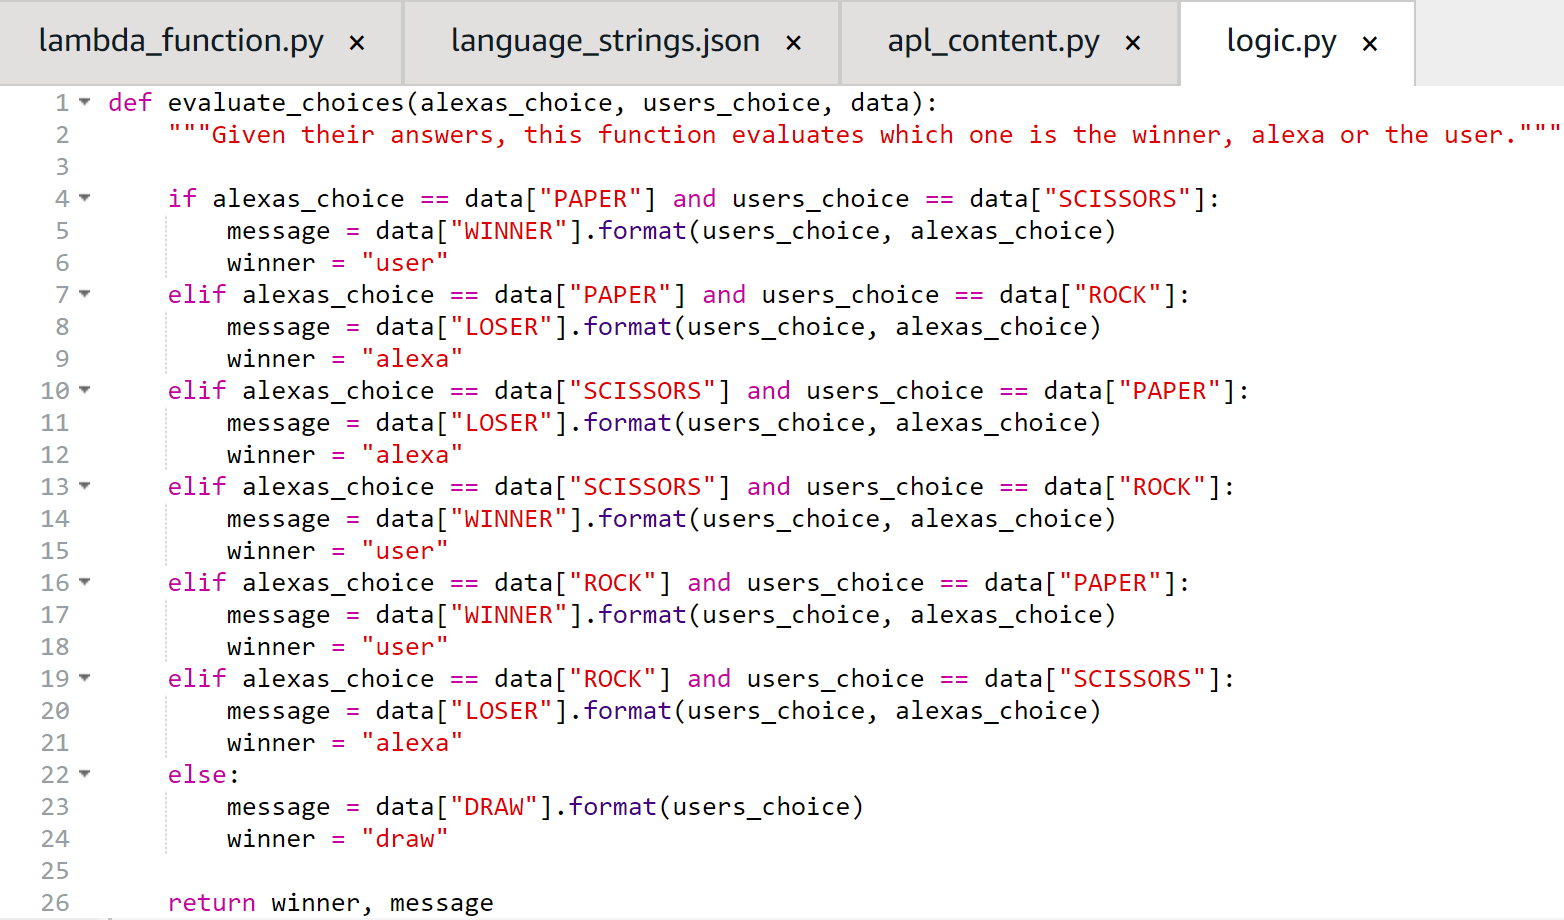
You can see the code for the other intents on Github.
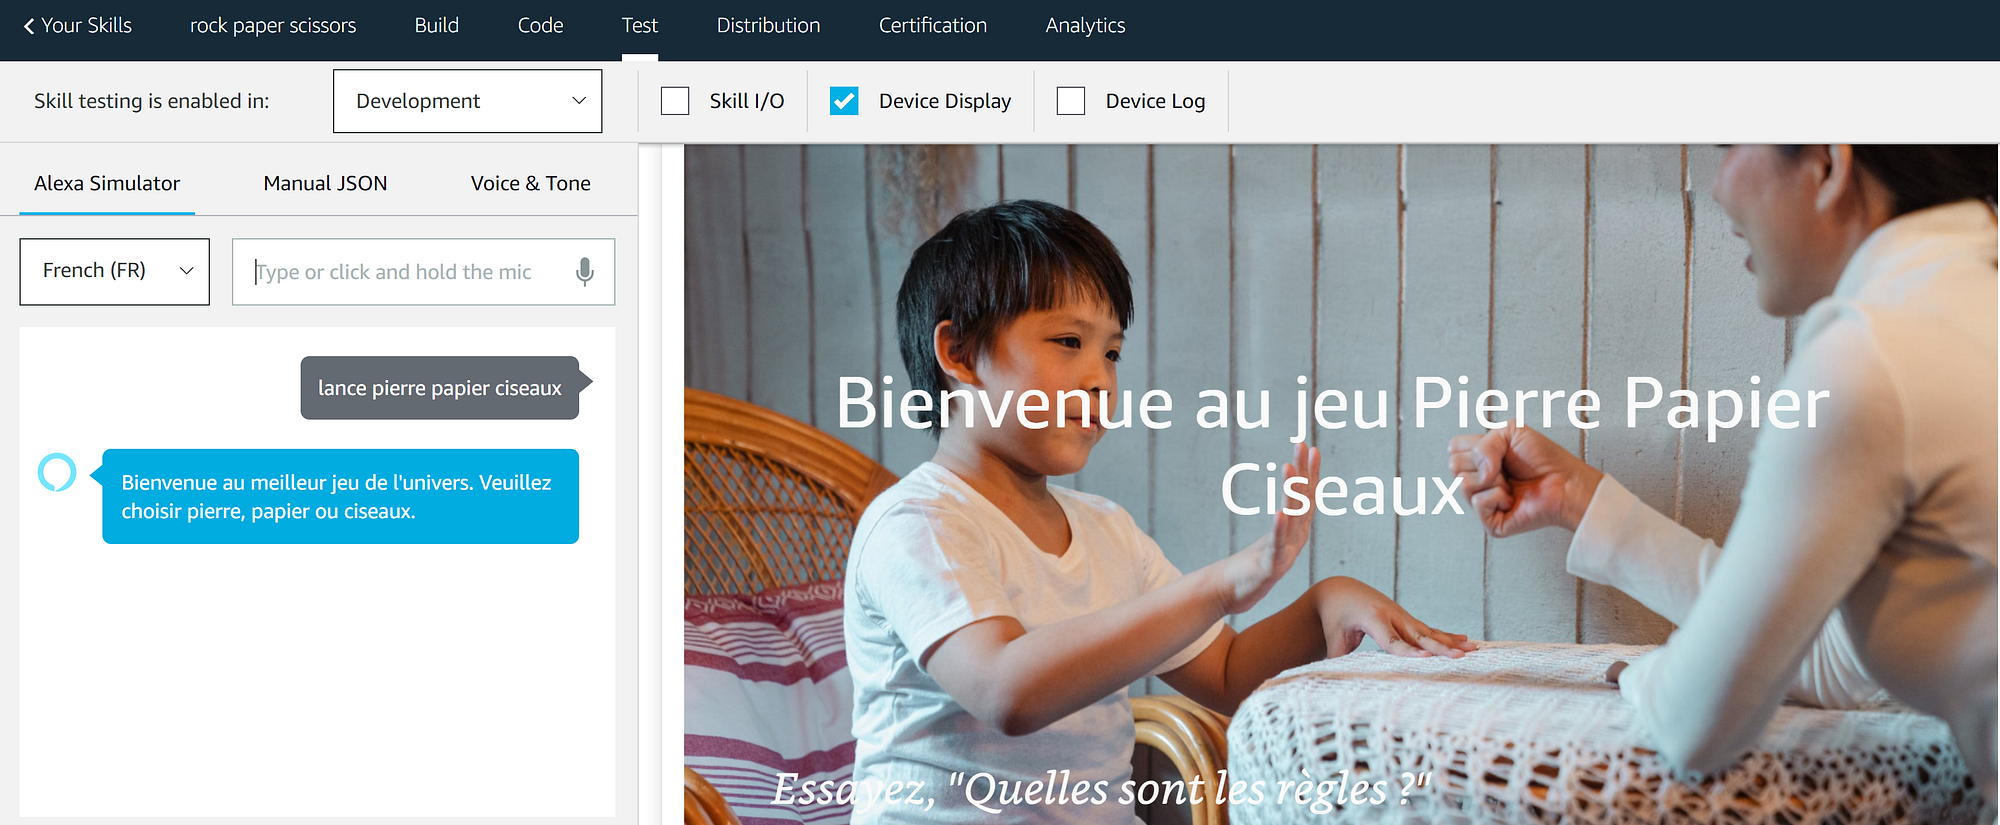
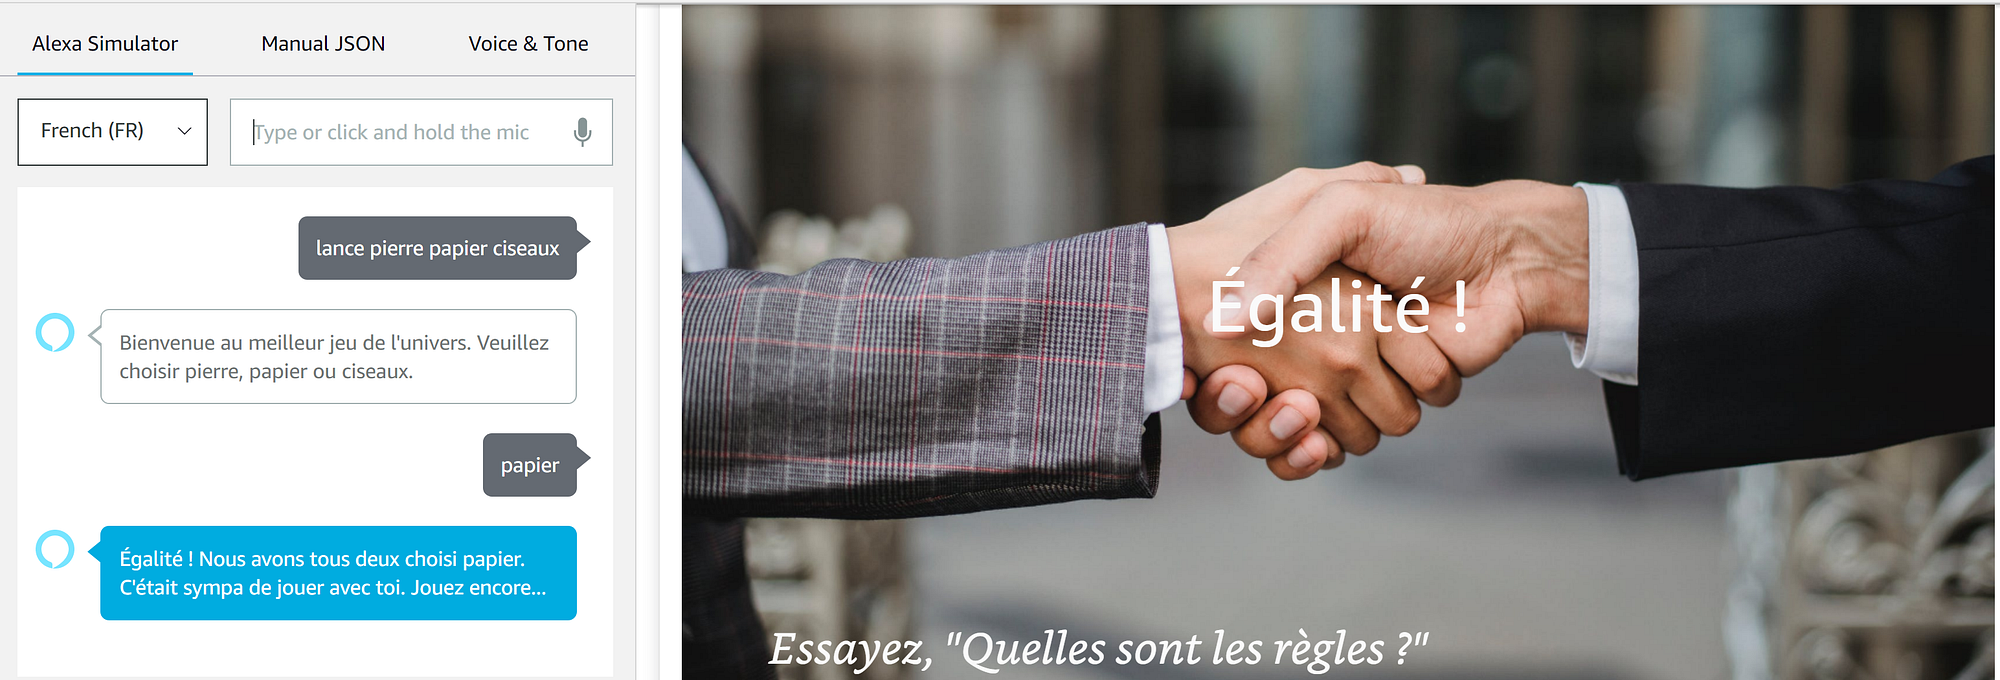
Great job! Now you have all the essential tools to create any Alexa skill you want, for any type of Alexa device. You can also add visuals, and have it speak many languages.
Extra: Distribution & Certification
Despite the skill being up and running on all of your Alexa devices, you might be so proud that you want the world to know about it. In that case, you have to publish it to the Amazon Alexa Skills Store so that anyone can enable it on their devices.
To do so, you’ll need to get your Skill certified by the Amazon Alexa team. The procedure might take a couple of days, but the steps are pretty straightforward:
- Navigate to the “Distribution” section and fill in the (required) boxes.
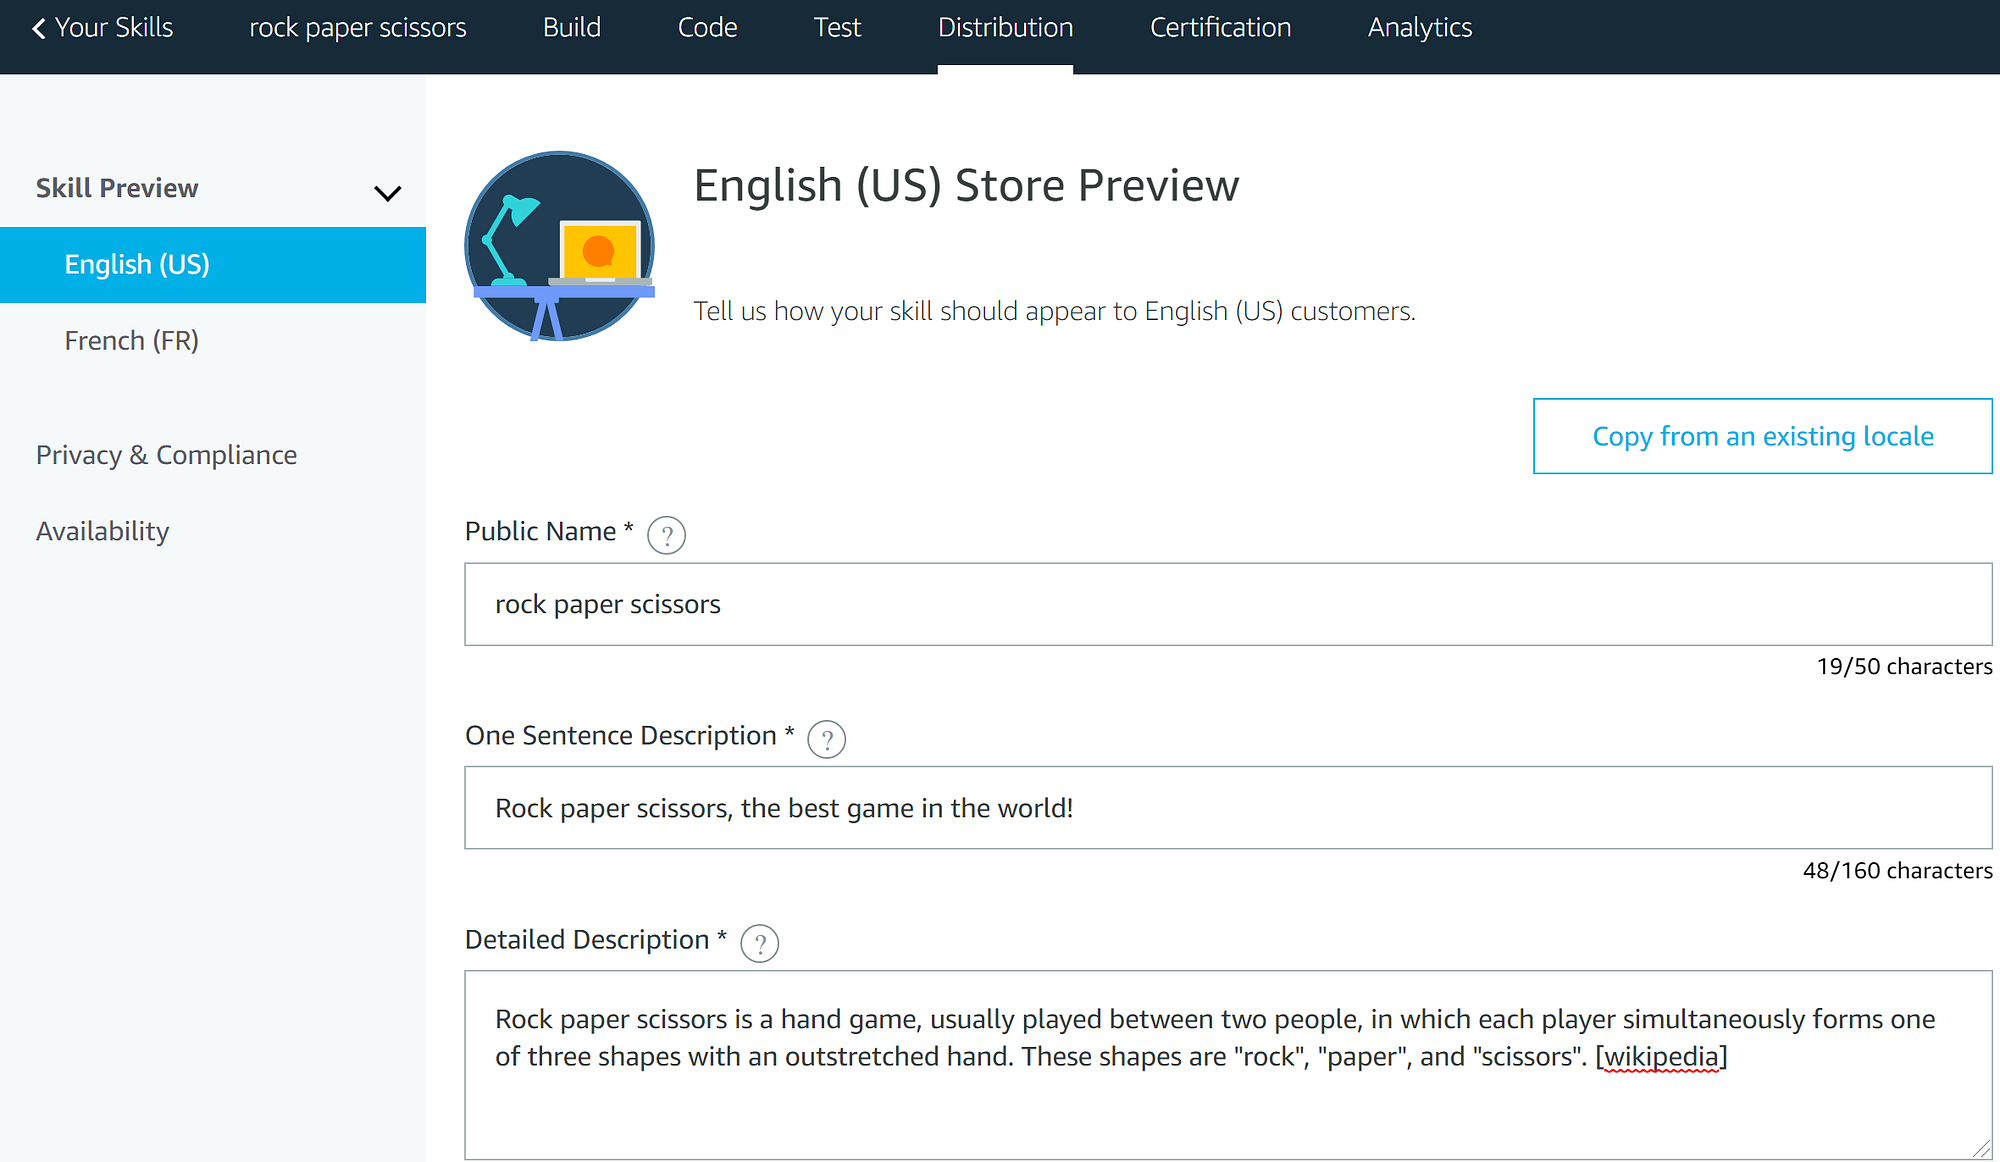
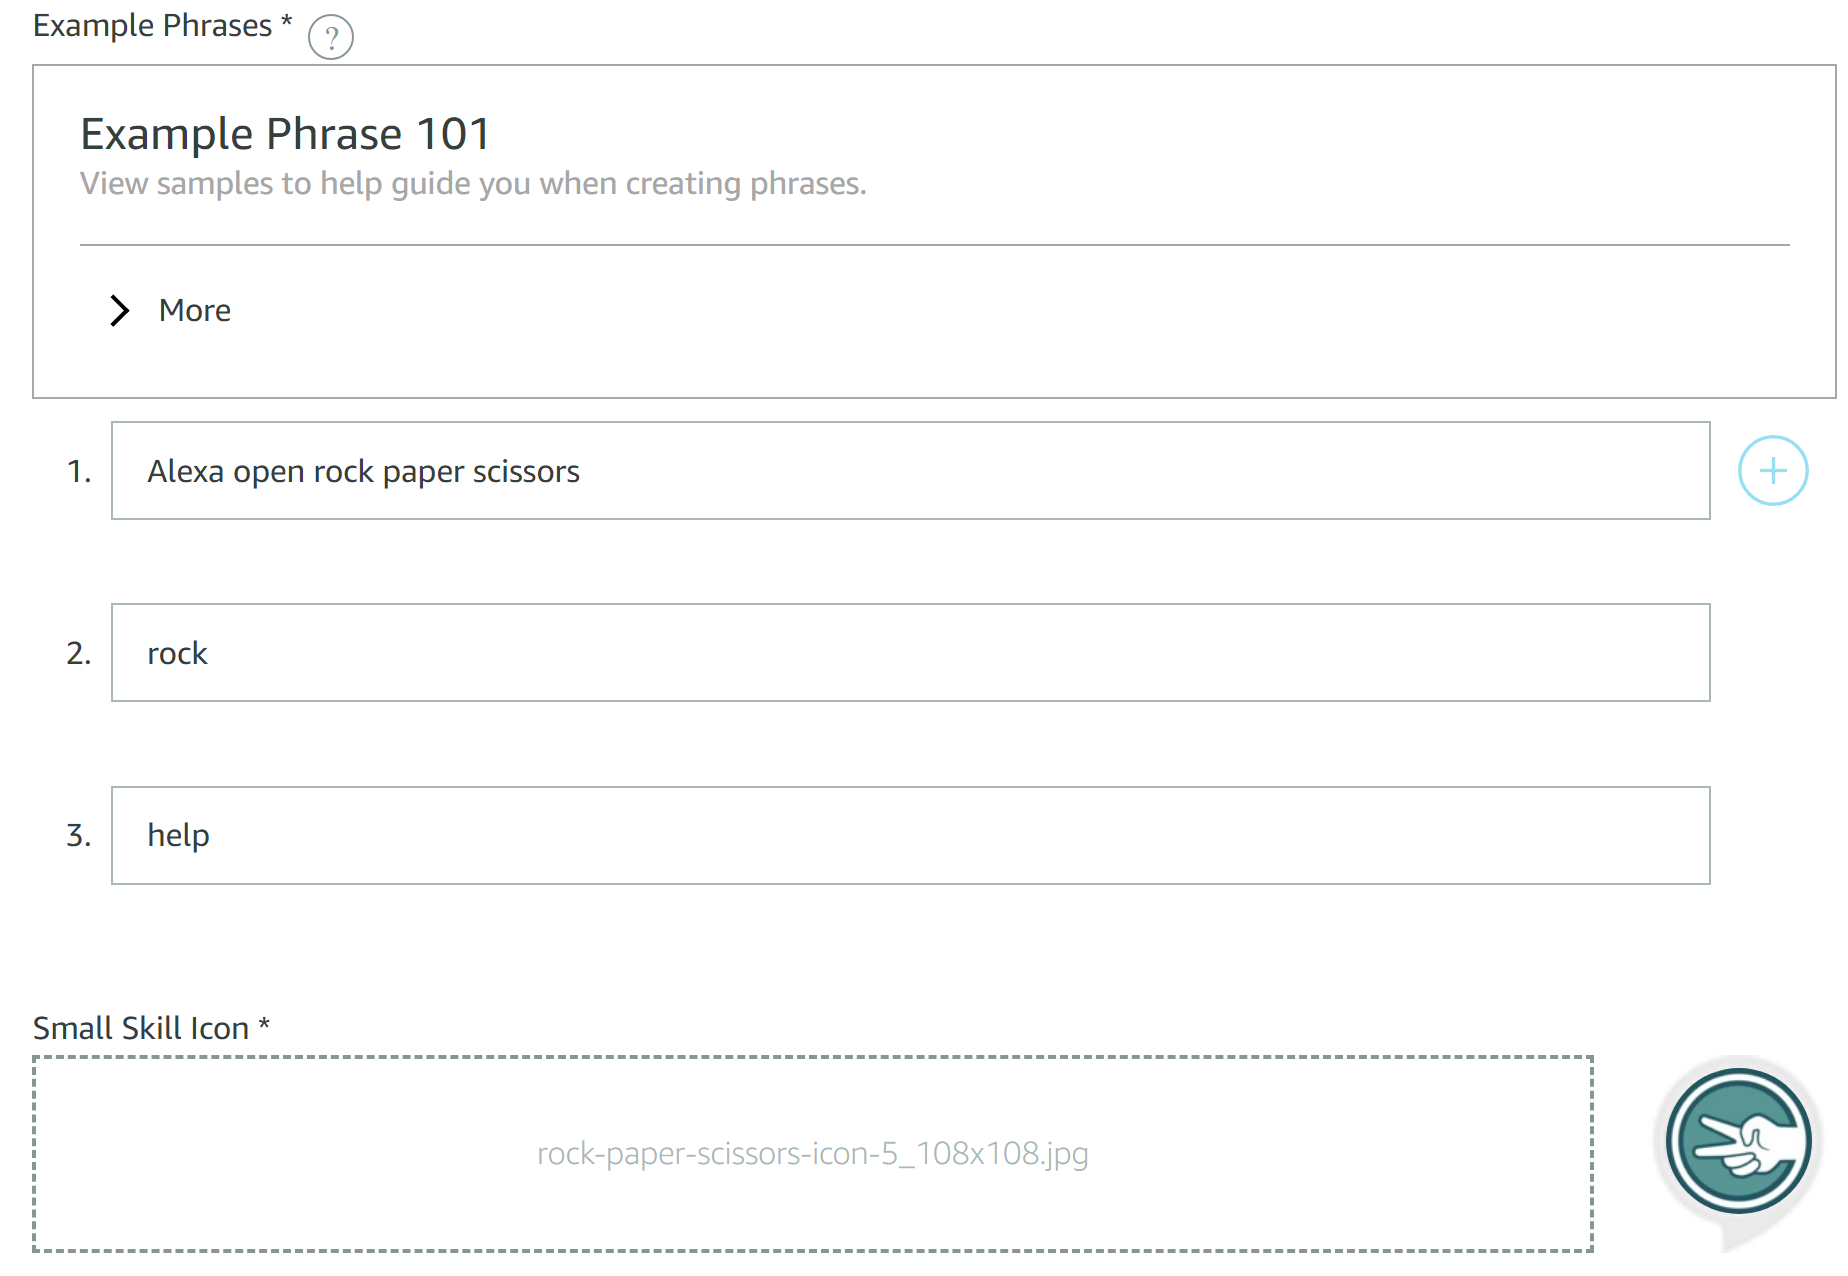
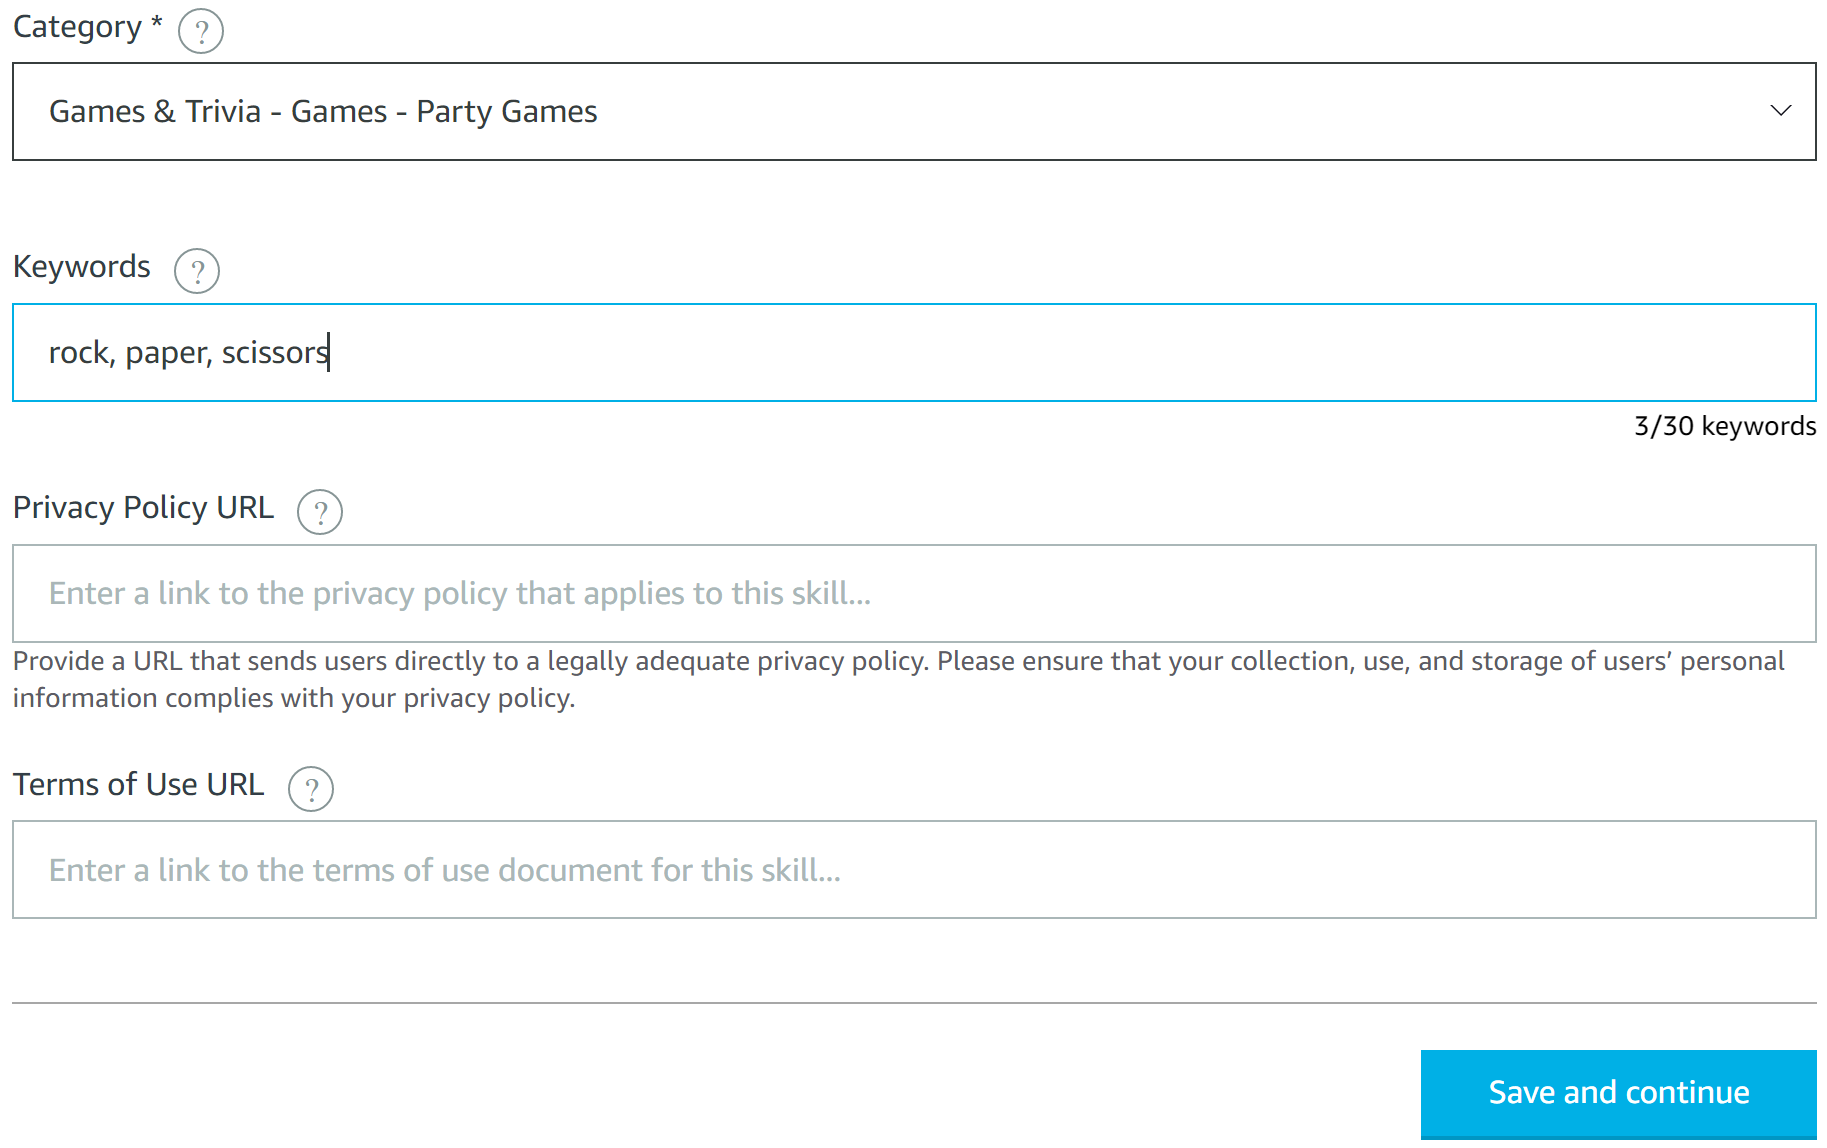
- Save and continue. Then do the same thing for every language that your Skill supports (French in our case)
- Move to the “privacy & compliance” section. You’ll be asked to answer some simple questions about your Skill, something like: Does this skill allow users to make purchases or spend real money? Does this Alexa skill collect users’ personal information? Does this skill contain advertising?
- Save and continue to move to the “Availability” section, where you have to check additional boxes regarding the reach of your Skill.
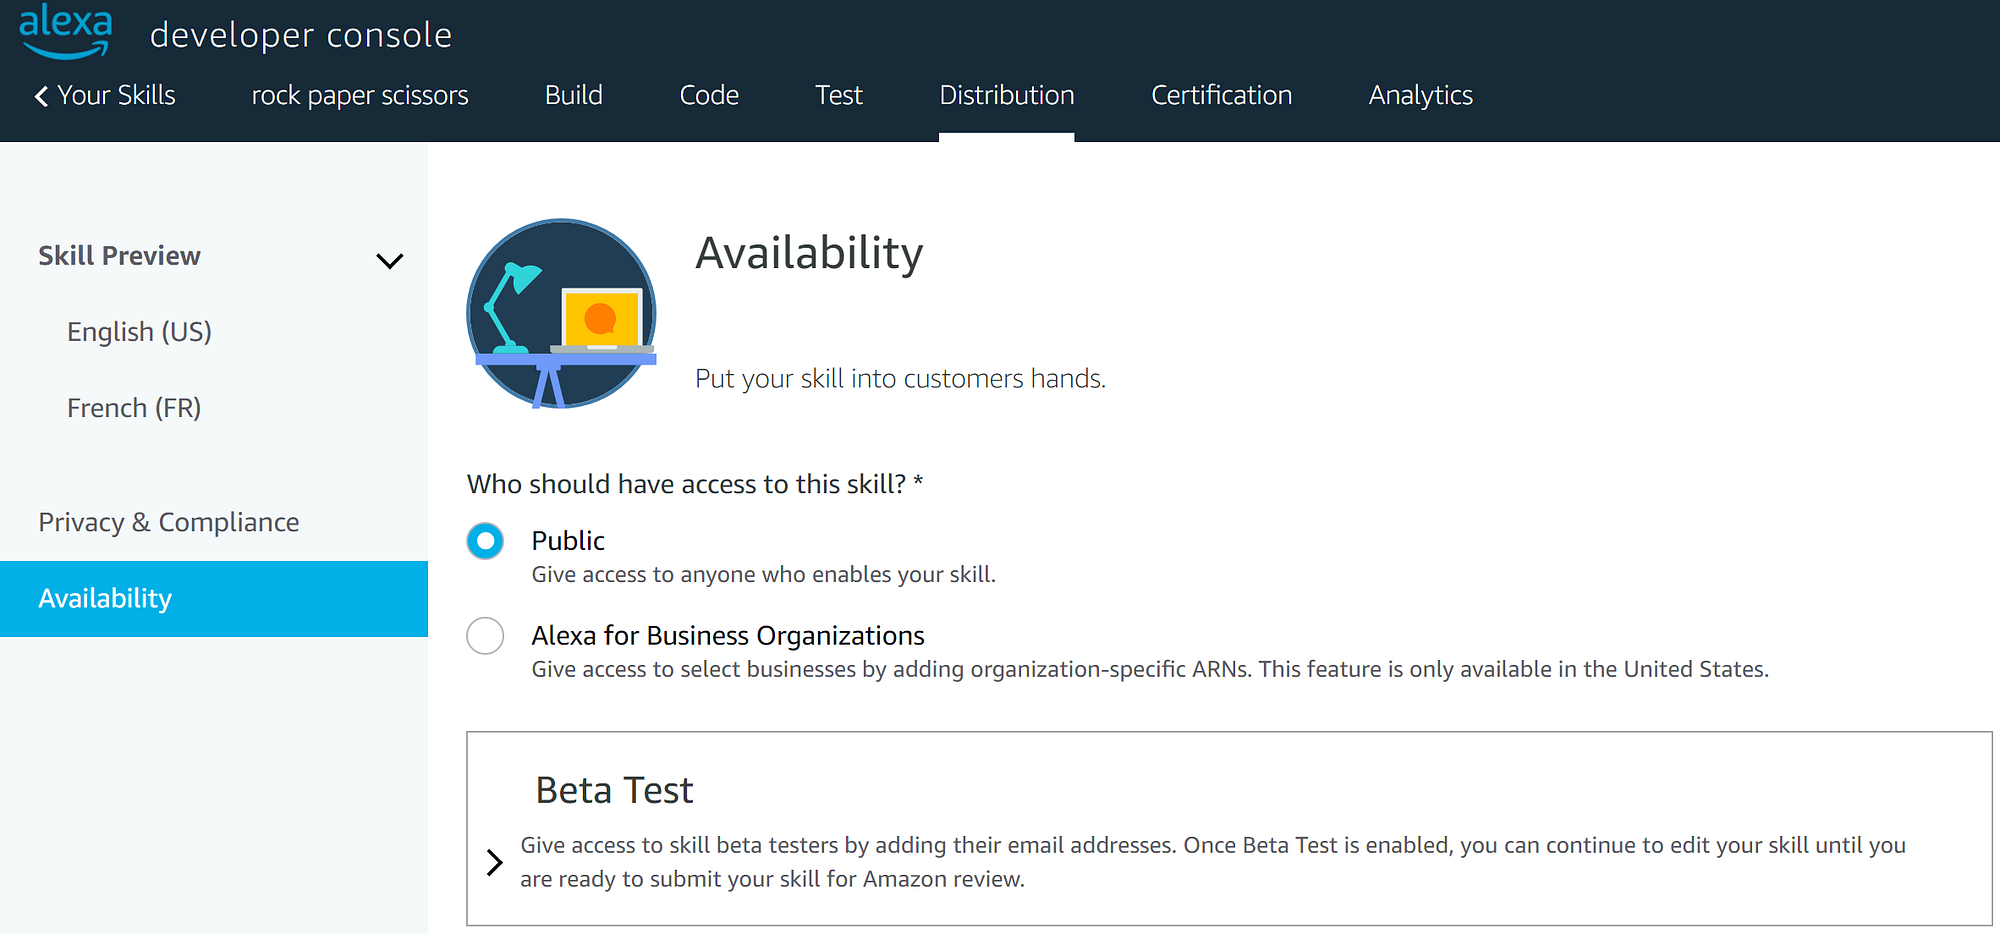
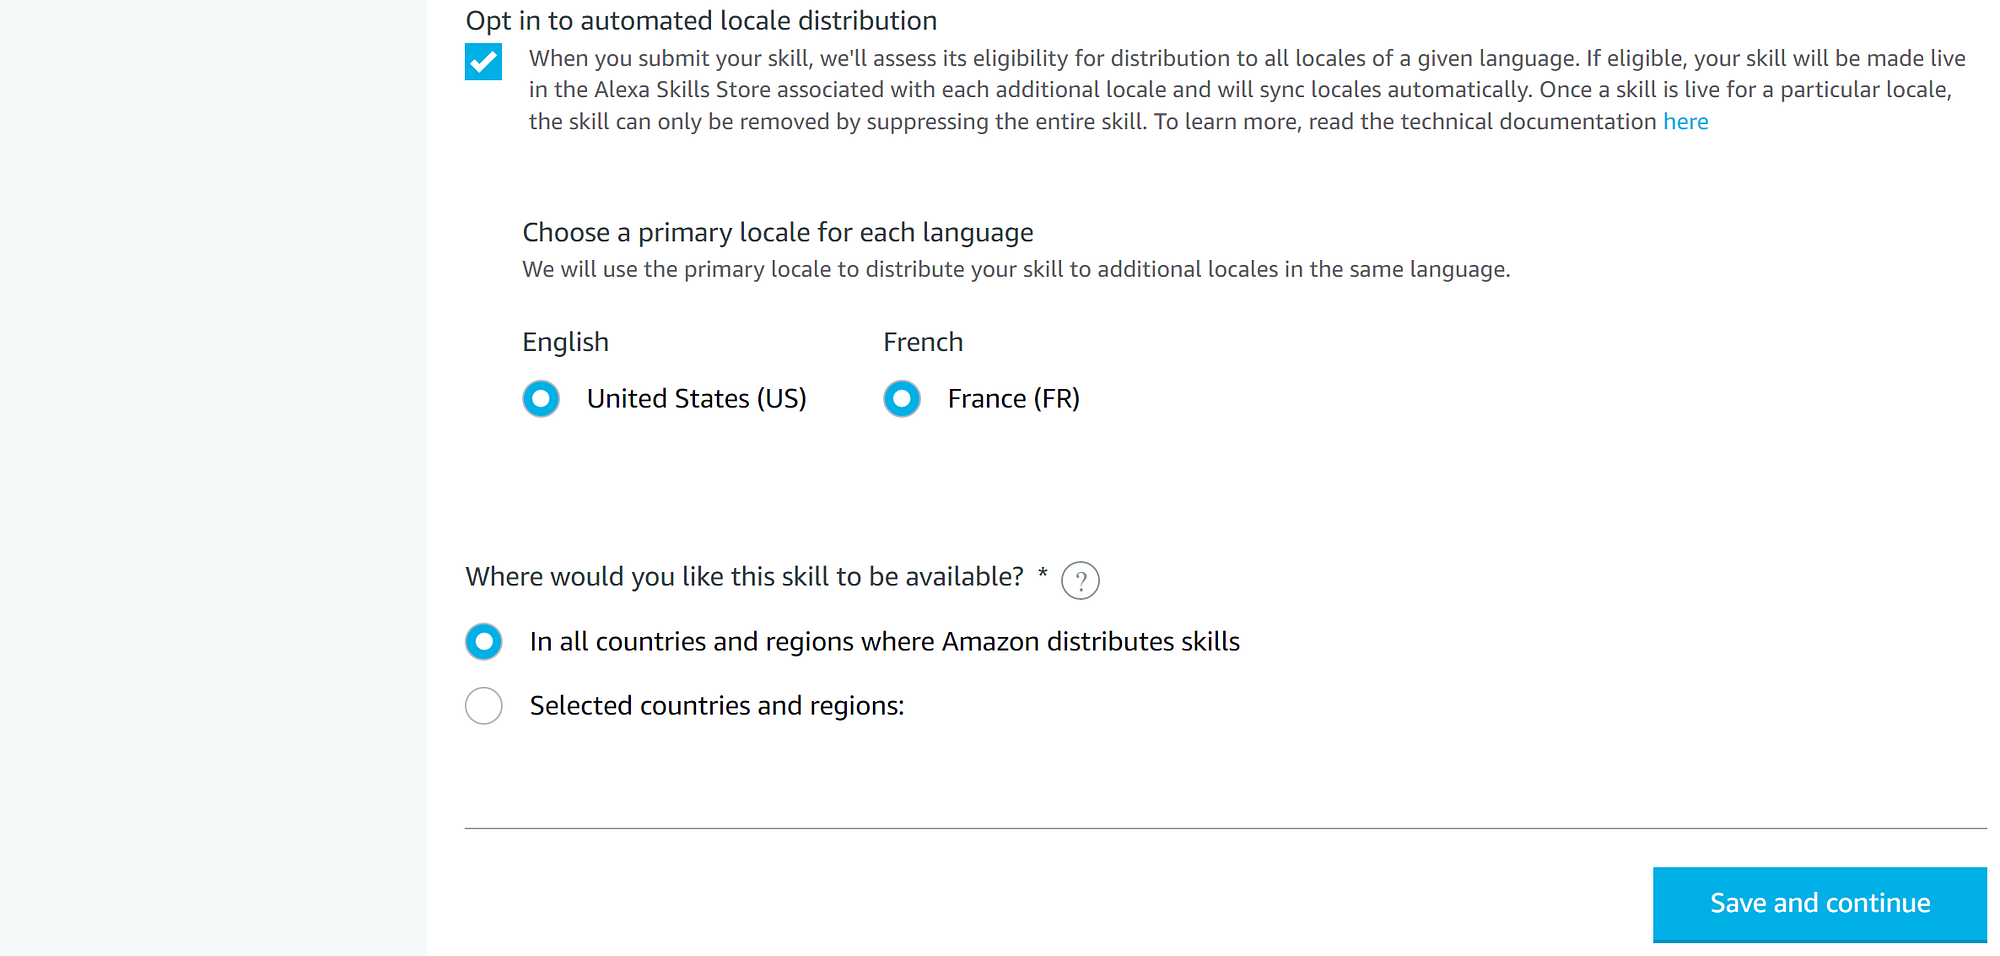
Thankfully, we’re done with the Distribution part. Now, navigate to the Certification section and run the automatic validator.
If everything goes well you’ll get a green sign saying that everything’s good. Otherwise, you’ll be prompted with some issues that you should go back and fix. Anyway, when you’re done with the validation phase, go to the “Submission” section and submit your skill for publication.
The certification process does not usually take more than 3 or 4 days (for me at least), after that the Alexa team will reach out to you with an acceptance email, or a detailed description of what’s needed to be fixed.
What’s next?
As I promised in the pilot of this series about Alexa Skills, the next (and final) post will cover monetization, a.k.a. how to earn money with your published Alexa Skills.

More content at PlainEnglish.io. Sign up for our free weekly newsletter. Follow us on Twitter, LinkedIn, YouTube, and Discord.
Alexa Skills with Python: Multilingual Support