

A beginner’s guide for creating Alexa Skills using Python.

Hello friend!
This is the second post in a series of (at least) 5 tutorials where I share with you everything you should know to turn any idea you have in mind into an Alexa Skill.
As a reminder, in the previous post, we agreed to develop a Rock Paper Scissors skill, and by “agreed” I mean I was the one who chose it 😈. Besides, I explained the general concept behind Alexa skills development. All in all, you should just remember that developing a skill means two things:
- Helping the Alexa service to detect the intention of the user;
- Figuring out what to do after knowing this intention (backend logic).
⚠️ Note that for better presentation and visibility, the code snippets provided below are in the form of screenshots. However, the same codes are available in my GitHub profile [here], if you want to copy/paste something.
Now let’s get started!
Create the Skill
The first thing to do is to create an Amazon developer account (it’s free 😇). To do so, go to the Amazon developer console, click on “Create Your Amazon account”, then fill in the form to complete the process.
You should bookmark this address https://developer.amazon.com/alexa/console/ask since it’s where you will be going every time you need to work on an Alexa project.
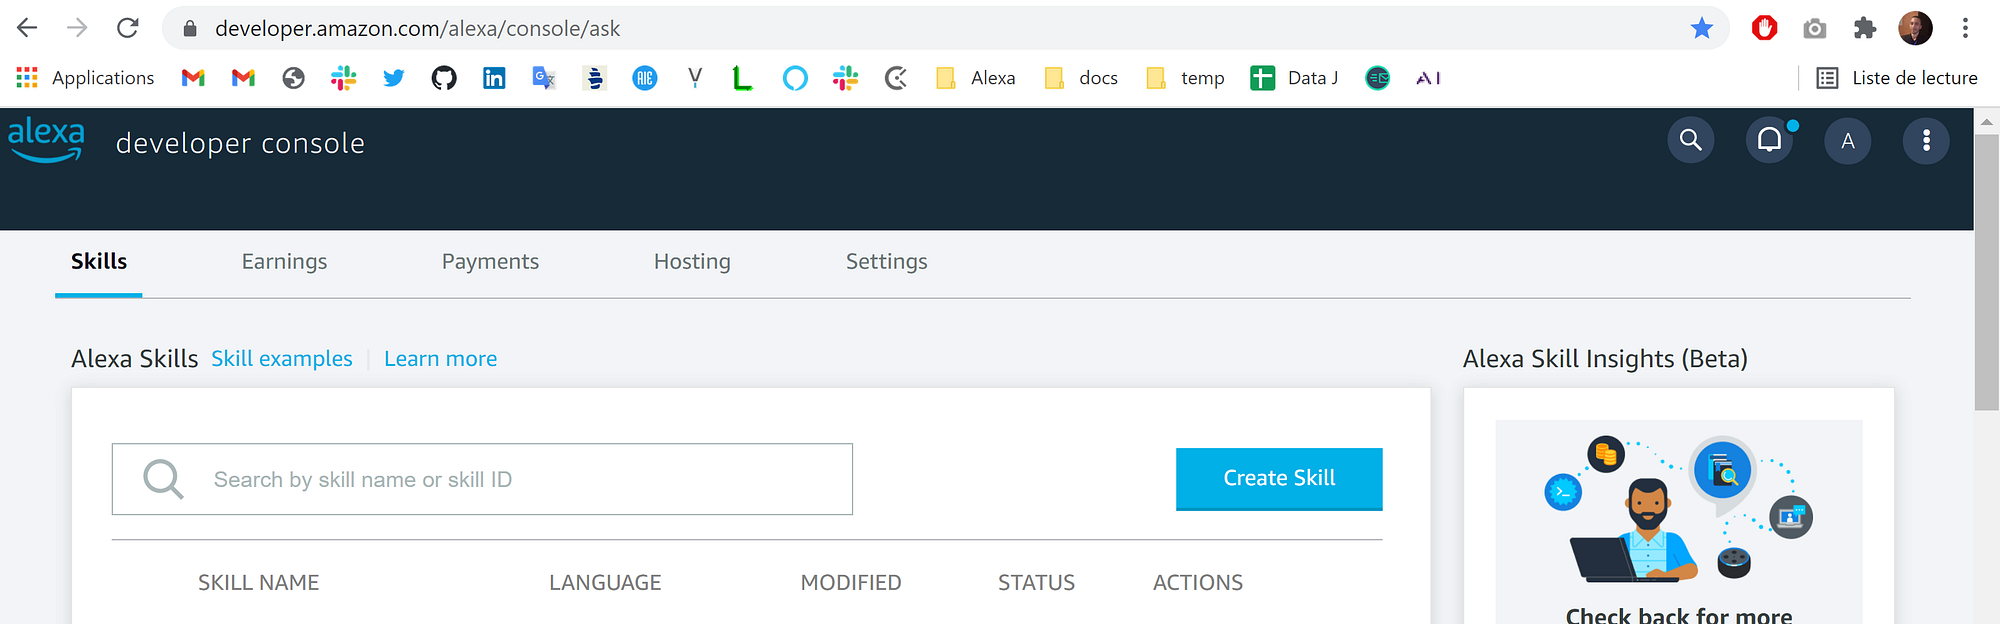
Now that you’re connected, click on “Create skill” as in the following image.
- Enter the name of the skill, in our case: rock paper scissors
- Scroll down, under the “1. Choose a model to add to your skill” section, select “custom”.
- Under “2. Choose a method to host your skill’s backend resources” select “Alexa-hosted (Python)”.
- Click on “ create skill”.
- Select “Start from scratch” -> “continue with template”
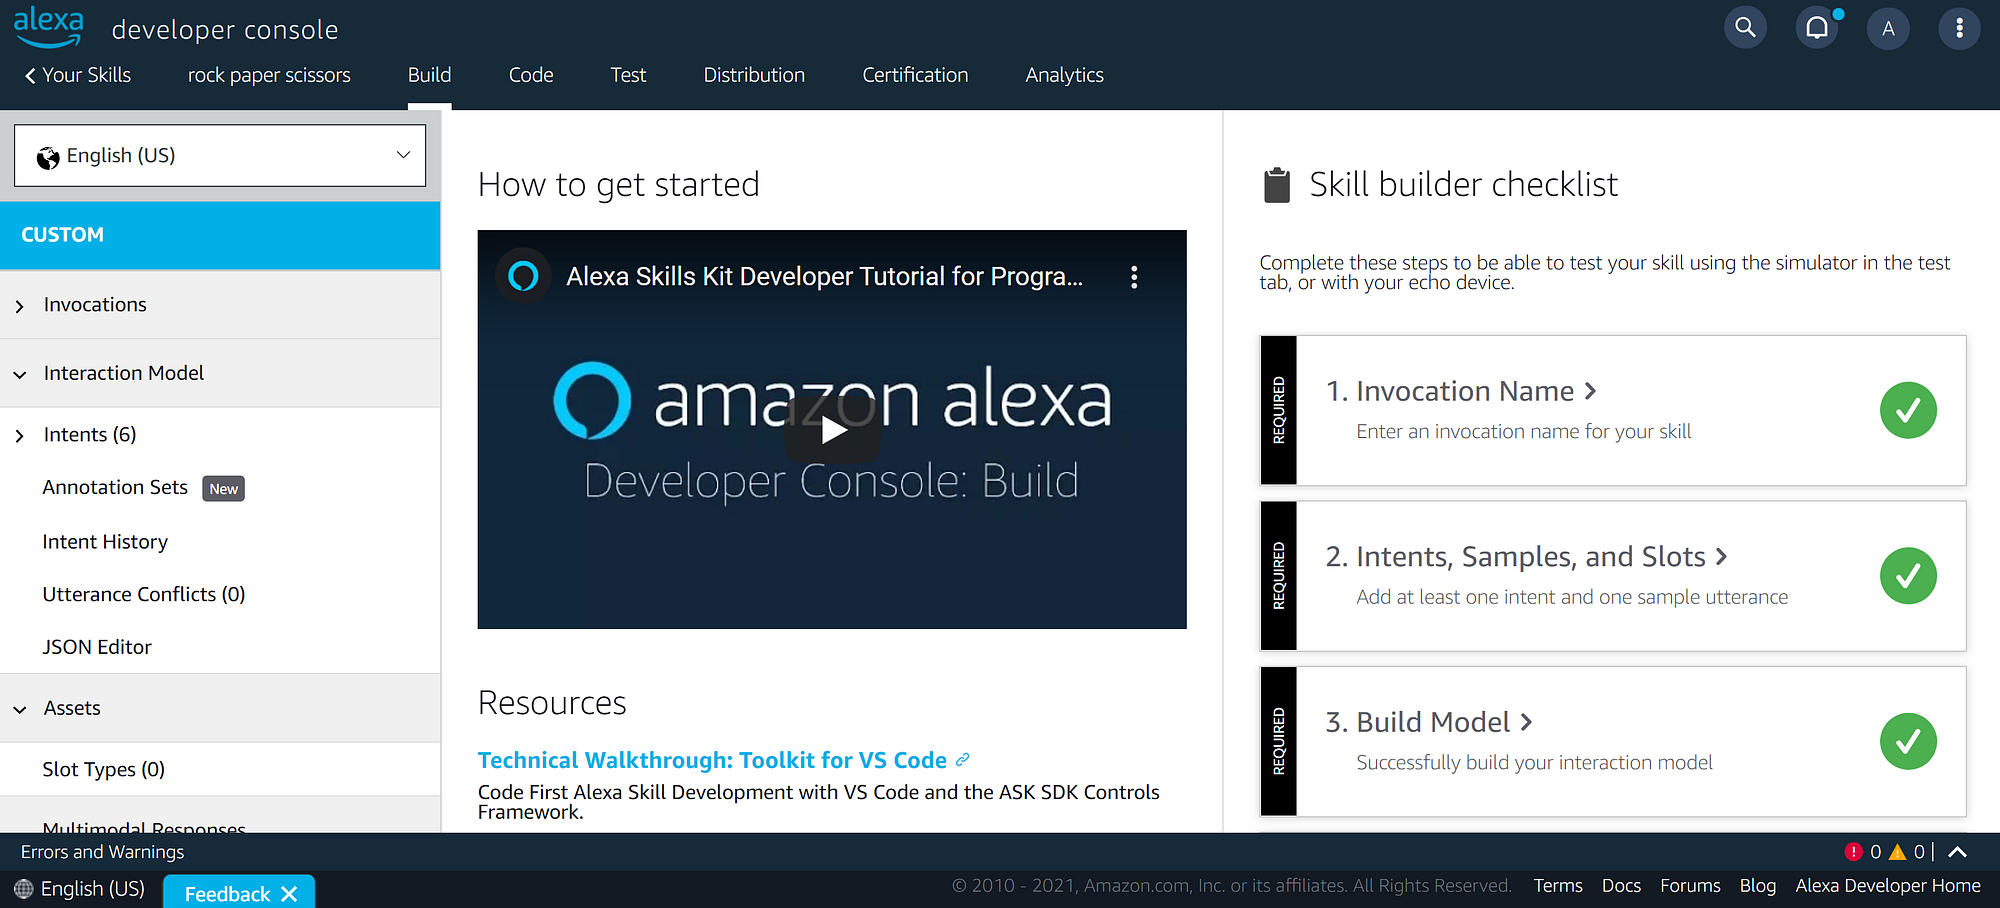
The creation phase may take about a minute or so. Then you’ll get a dashboard like this:
Hello world!
As we’ve discussed in the previous post, when a user speaks to an Alexa device, this latter streams the input to the Alexa Cloud, where some Deep Learning magic is performed to determine what is the intent of the user. Then, as developers, we need to figure out what to do with these intents.
It turns out that before dealing with any intent, the first interaction a user has with a skill triggers a special request named LaunchRequest. So let’s start by handling this one first. To do so, go to the top menu and select “Code”.
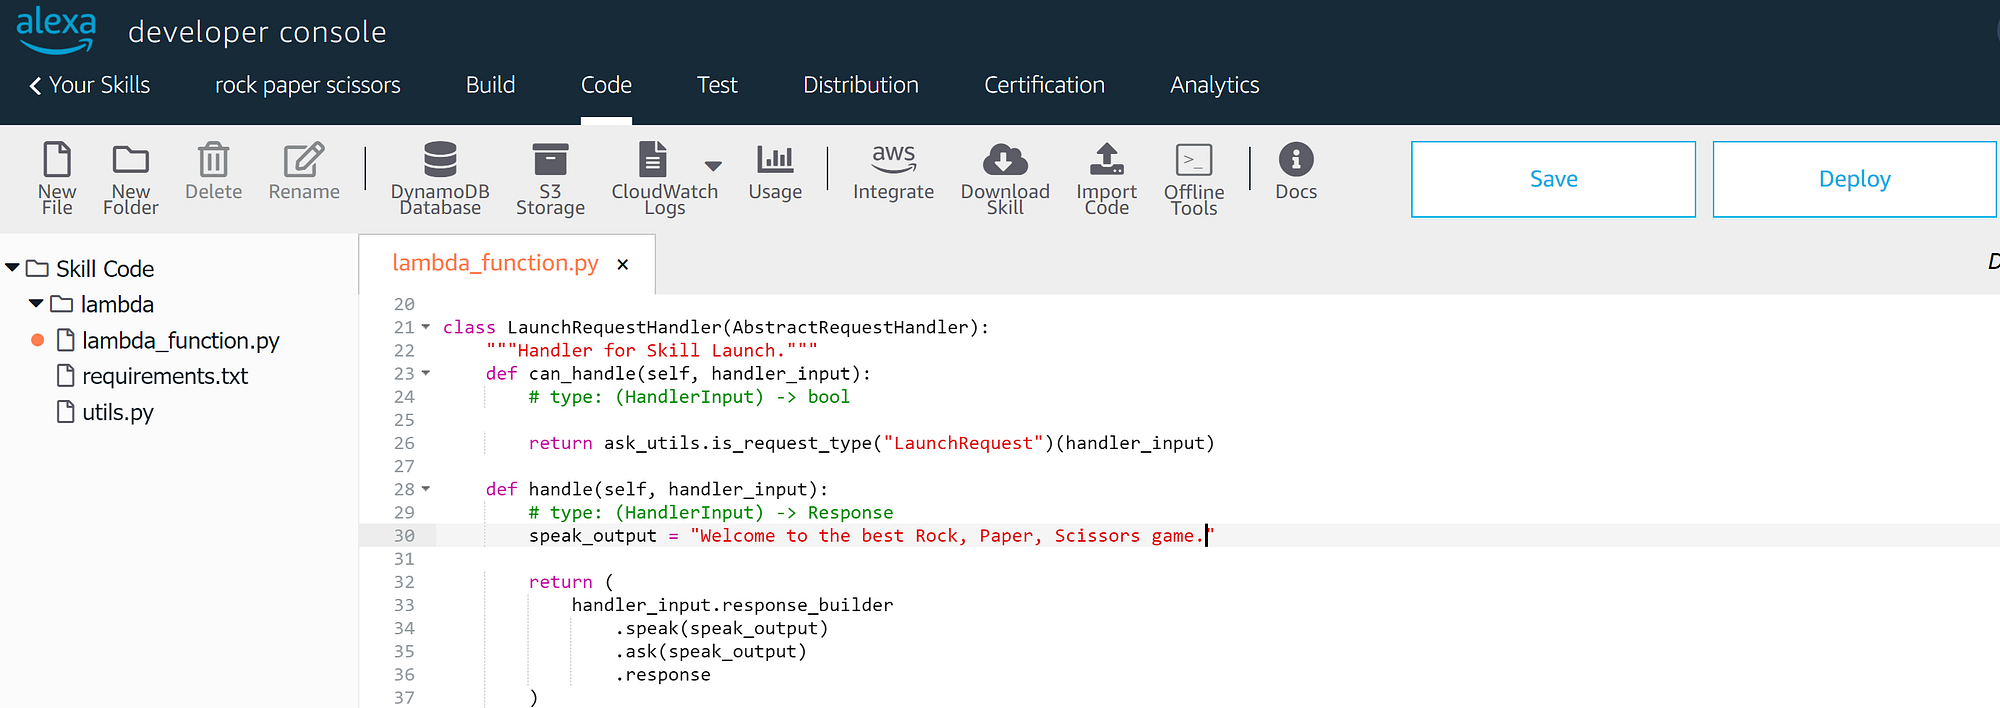
In the “lambda_funtion.py” file, go to the “LaunchRequestHandler class”, and edit the “speak_output” message to “Welcome to the best Rock, Paper, Scissors game”. Then click “Deploy”. (Previous image)
Testing the skill
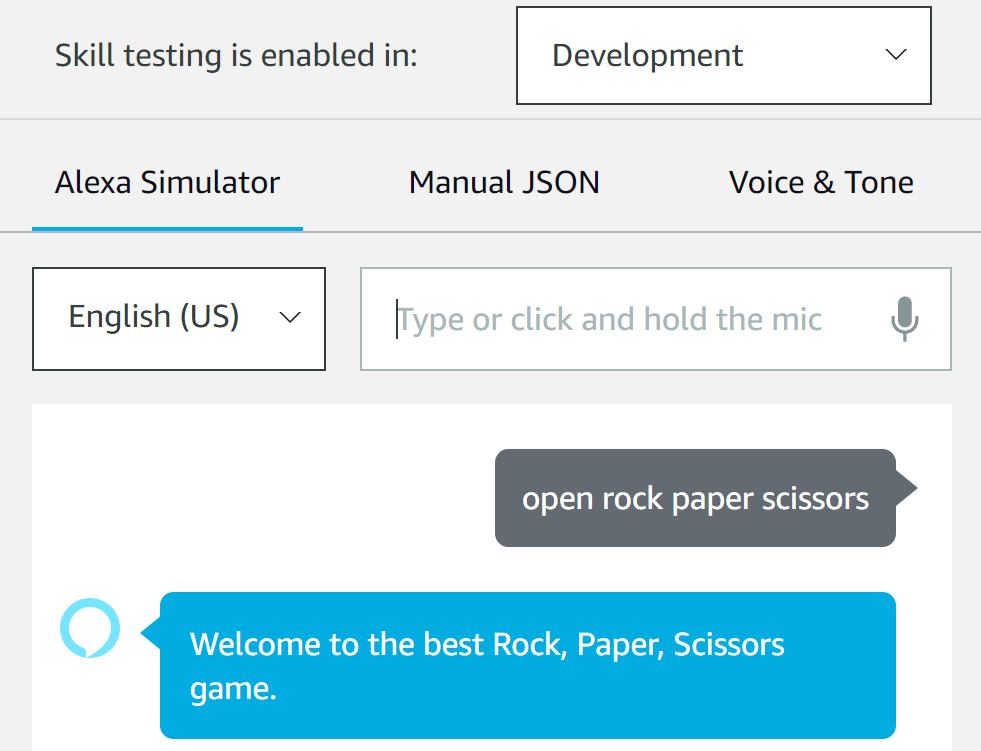
To make our life even easier, Alexa Skills Kit provides us with a Testing interface. This means you can test your skill without actually owning an Alexa device. The interaction could be done through text or voice (by holding the mic icon in the following figure).
So, after the deployment phase is completed, navigate to the “Test” section (top menu), and enable the test mode by changing “Off” into “Development”.
Invoke the skill by saying/typing “open rock paper scissors”:
Bingo!
Try to personalize the speak_ output variable to get more welcoming answers 😎.
⚠️ If you own an Alexa device that is connected to the same Amazon account you used to develop the skill, this latter will be available on your device. Just call it by saying: “Alexa, open rock paper scissors”.
The Build (or Front-end)
Great. You just created your Hello world skill. Now, let’s build some real stuff, because as much as you appreciate your skill, deep down you do know that you haven’t done much, don’t you?
But yeah, it is the first step indeed, so I’m not going to be hard on you, congratulations 🎉🎉

In this section, we’ll create a new intent, which will be triggered by the users when they want to play the RPS game. Imagine you’re playing RPS, what would the game experience look like? If you think about it, the first thing to do is to adapt the LaunchRequest to ask for the user’s input.
So, go back to your code, and modify the speak_output to something like:

Now, we need an intent that can receive an answer to this question.
Slots
Let’s pause for a moment and think about what would the users’ answers be like. If we’re playing a voice-only version of RPS and it’s your turn, how would you play?
If you ask me, I would simply say rock, paper, or scissors. Or I would go for something like:
- Select rock
- I choose paper
- I’m going for scissors
Although there are countless ways to invoke this intent (in other words, to express one’s choice), we can notice that each of them comes with a container (or slot) carrying one of the three choices (rock, paper, or scissors).
Fortunately, ASK allows us to cluster our three choices by creating a slot that serves as a container of the user's choices.
Now, navigate back to the Build interface. In the right-hand menu, click on “Slot Types”, “Add Slot Type”, give it a name, then hit “Next”.
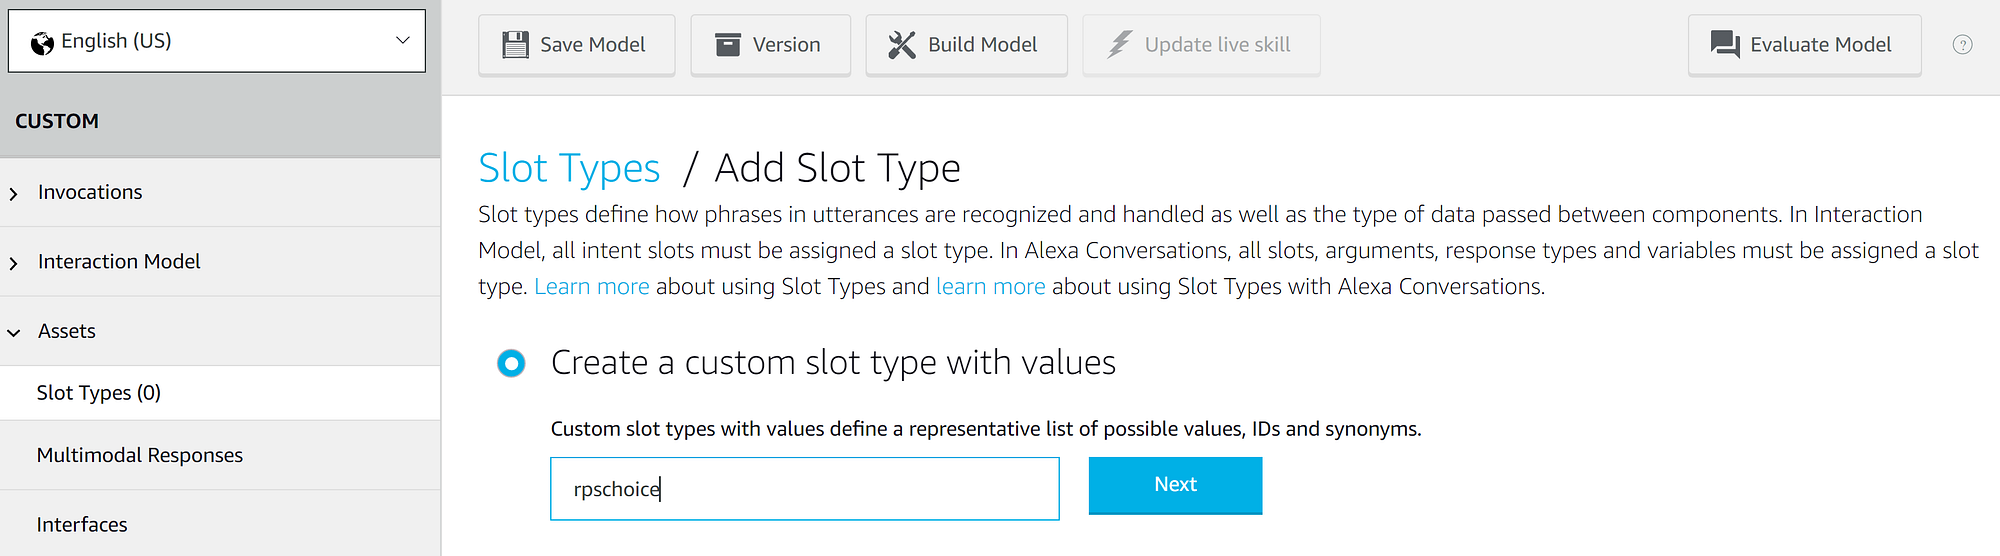
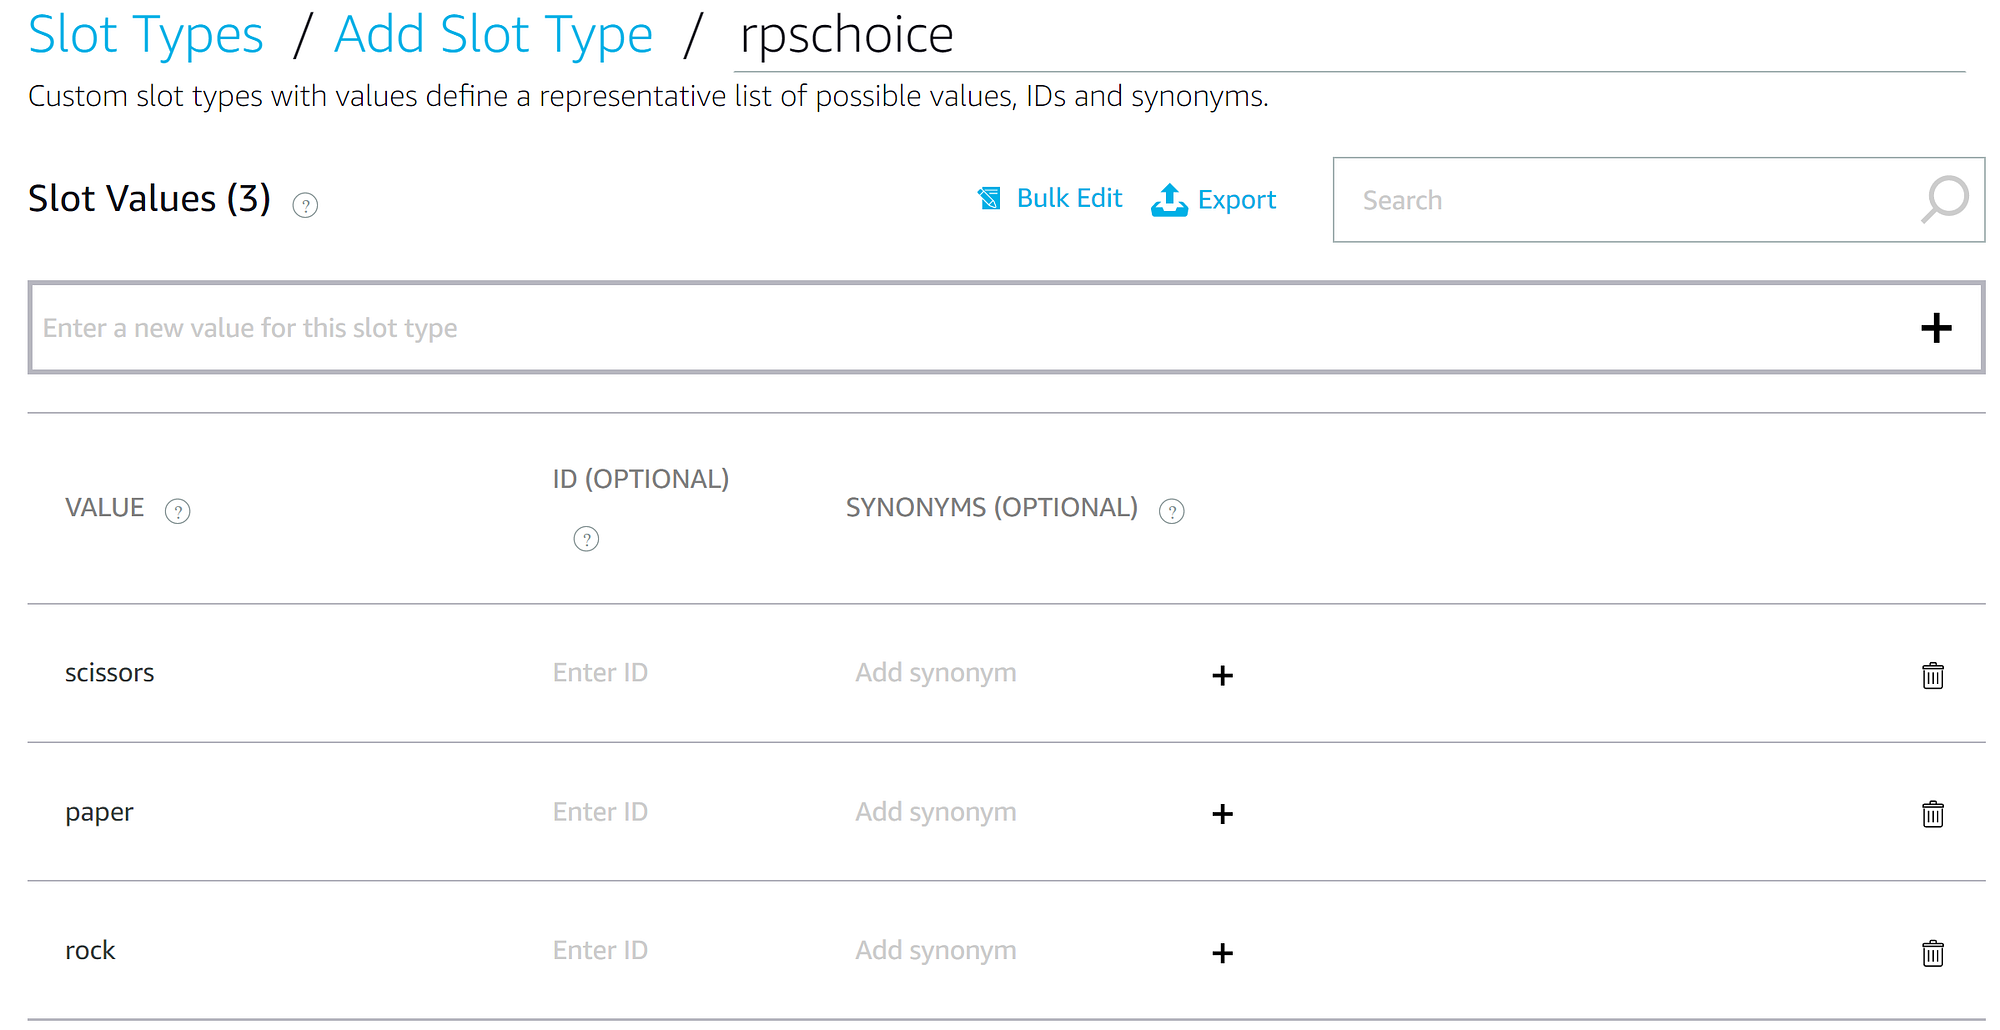
Add slot values “rock”, “paper”, and “scissors”. Then save a model.
Intents
We’ve been talking about intents for decades, now it’s time to create one. Thus, in the Build section, on the left-hand menu, select “Interaction Model”, “Intents”, then “Add Intent”.
Give your intent a name, let’s say “answerIntent”, then click “Create custom intent”.
Add some utterances, a.k.a. examples of how users would invoke this intent:
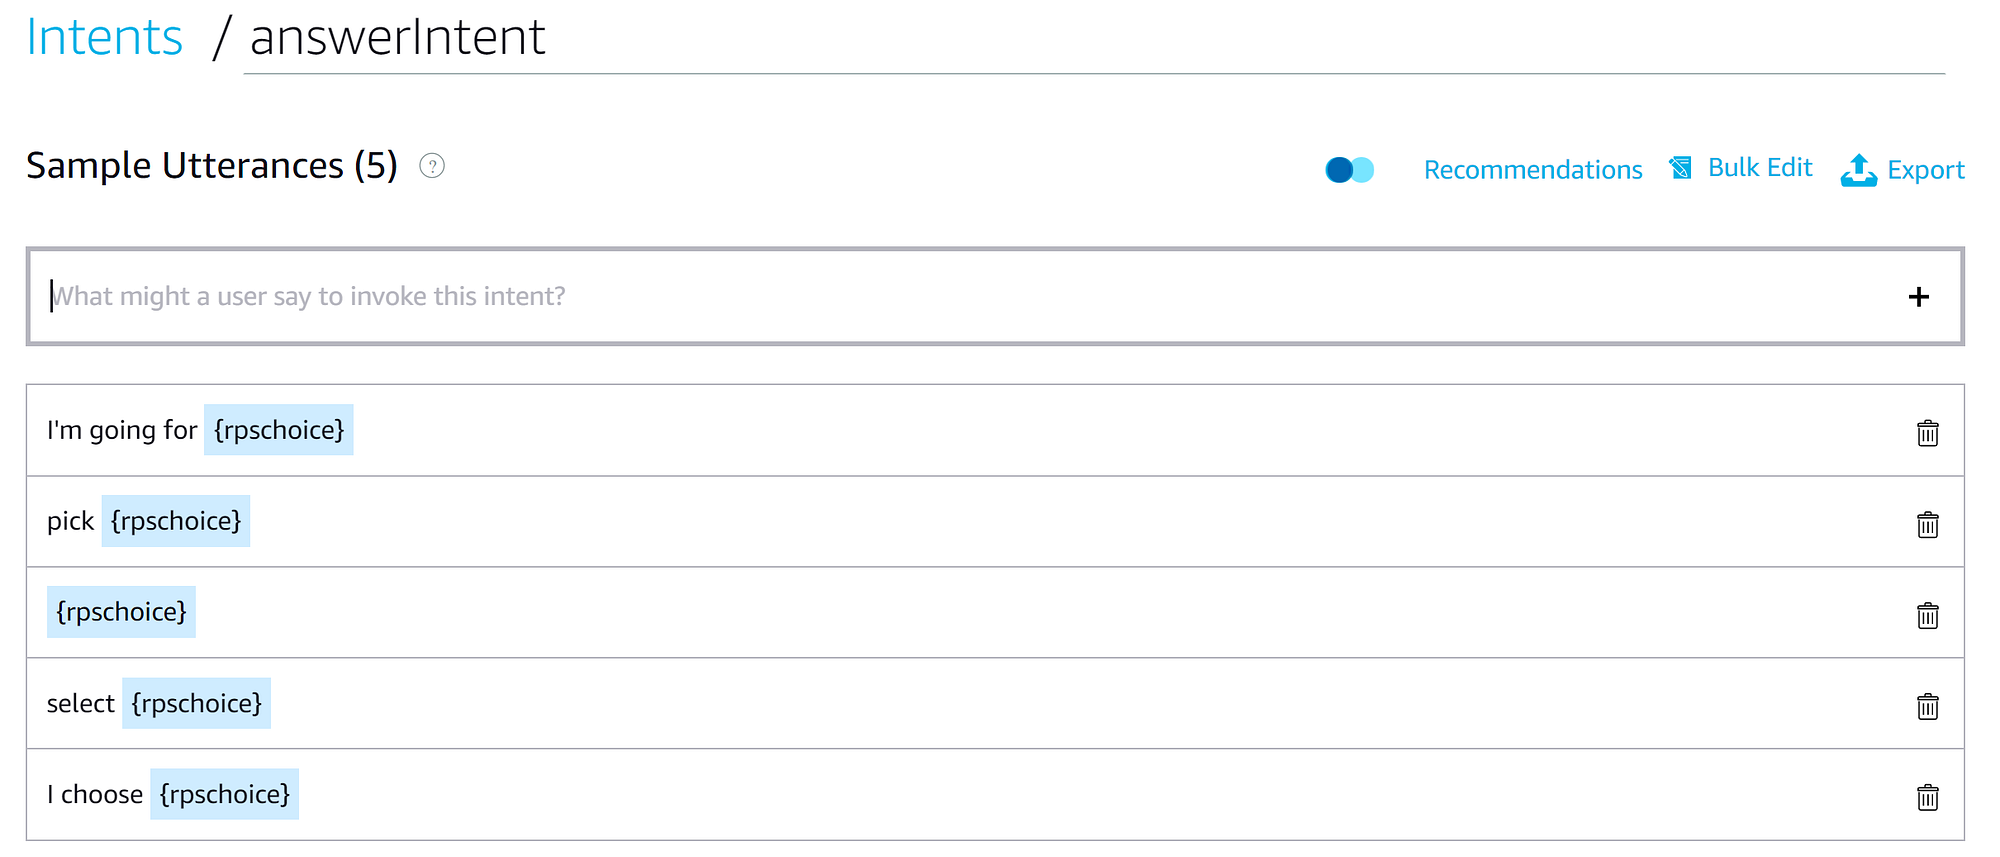
⚠️ Note that we used the slot we created earlier in our samples.
Scroll down to the “intent slots” section, then select slot type as “rpschoice”, then click on the “edit dialog”.
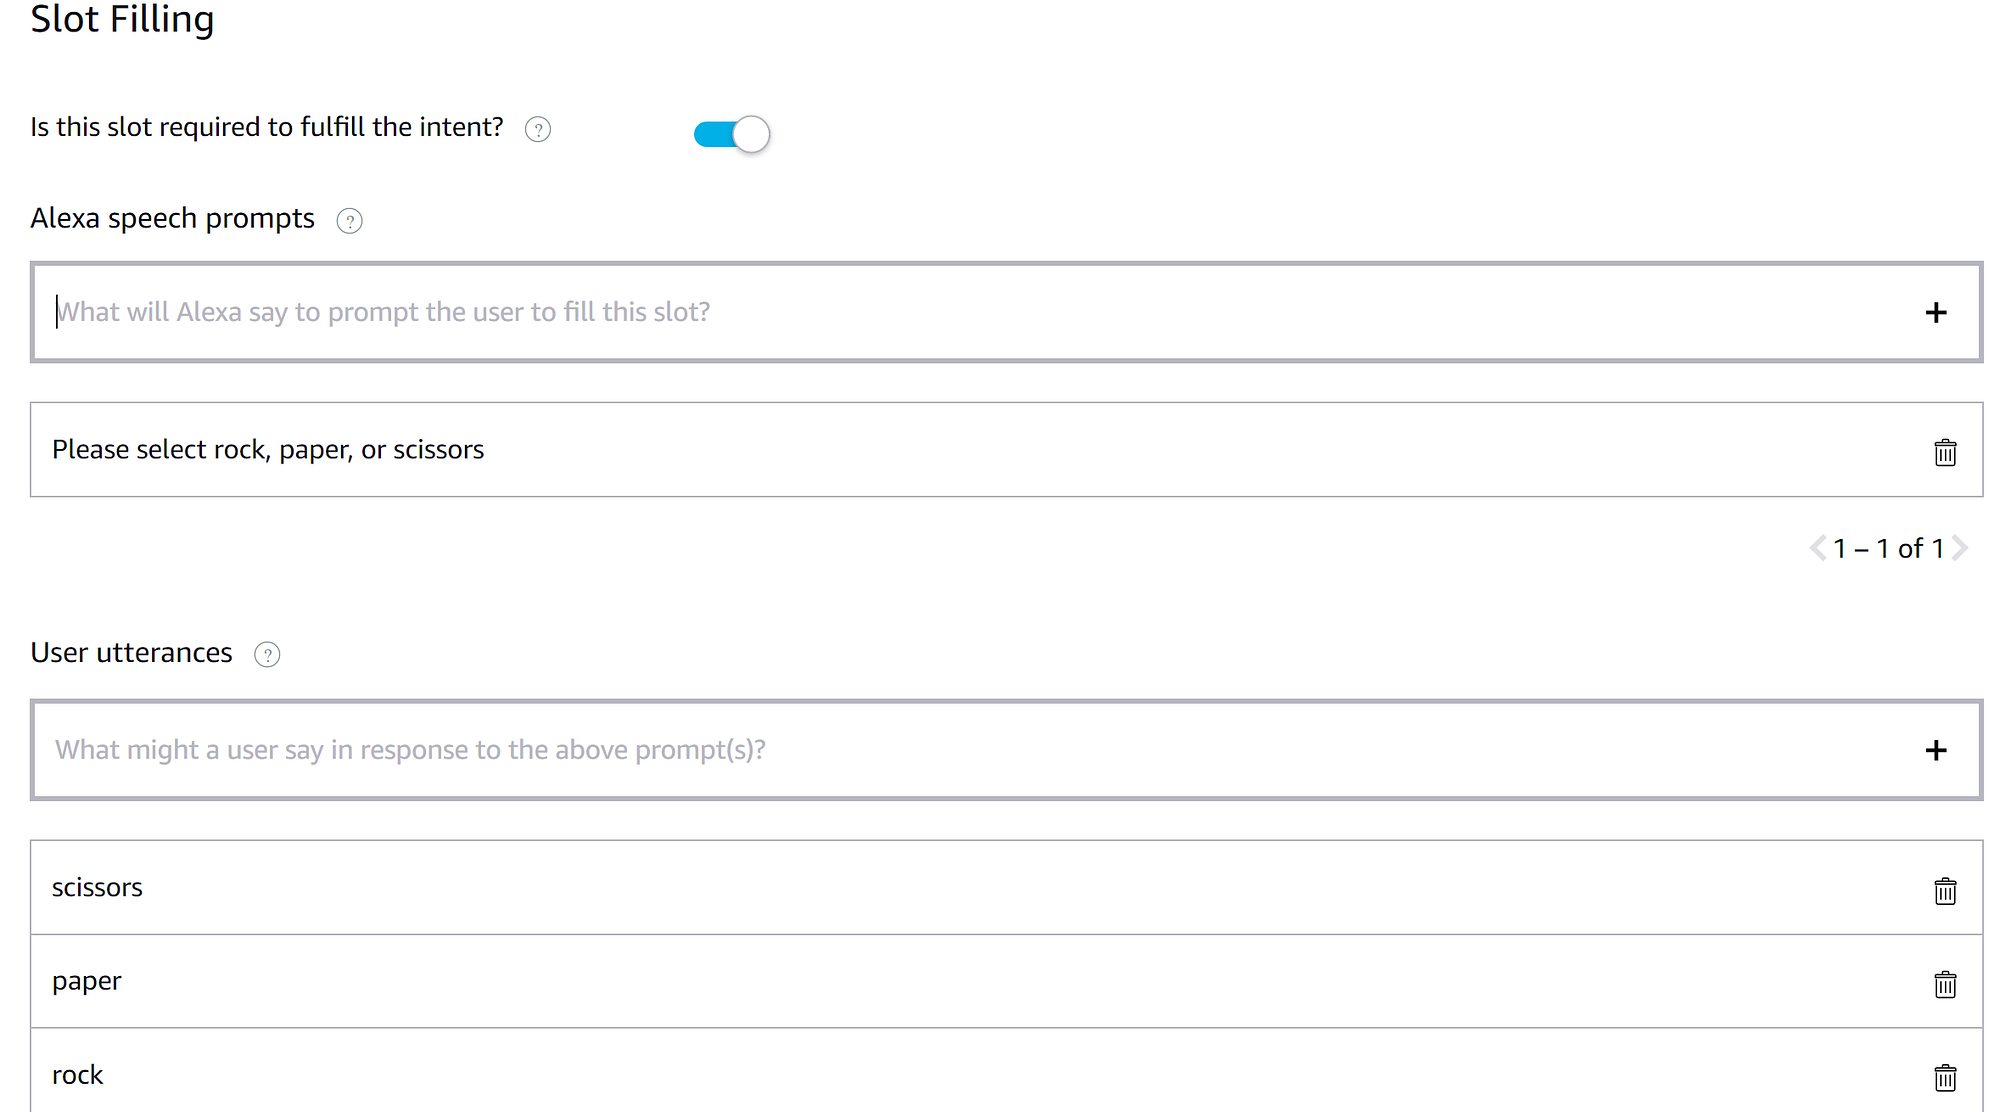
Enable the slot filling “Is this slot required to fulfill the intent?” option.
Add a “speech prompt” and some “user utterances” as in this figure.
Next click “save model” then “build model”.
The Code (or Back-end)
Now that we have an intent that can handle the users’ answers, let’s go back to our backend code and create a handler for this intent. That is to say, what to do if the user triggers this intent.
Navigate to the lambda_function.py file, and create an answerIntentHandler class, as in the figure below:
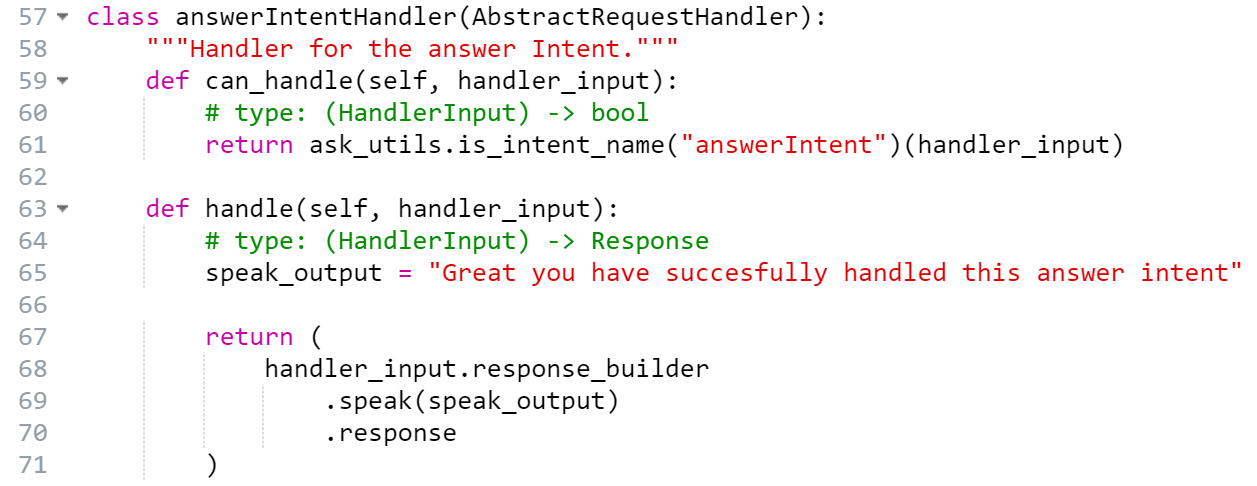
⚠️ Note that there are two main changes between the LaunchRequest Handler we saw earlier, and the answerInetntHandler we’re dealing with here, these are: The output message, and intent checker: is_intent_name.
Next, at the end of the lambda_function.py file, add this line:

Click on “Deploy”, go back to the “Test” section, and invoke the skill again by saying “open rock paper scissors”.
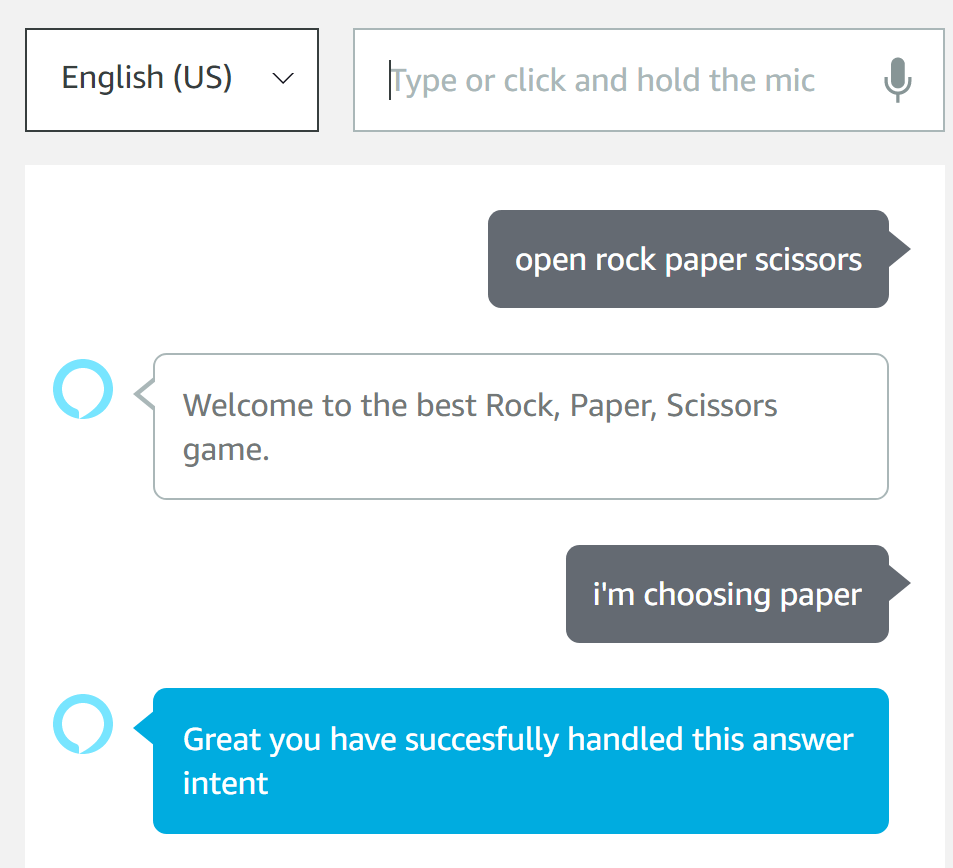
After the welcome message, you can now try to start playing by choosing Rock, Paper, or Scissors, as in the adjoining image. Now Alexa recognizes it when the user is selecting their answer.
⚠️ Note that “I’m choosing paper” didn’t exist in the utterances, this is where the Deep Learning magic comes in. You just need to provide a few samples, then the model can build on them and generalize.
One extra step
At this stage, the skill can know what the user chose. In this section, we’ll use this information to play the RPS game.
We need Alexa to randomly choose “rock”, “paper”, or “scissors” at the very beginning (in the LaunchRequest). Then, when the user picks an answer, Alexa compares these two results and outputs a winning message. The full code is on GitHub, and it’s self-explanatory. Yet, since I’m a kind person 😇, I’ll walk you through a few code snippets:
- Start by selecting a random choice, and store it in a session attribute (a variable that you can access & use during each session).

- Add a logic.py file (by right-clicking somewhere around the lambda_ function.py file name and selecting create file). In this file, create a function to decide the winner between the user and Alexa.

- In the lambda_function.py file, import the previous function, then add the answerIntentHandler as follows:
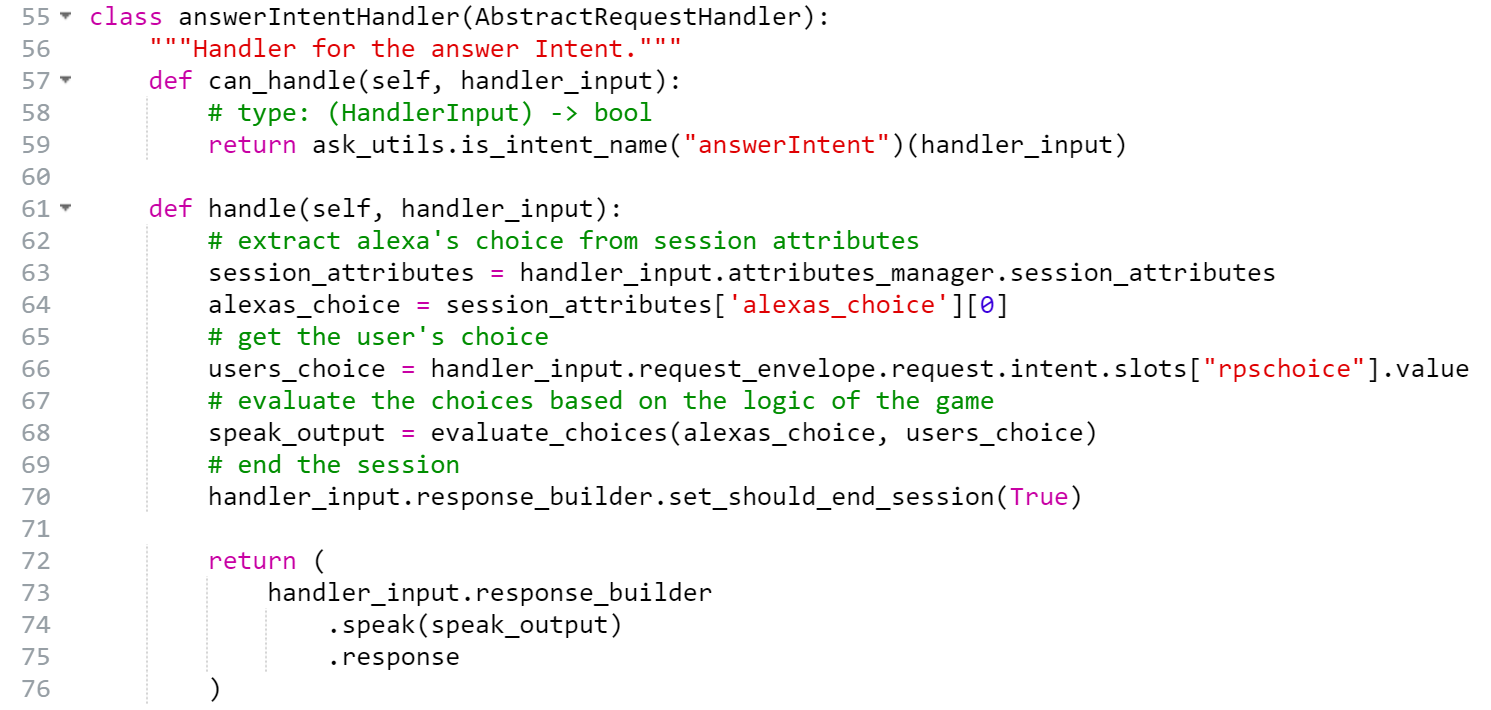
DONE! Save, deploy, then navigate to the Test interface to enjoy your skill 🎉
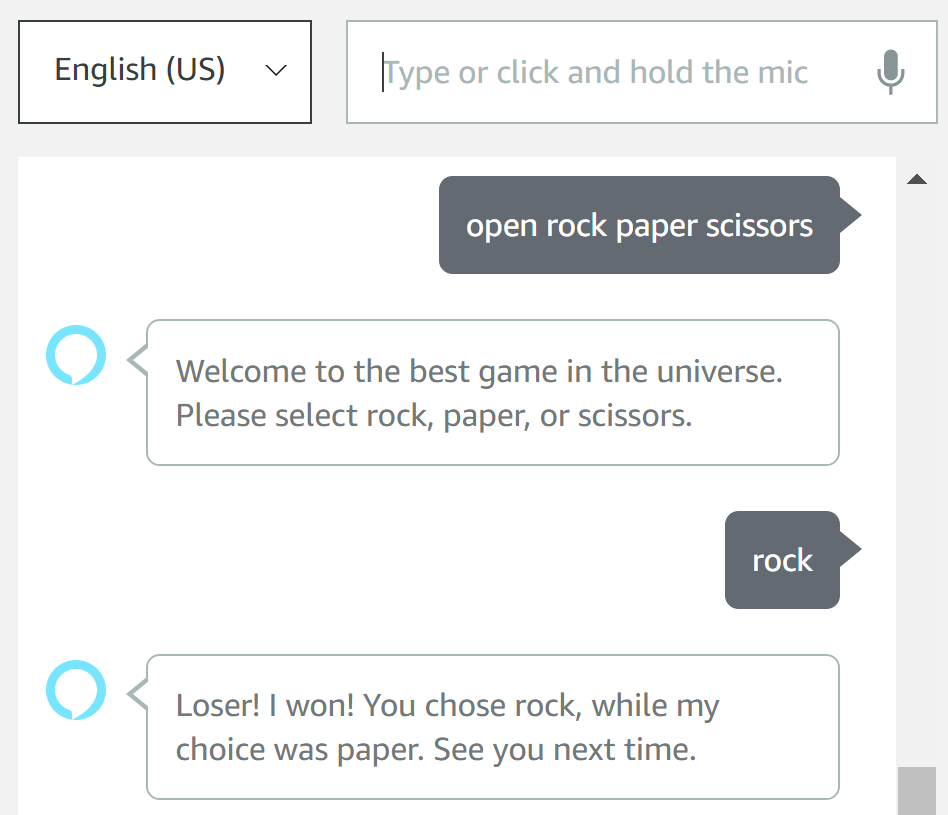
⚠️ Note that in the final code [here], I removed some prebuilt intents (HelloWorld), and changed the output of some others (Help, CancelOrStop, and Fallback).
The next post is about adding Alexa Presentation Language (APL) to our skills. In other words, we will provide a visual experience to Alexa devices with a screen. See you there.

More content at plainenglish.io
How to Create Alexa Skills with Python